Pixso MCP Skill
After connecting Local MCP, we recommend installing the official Pixso AI plugin (Skills). The plugin includes skills for design-to-code, design editing, code-to-design, D2C+ component parsing, and MCP best practices to help the Agent choose the right Pixso MCP tools.
Plugin Repositories
Pixso provides two plugin repositories. Choose based on your IDE / Agent:
| Platform | GitHub Repository |
|---|---|
| Codex (CLI / App) | PixsoLtd/pixso-ai-integration-codex |
| Claude Code, Cursor, and other IDEs | PixsoLtd/pixso-ai-integration |
TIP
Codex users should use pixso-ai-integration-codex; other IDEs should use pixso-ai-integration. Both repositories offer the same Skills capabilities, but installation steps differ by platform.
Download Skills that match your Pixso version
Different Releases correspond to different Pixso client versions. Before downloading, check the Release notes and confirm that version works with the Pixso you are using. A mismatched version may prevent Skills from working correctly.
- On the repository homepage, click Releases on the right.
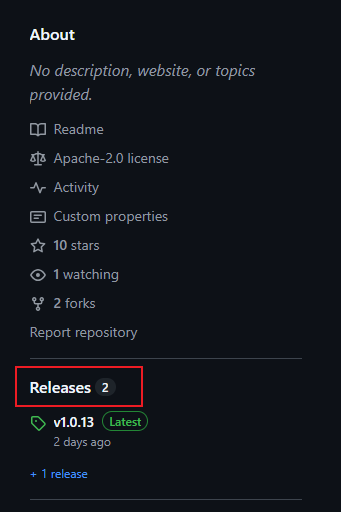
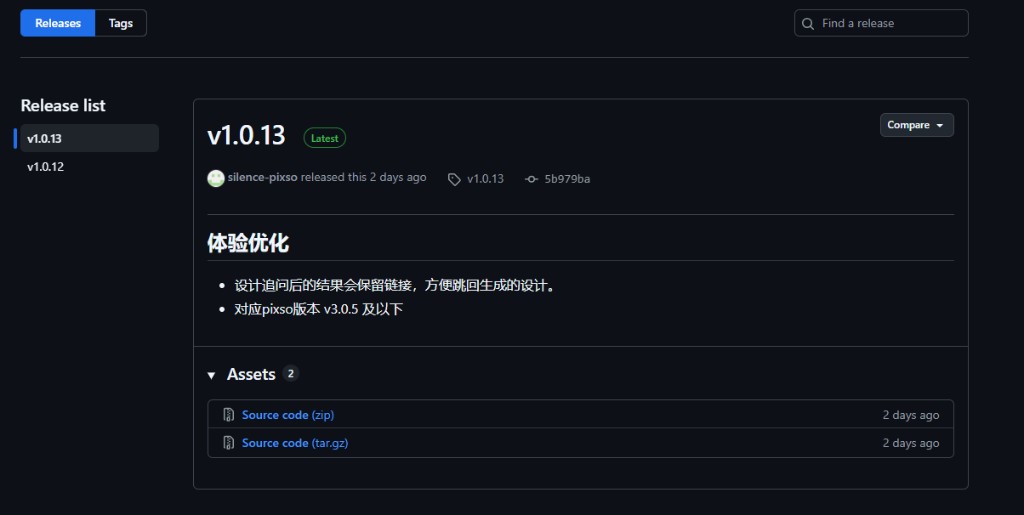
- Check the Pixso version compatibility in the Release notes, then choose the matching version. For example,
v1.0.13supports Pixsov3.0.5and earlier. - Expand Assets, download
Source code (zip), unzip it, then install using one of the methods below.
Option 1 (recommended): Let the Agent install it for you
If you are unfamiliar with the installation process, ask the Agent to handle it. Tell the Agent which IDE you use and provide the corresponding repository link.
Codex user example:
Please help me install the Pixso AI plugin. I am using Codex.
Repository: https://github.com/PixsoLtd/pixso-ai-integration-codex
After installation, please verify that MCP is connected successfully.
Cursor / Claude Code / Gemini CLI user example:
Please help me install the Pixso AI plugin. I am using Cursor.
Repository: https://github.com/PixsoLtd/pixso-ai-integration
After installation, tell me how to use Pixso design-to-code in chat.
The Agent will follow the repository README to clone, install, and configure the plugin, then prompt you to restart your session.
Option 2: Install manually
Clone the repository or install from GitHub following the README.
Codex example (GitHub install):
codex plugin marketplace add PixsoLtd/pixso-ai-integration-codex
codex plugin add pixso@pixso
Claude Code example (load from local directory):
git clone https://github.com/PixsoLtd/pixso-ai-integration.git
claude --plugin-dir ./pixso-ai-integration
Cursor example:
- Open Cursor Settings -> Plugins
- Choose install from local directory and point to the
pixso-ai-integrationrepository root - Restart or refresh Cursor to reload the plugin configuration
Gemini CLI example:
gemini extensions install https://github.com/PixsoLtd/pixso-ai-integrationAfter installing or updating the plugin, restart your Agent session or start a new thread to avoid stale cache preventing Skills or MCP config from taking effect.
Verify Skills are enabled after installation
Using Cursor as an example, after installing the plugin and restarting Cursor:
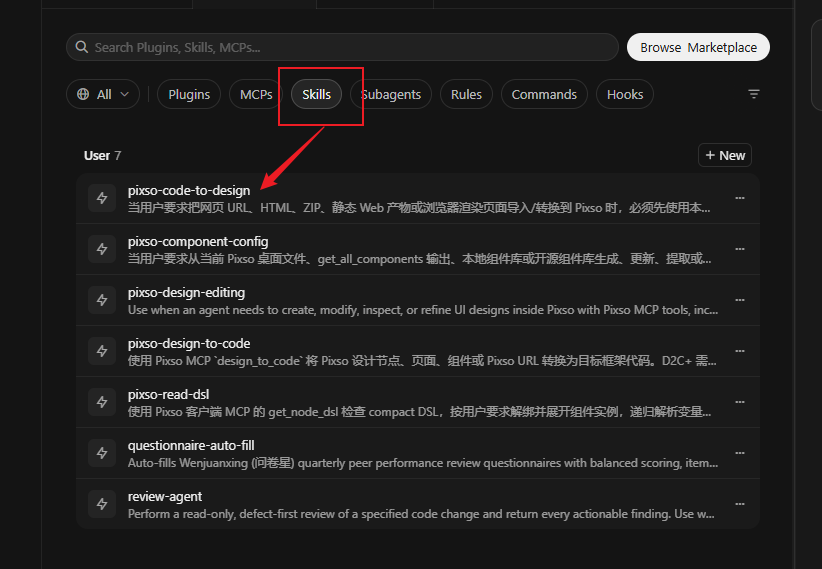
- Open Cursor Settings → the Customize page.
- Switch to the Skills tab.
- Confirm Pixso Skills such as
pixso-code-to-design,pixso-component-config,pixso-design-editing,pixso-design-to-code, andpixso-read-dslappear in the list. That means they are loaded successfully.
NOTE
If no Pixso entries appear in the Skills list, confirm the plugin is installed correctly, then restart Cursor or start a new chat and check again. For more troubleshooting steps, see the pixso-ai-integration README.