Scott
To add a realistic touch to an image or an object, a shadow is a necessary inclusion. To nail this detail, you would require detailed tools to manipulate the shadow according to its background image. Nevertheless, in Photoshop, you can easily make a drop shadow and bring authenticity to your designs.
In this blog, you will learn how to make a shadow in Photoshop manually and using Photoshop’s built-in tools. Furthermore, you will get insight into a bonus design tool where you will learn how to make shadows easily in fewer steps.

Part 1. How To Create a Drop Shadow in Photoshop?
Let us explore how to create a drop shadow in Photoshop. Before discovering its built-in tools, we will learn how designers manually implement drop shadows in their objects by duplicating the image.
1. Creating shadows manually
Step 1. Firstly, we’ll open a colored object in Photoshop. Then, head to the Layers section on the right-hand side, hold Alt, and drag your object layer below (hold Option and drag if on Mac). Thus, creating a duplicate of the image or object. We’ll call this the duplicate version. You can see that the layer is revealed by using the eye icon. Ensure the shadow layer is below your primary object layer so that it stays behind the image.
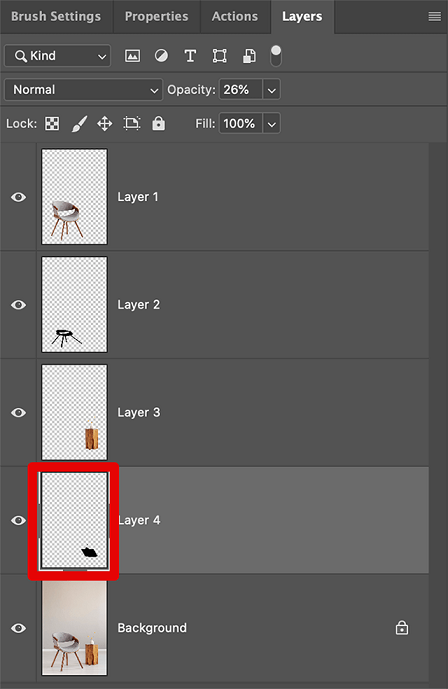
Step 2. Change the color of the duplicated layer to black and we’ll call this our shadow layer. You can do this by right-clicking on the duplicate layer and selecting blending options. Then, check the Color Overlay tick box and choose black as your overlay color.
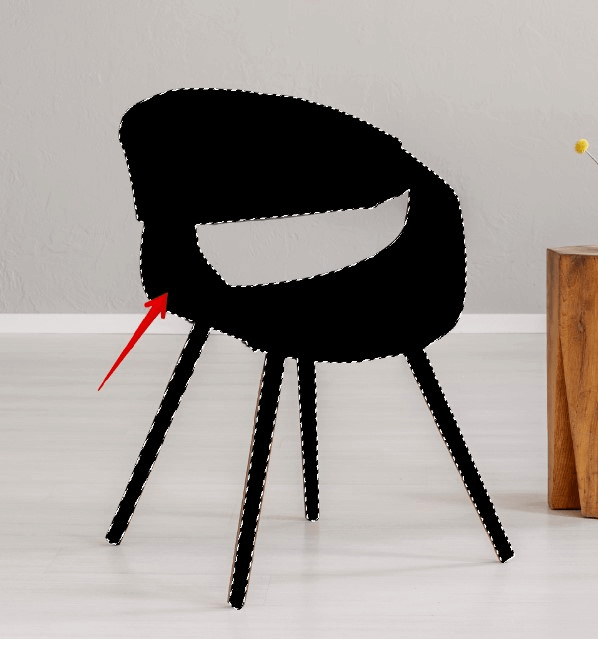
Step 3. You can select the shadow layer and press Ctrl/Cmd + T. That provides a control box so you can use the arrow keys to move the shadow layer around the image, thus, manipulating a drop shadow. Moreover, you can hold the Shift + arrow keys to make larger movements.
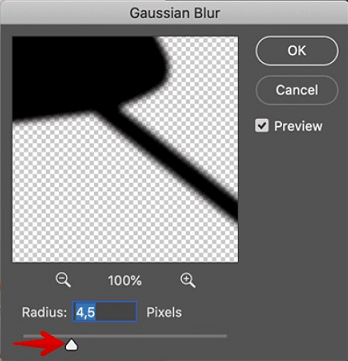
Step 4. To make the shadow look more authentic, head over to the filter menu at the top, go to Blur and select Gaussian Blur. When a pop-up appears, click on “convert to a smart object”. As a result, you can see the shadow layer becoming blurred. You can manipulate the sharpness by adjusting the radius slider in the Gaussian Blur box.
Step 5. To tweak its perspective, press Ctrl/Cmd + T like earlier and drag the shadow layer to any corner you want. This helps to adjust the shadow’s base and gives us a better perspective.
2. Using Photoshop’s built-in tools
Step 1. Next, we’ll understand Photoshop’s very own built-in tools. Select the graphic or object in the Layers tab, and click on the small FX button—which can be seen on the bottom right-hand side of your screen. Then, select Drop Shadow from its menu.
Step 2. A pop-up will appear giving you various attributes to manipulate your drop shadow. In the Structure section, the first slider you can adjust is its Opacity. Adjusting this slider will influence how solid your shadow will appear against the background layer.
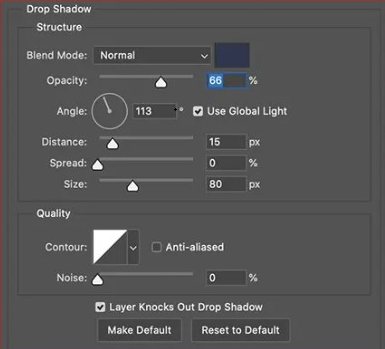
Step 3. Then, you can adjust the angle by playing around with the clock-like object to determine which direction the light comes from. Additionally, you can adjust the Distance of the shadow by increasing or decreasing the slider. Another convenient tip you could use is by dragging the shadow around your image manually when the pop-up is open.
Step 4. Moreover, you can adjust the Spread of the shadow to manipulate the blurring of the edges. Then, you can adjust the Size of the shadow to determine how close the object is to the light source.
Step 5. Above those sliders, you can see a checkbox that mentions Use Global Light. Ensure to tick that box so you can change multiple objects’ shadows in the canvas at the same time. This would be pretty useful when working on big design projects.
Step 6. Then, under the Quality section, you can adjust the Contour and Noise. You can use these settings to add more intricate detail to your shadows which are mainly used in advanced graphic designing.
Part 2. An Easier Way to Make a Drop Shadow
Do you want to know a simpler way to make a drop shadow? Then, switch over to Pixso as your alternative design tool. Pixso supports importing various design files and offers free unlimited files and templates for teams to work on design projects together. Moreover, you can preview your designs without installing any separate apps.
Creating a drop shadow with Pixso
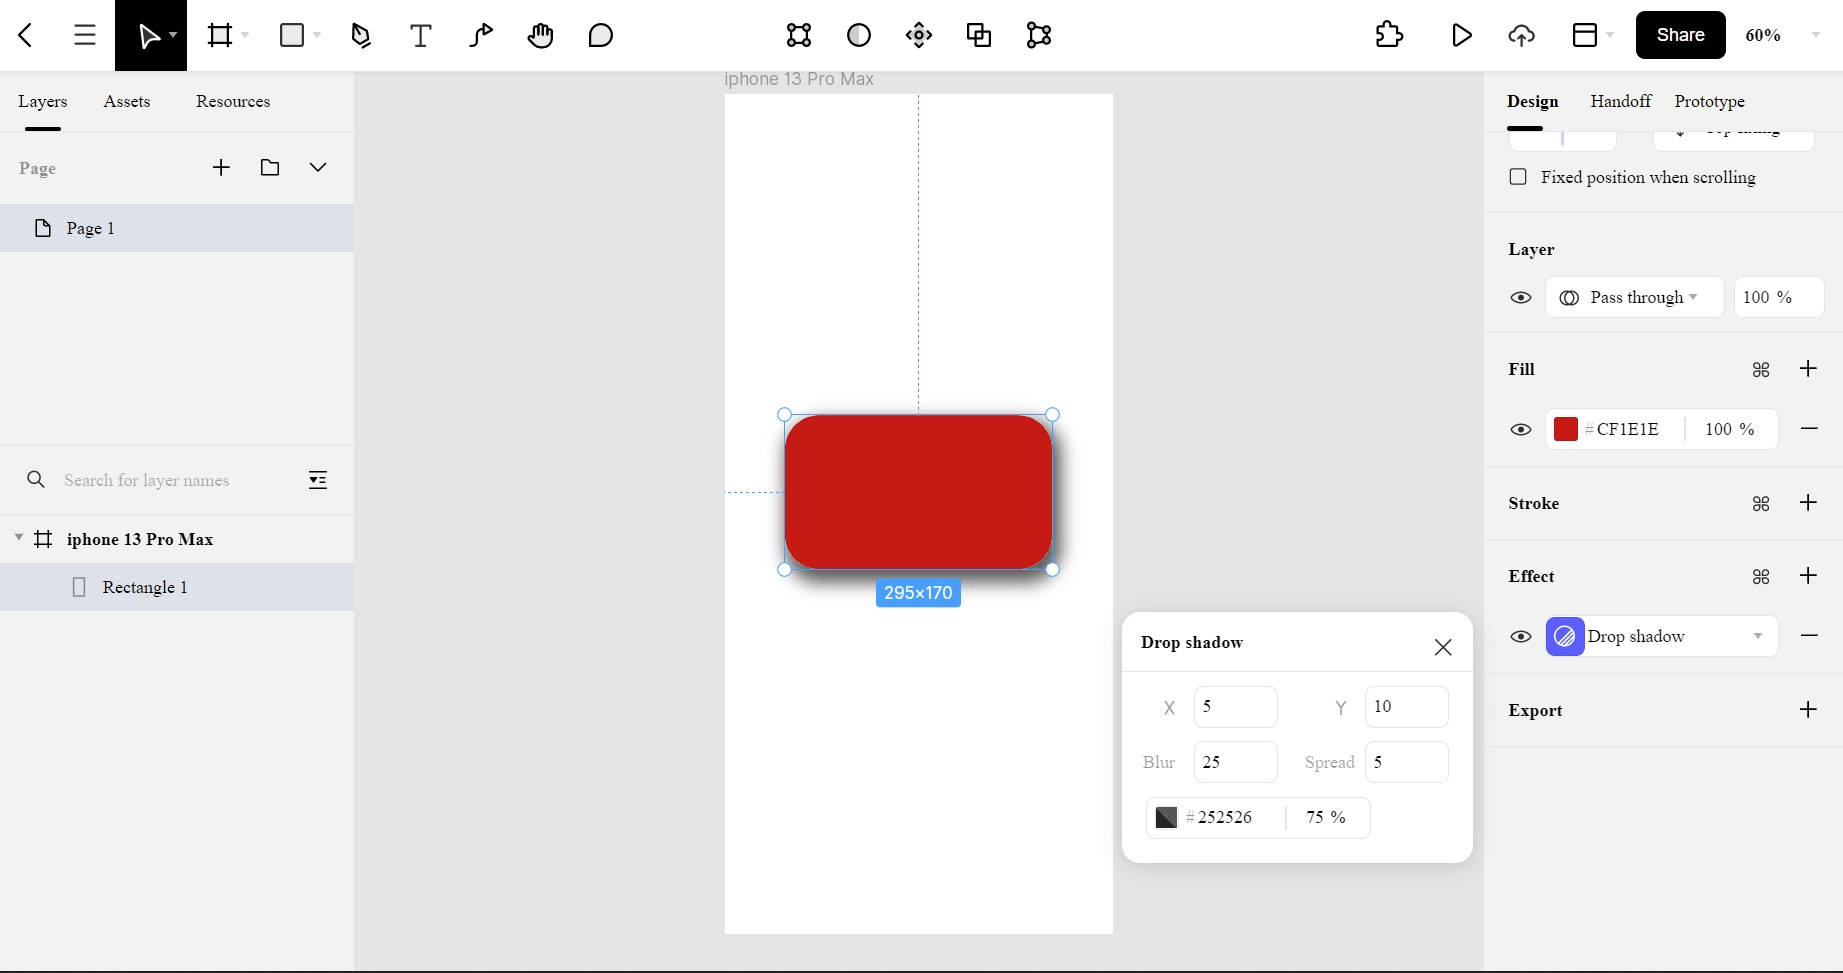
Step 1. Select the graphic or object in your canvas, and head over to the Effect section in the right-hand side panel.
Step 2. Click on the plus icon and the first thing you would see is a Drop shadow added to your object. Additionally, you can add Inner shadows, Layer blur, and Background blur to your object.
Step 3. You can adjust your drop shadow attributes by heading over to the Effect settings which is indicated by a circular icon.
Step 4. Once there, you can just the X and Y coordinates of your shadow, the blur, the spread, the color, and the opacity of your shadow. Just like that, you can manipulate your drop shadow on Pixso in a few easy steps.
Craft Your Perfect Shadow…
You have learned how to make a shadow in Photoshop and also an easier alternative to making drop shadows in Pixso. Shadows are necessary detail to make objects blend in well with the background and as a beginner, make sure to play around with the settings and find the best sweet spot of realistic shadows for your designs. Now, go out there and bring your images to life.