PIXSO · INTERACTIVE PROTOTYPING
Interactive prototyping tool for apps and websites
Turn app and website screens into interactive prototypes, without code. Shape navigation, overlays and motion, then share the experience with your team from the same design file.
No coding needed. Your screens, interactions and feedback stay together.
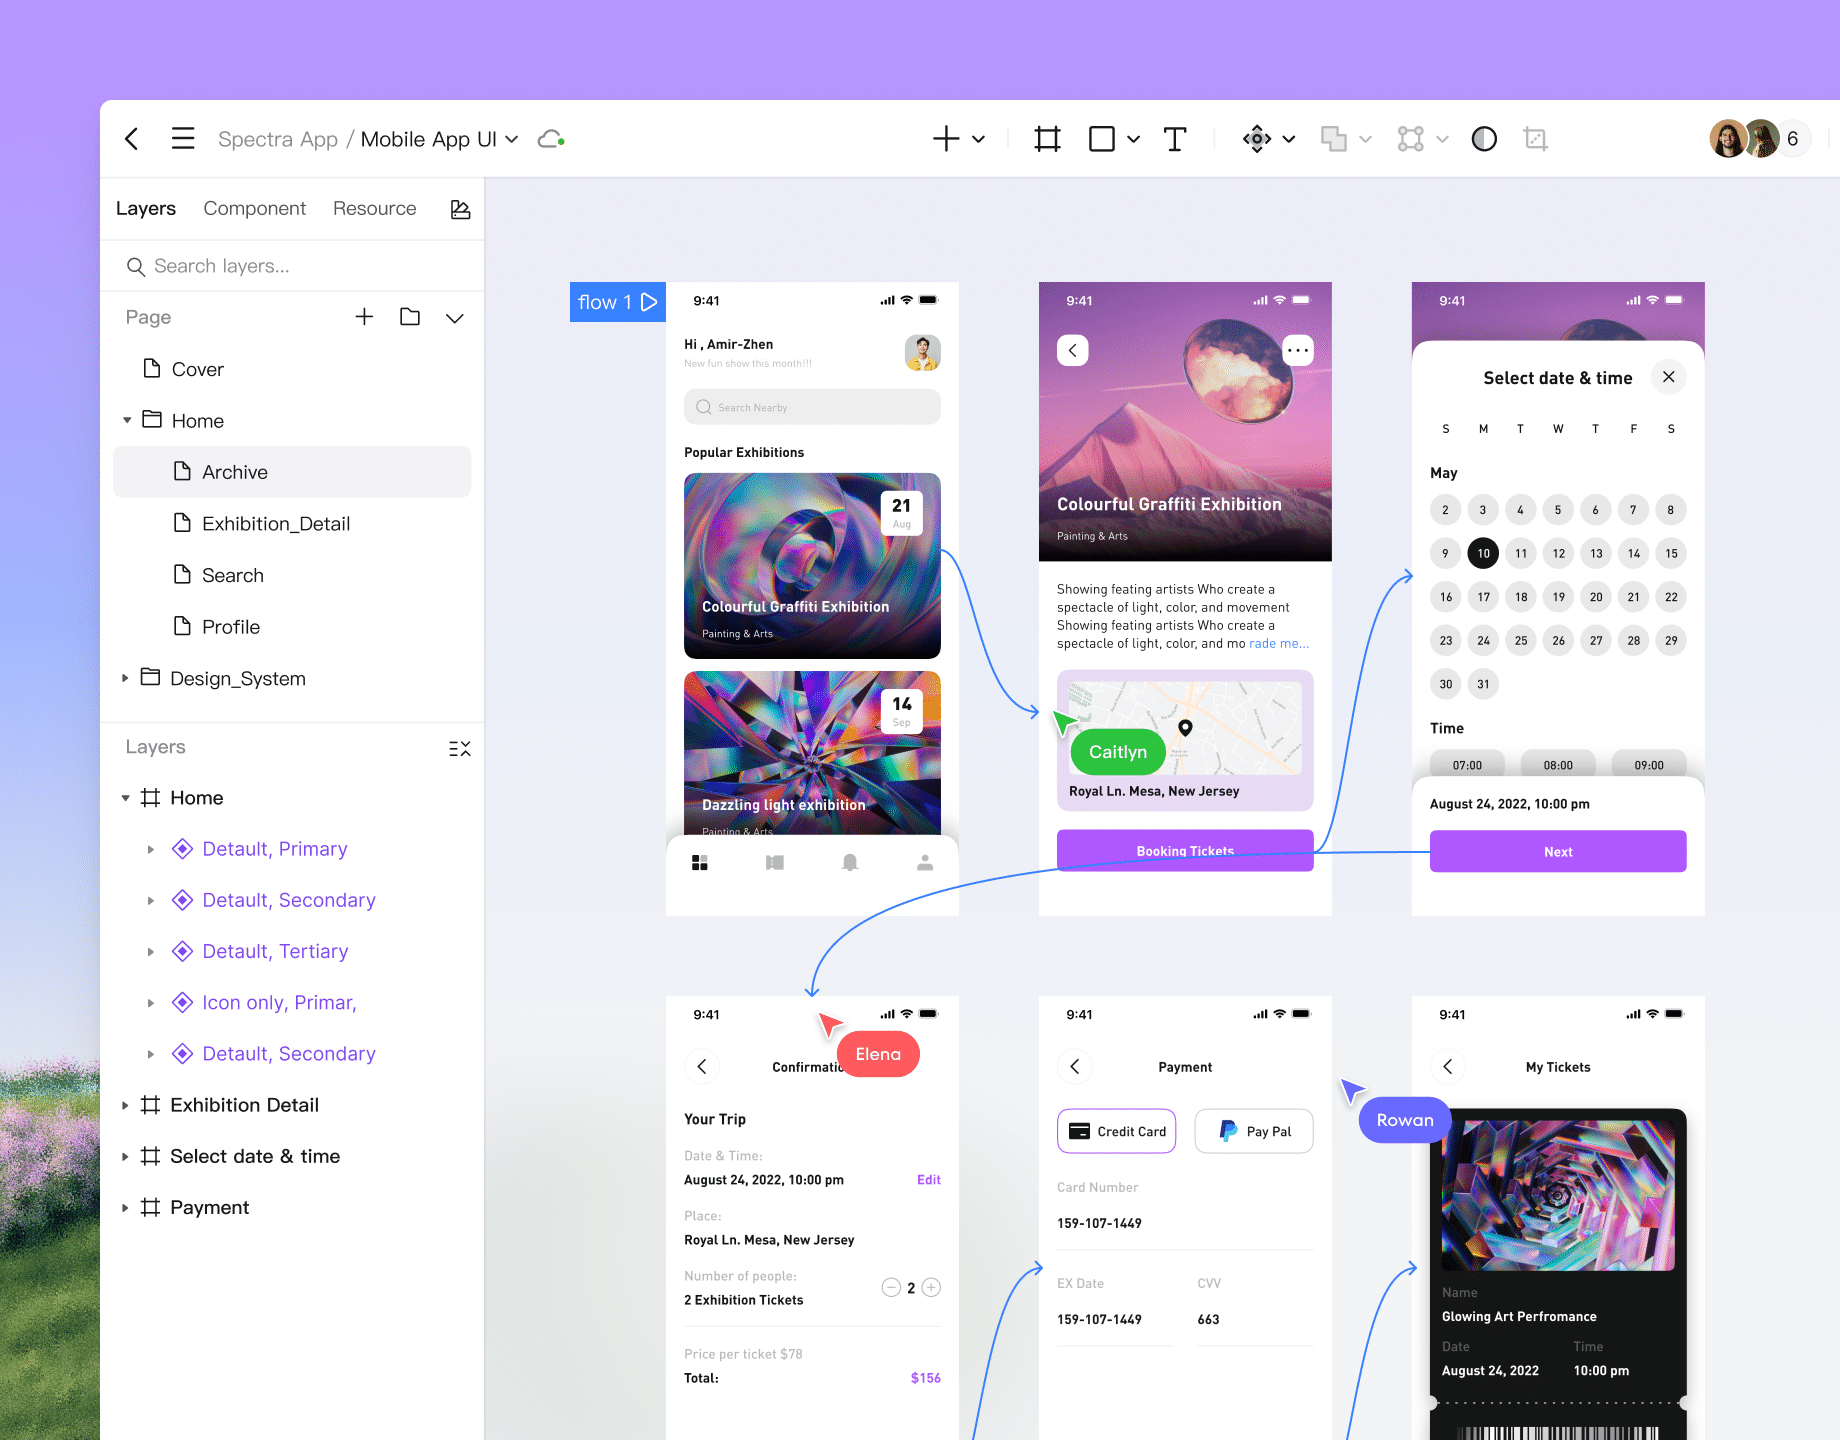
Watch the prototyping demo
BUILT FOR YOUR NEXT DESIGN REVIEW
Prototype the flows your team needs to review
Make the design decision concrete: the route through an app, the behavior of a website or the experience your team will discuss.
App journeys
Explore onboarding, booking and checkout screens as connected flows, including the route back and the confirmation state.
Website interactions
Show navigation menus, dialogs, animated transitions and scrolling content in a clickable experience.
Team reviews
Let product, design and development explore the same flow and discuss specific screens before implementation.
INTERACTIONS YOU CAN SHOW
Bring navigation, overlays and motion to your UI
Show how menus open, dialogs close and screens respond. Give reviewers the behavior behind the interface before development begins.
Interactions beyond clicks
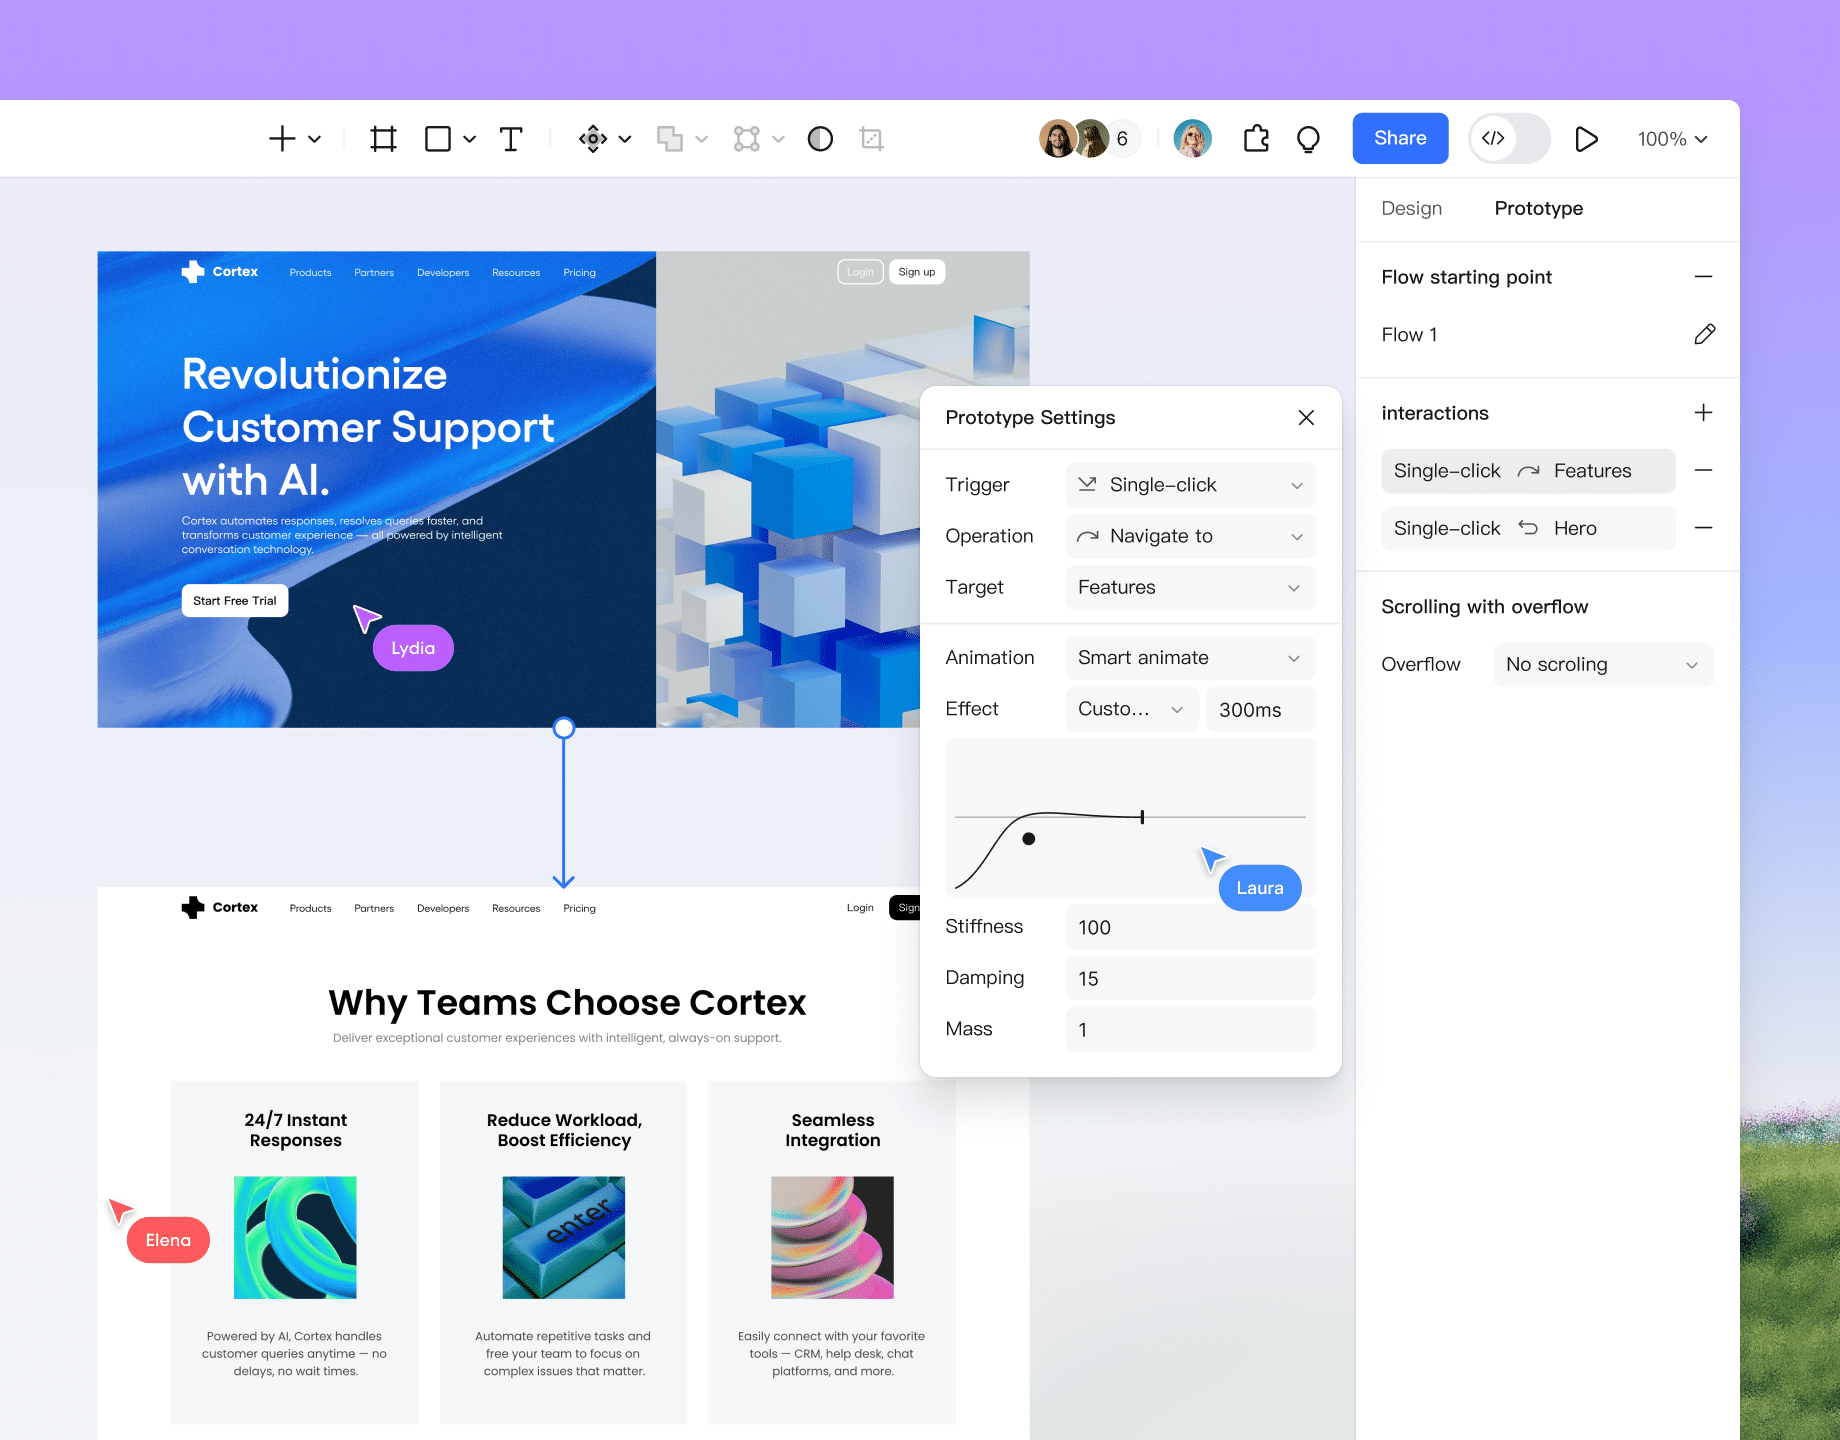
Use click, hover, drag or timed triggers to demonstrate different responses. Open, switch and close overlays for menus and dialogs while keeping the underlying screen in context.
Motion and scrolling that fit the screen
Adjust transition type, duration and easing to communicate the intended movement. Add vertical or horizontal scrolling for long pages and content strips, or both directions for a map-like view.
DESIGN AND PROTOTYPE TOGETHER
Design and prototype in the same file
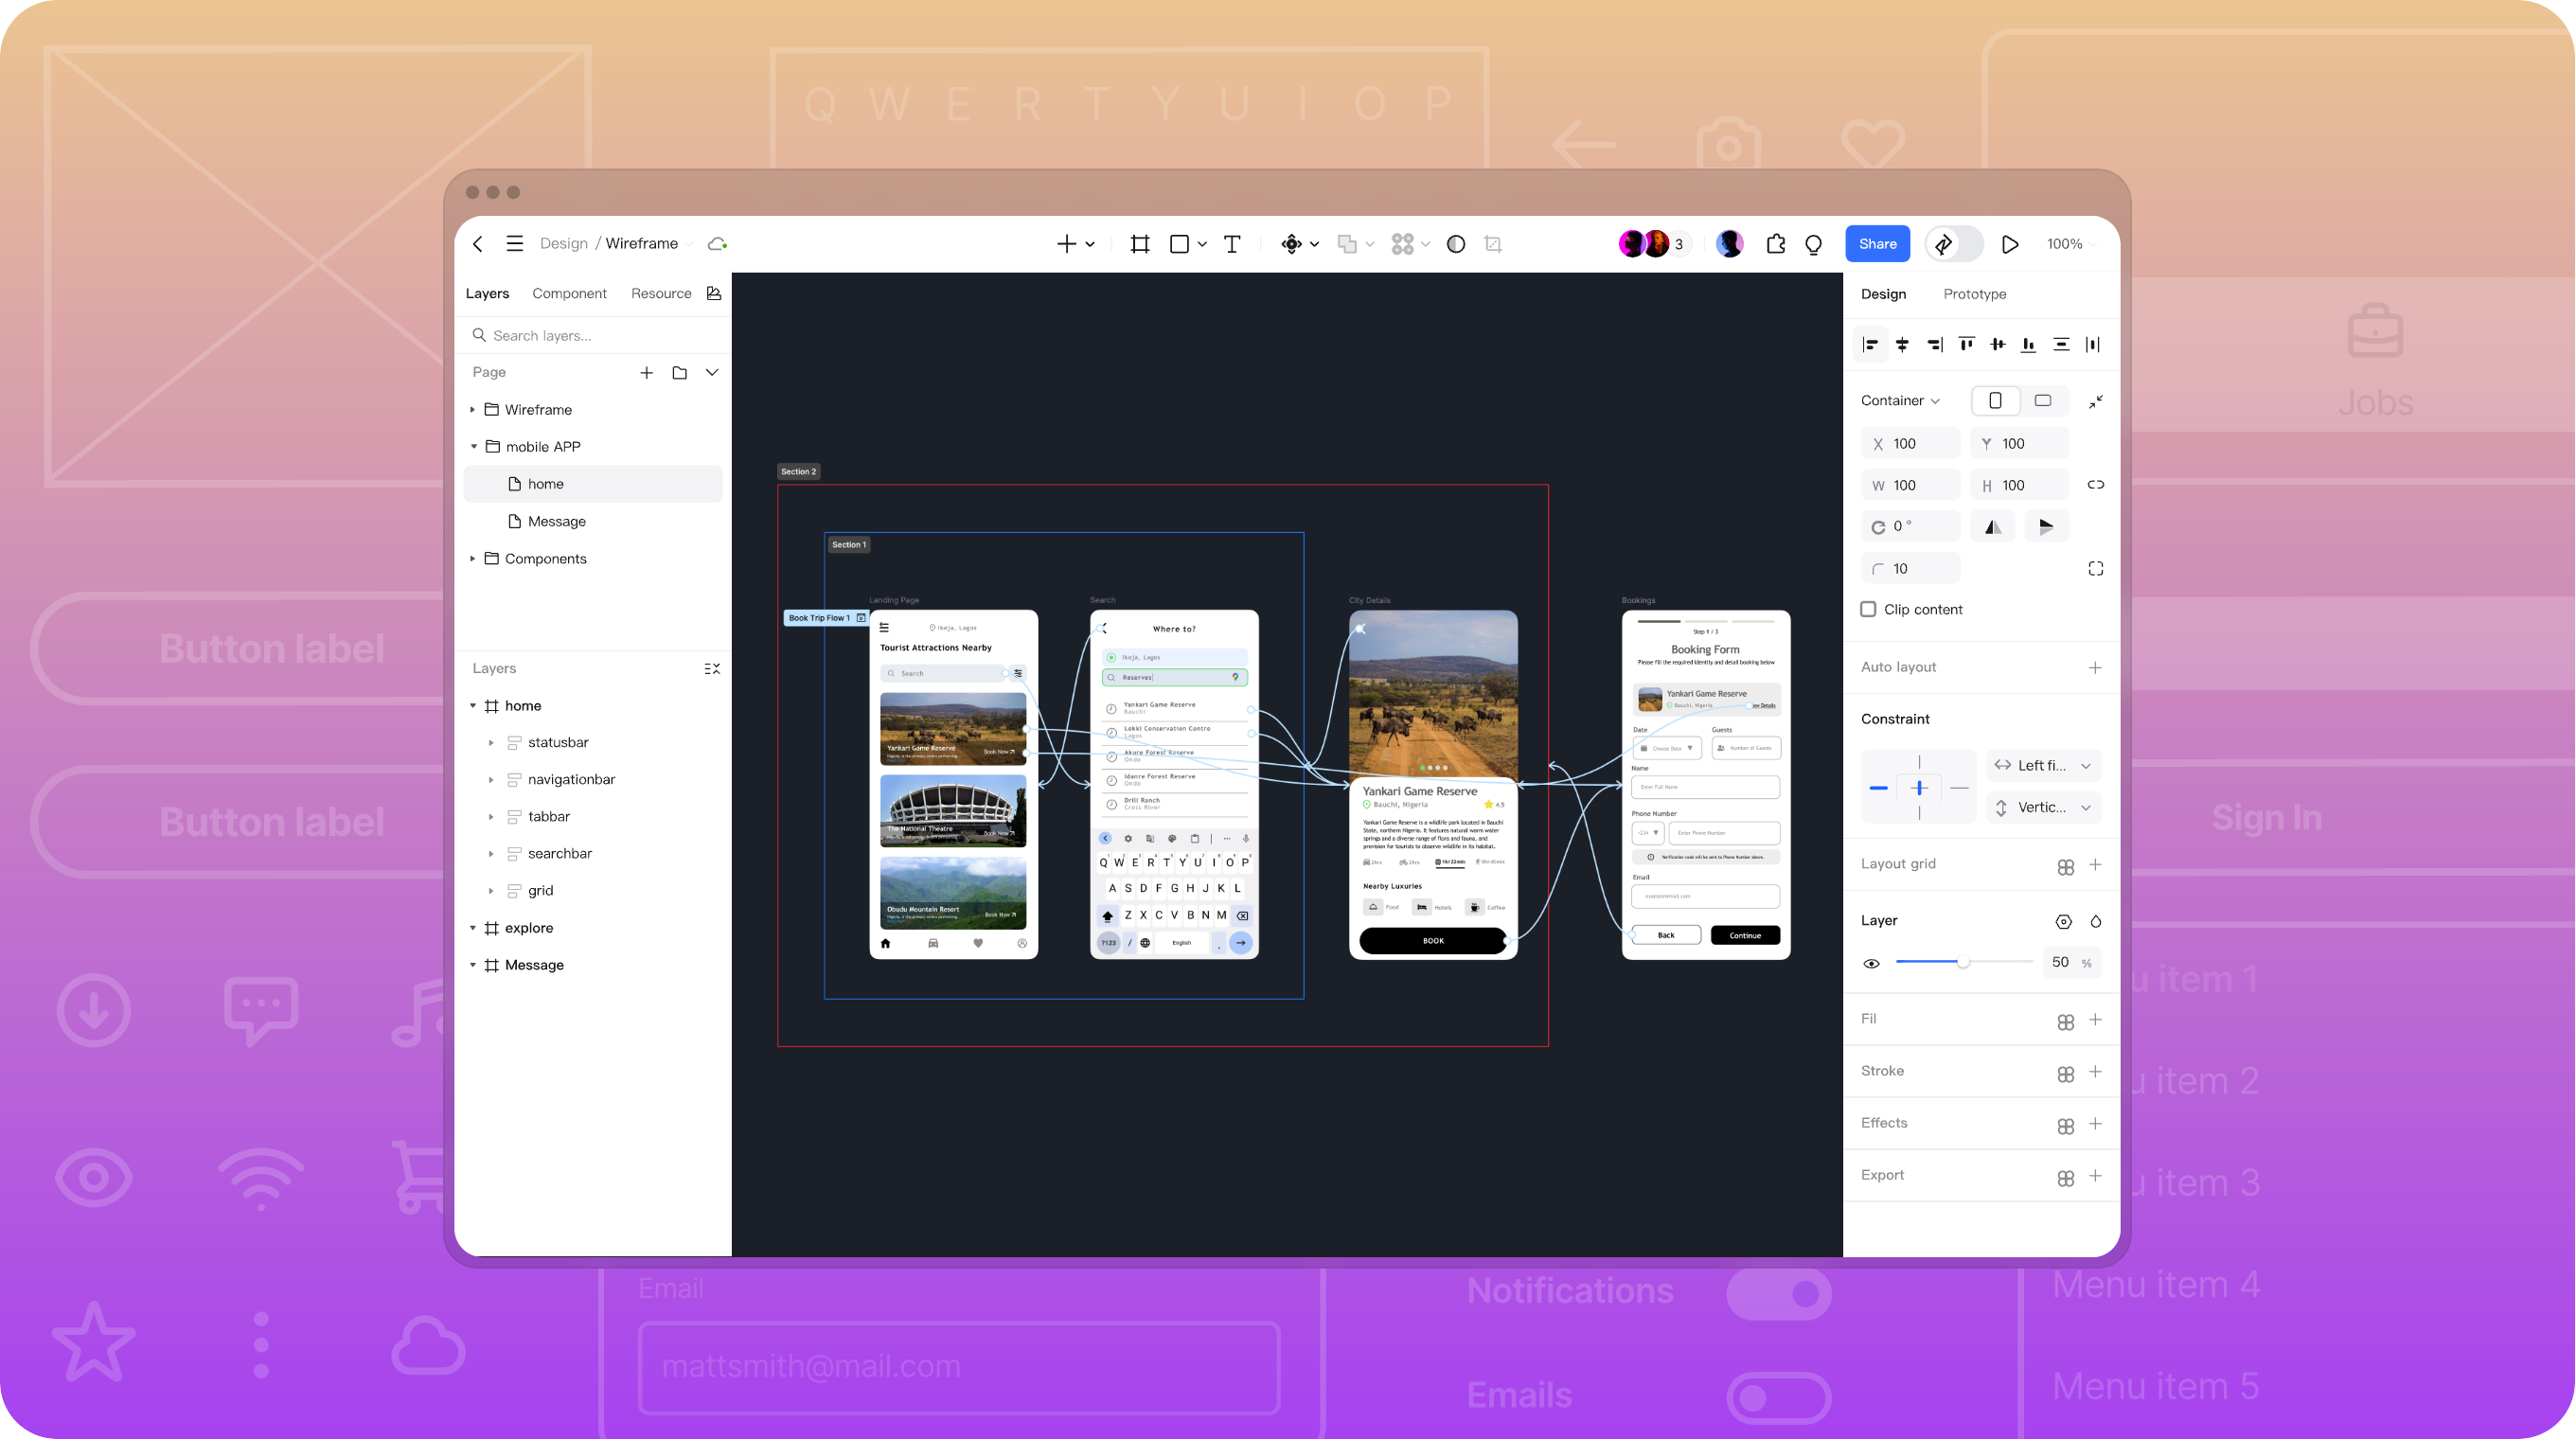
Turn the frames in your Pixso file into an interactive experience. Refine layouts and visual states alongside the connections between screens, without rebuilding them as a separate presentation.
Reuse the interface you are designing
Work with the same screens and components as the design evolves. Keep the prototype close to the layouts, labels and visual states it represents.
From wireframes to detailed UI
Try a simple flow with early wireframes, then add interactions to polished screens. The canvas keeps the whole route visible, from its starting point to the final state.
A SHARED EXPERIENCE
Share clickable prototypes and review in context
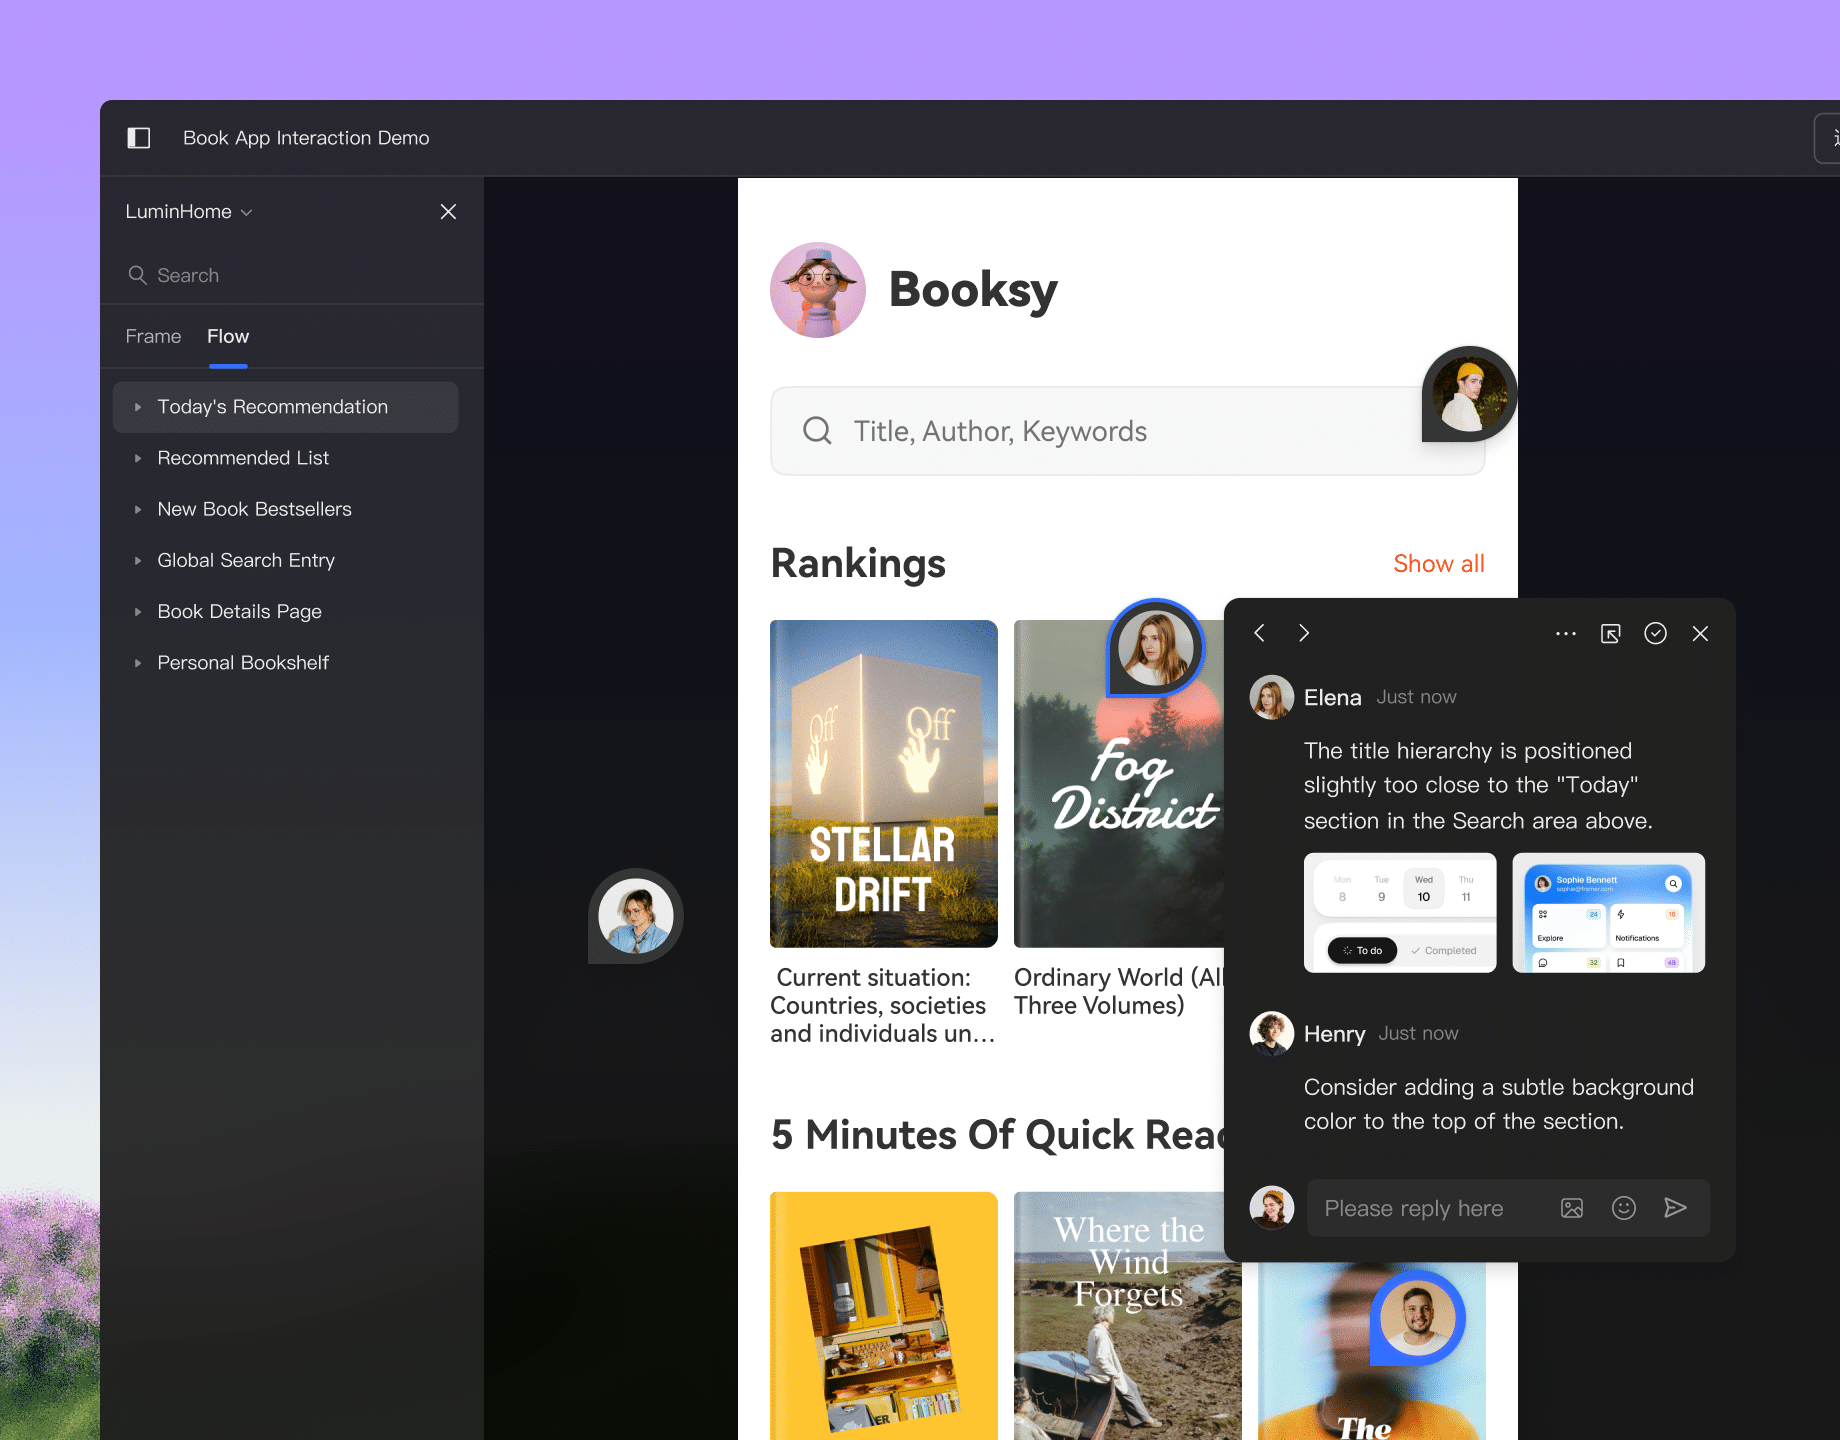
Give designers, product managers and developers the same flow to explore. A presentation link and comments beside the relevant screen make feedback easier to relate to the design.
A clear starting point for each review
Present a flow from its starting screen so reviewers can follow the intended journey. For a booking flow, for example, the team can explore selection, confirmation and the route back.
Feedback connected to the screen
Use comments to keep questions and suggestions beside the design being reviewed. Return to that context as you refine the interface and its interactions.
KEEP CONTEXT THROUGH HANDOFF
Pair prototype behavior with developer specs
Pair the interactive flow with the design information behind it. Pixso keeps the screens, prototype and developer view in one workspace, so your team can communicate both appearance and behavior.
Show the intended behavior
Use the prototype to explain navigation and transitions alongside the screen designs. Give implementation discussions a shared reference.
Keep specifications within reach
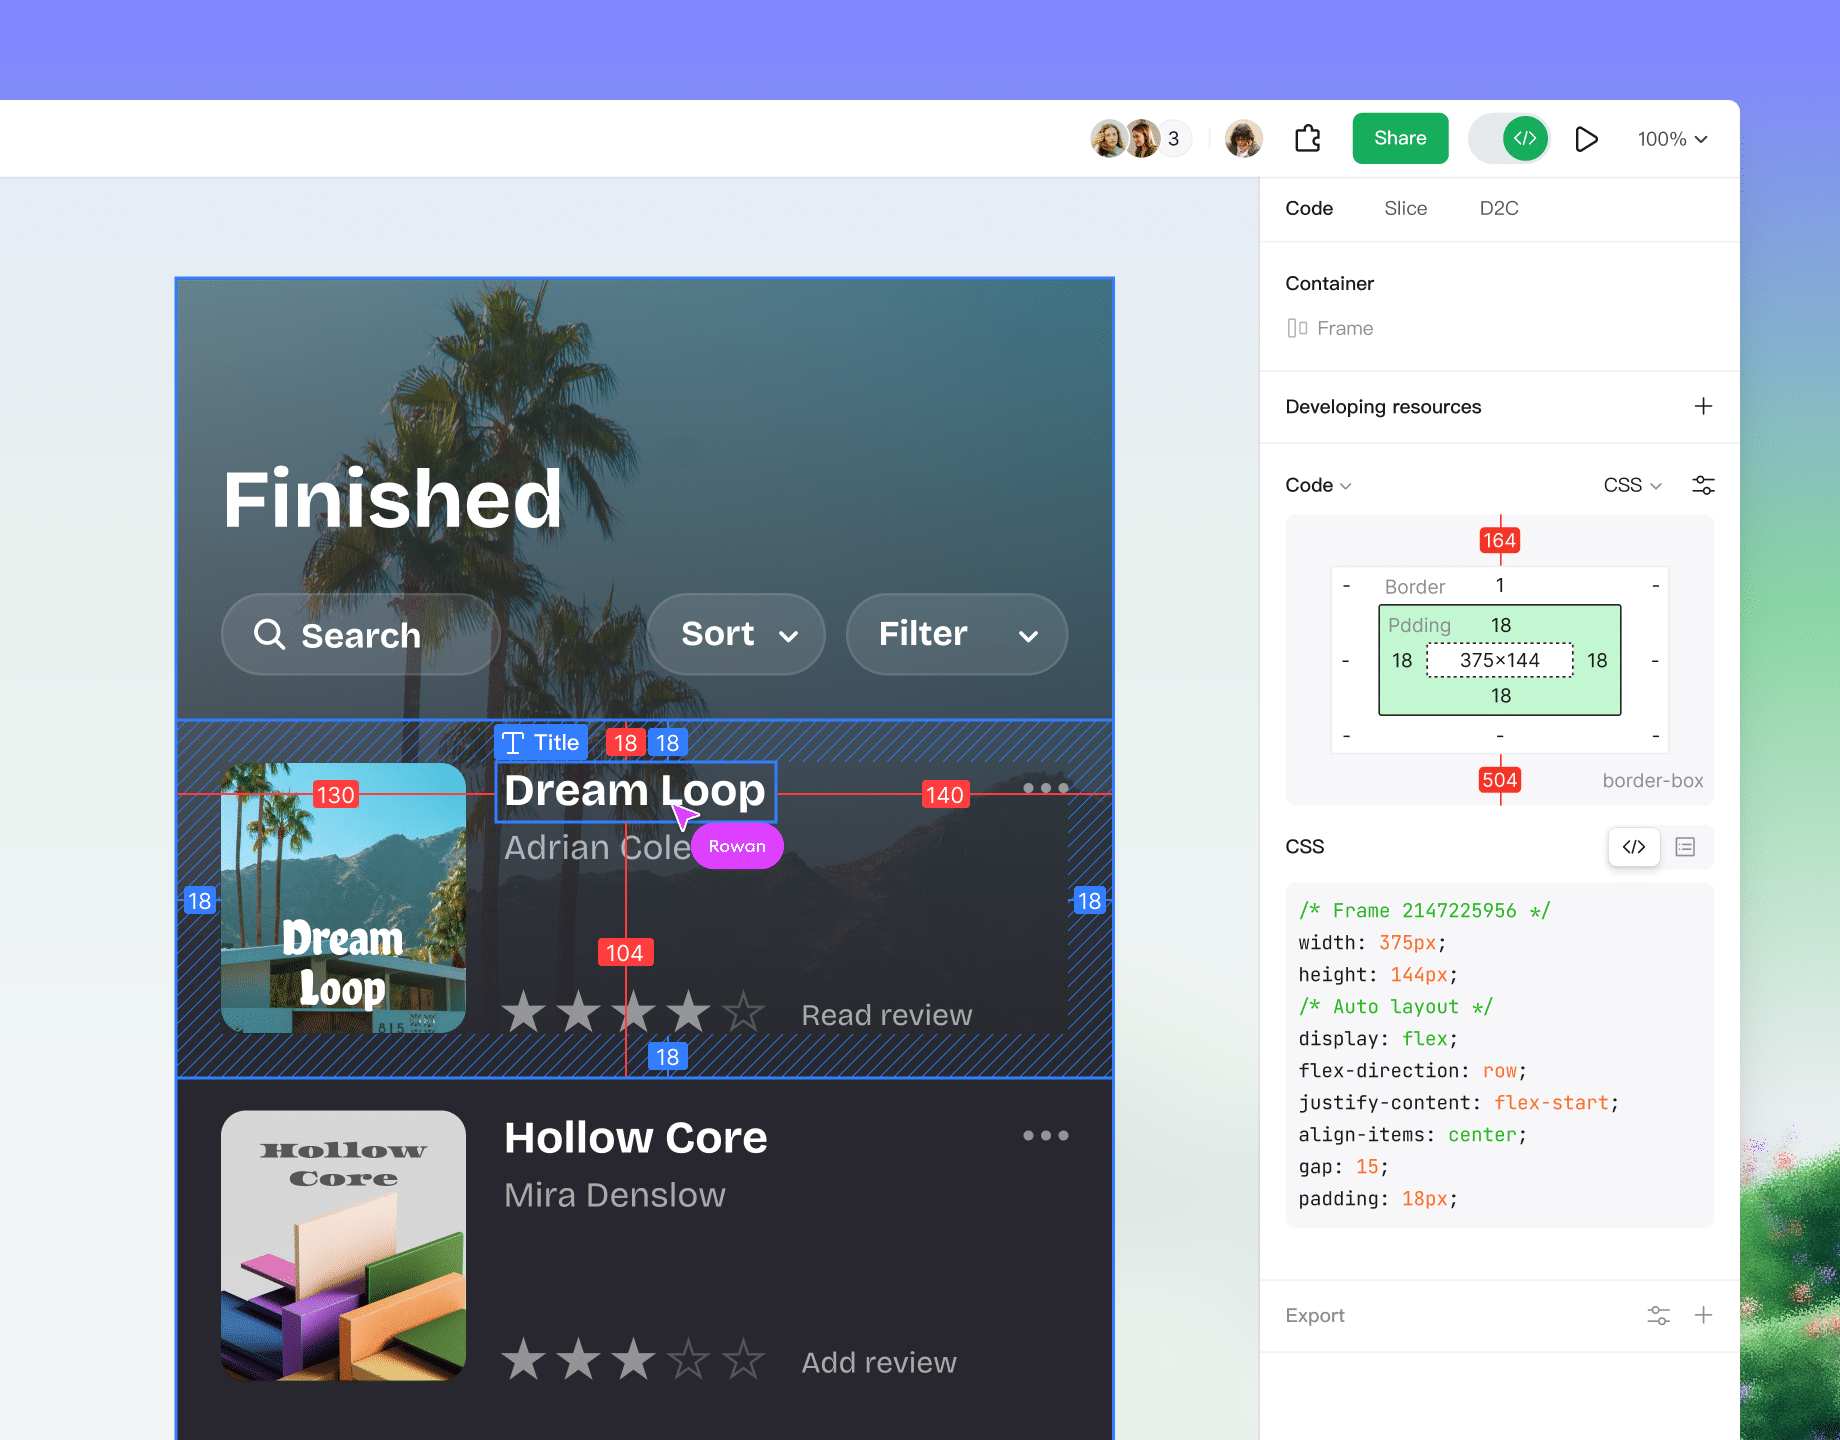
Developers can inspect design properties and measurements and export assets in Developer Mode. The prototype supplies the experience; the design supplies the detail.
PART OF YOUR PRODUCT DESIGN WORKSPACE
From the first idea to the details that ship
Explore the experience
Map the user journey and explore alternatives before committing to detailed screens.
Explore UX design in PixsoCreate the interface
Build the layouts and reusable components that become your interactive prototype.
Explore UI design in PixsoSupport implementation
Keep design properties, measurements and exportable assets accessible to developers.
Explore Developer Mode