Elodia
How much time do you spend explaining your design context to an AI? Copying layers, describing constraints, and pasting code snippets is a productivity killer. If you are wondering what is MCP, it is the Model Context Protocol—a standard built to solve this exact problem. Pixso is leading the charge by implementing MCP for UI/UX teams. By acting as a secure MCP server that connects directly to your AI MCP client, Pixso allows models to read and interact with your design environment in real-time. The "middleman" work vanishes. Here is how Pixso meets MCP to streamline your design system, automate tedious tasks, and unlock a smarter way to work.
About Pixso MCP
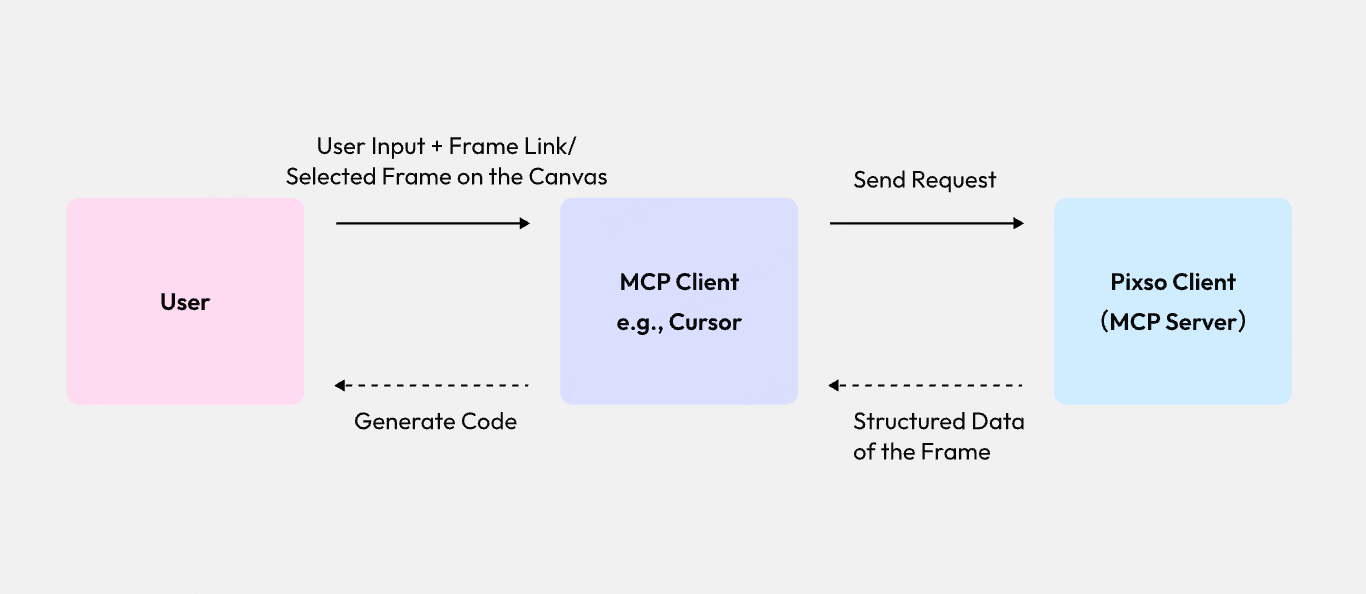
MCP (Model Context Protocol) is an open protocol that provides a standardized, secure, and extensible framework for LLMs (Large Language Models), enabling them to interact with external tools or data sources.
The Pixso MCP server enables the transfer of Pixso design file data to local IDEs with AI programming tools (such as Cursor, VS Code, Windsurf, etc.), intelligently generating front-end code and efficiently transforming designs into code.
The Pixso MCP feature is only available within the Pixso client.
With Pixso MCP, users can:
Generate code for selected frames (design files), enabling a seamless transition from design to code.
Extract structured frame data: directly send the frame's corresponding front-end code and image assets to the client.
How to Use Pixso MCP
You may also access the full guide directly in Pixso.
Step 1. Enable Pixso MCP
- Install and log in to the Pixso client:
Click To Download the Pixso Client
- Create a new design file or open an existing one in the Pixso client.
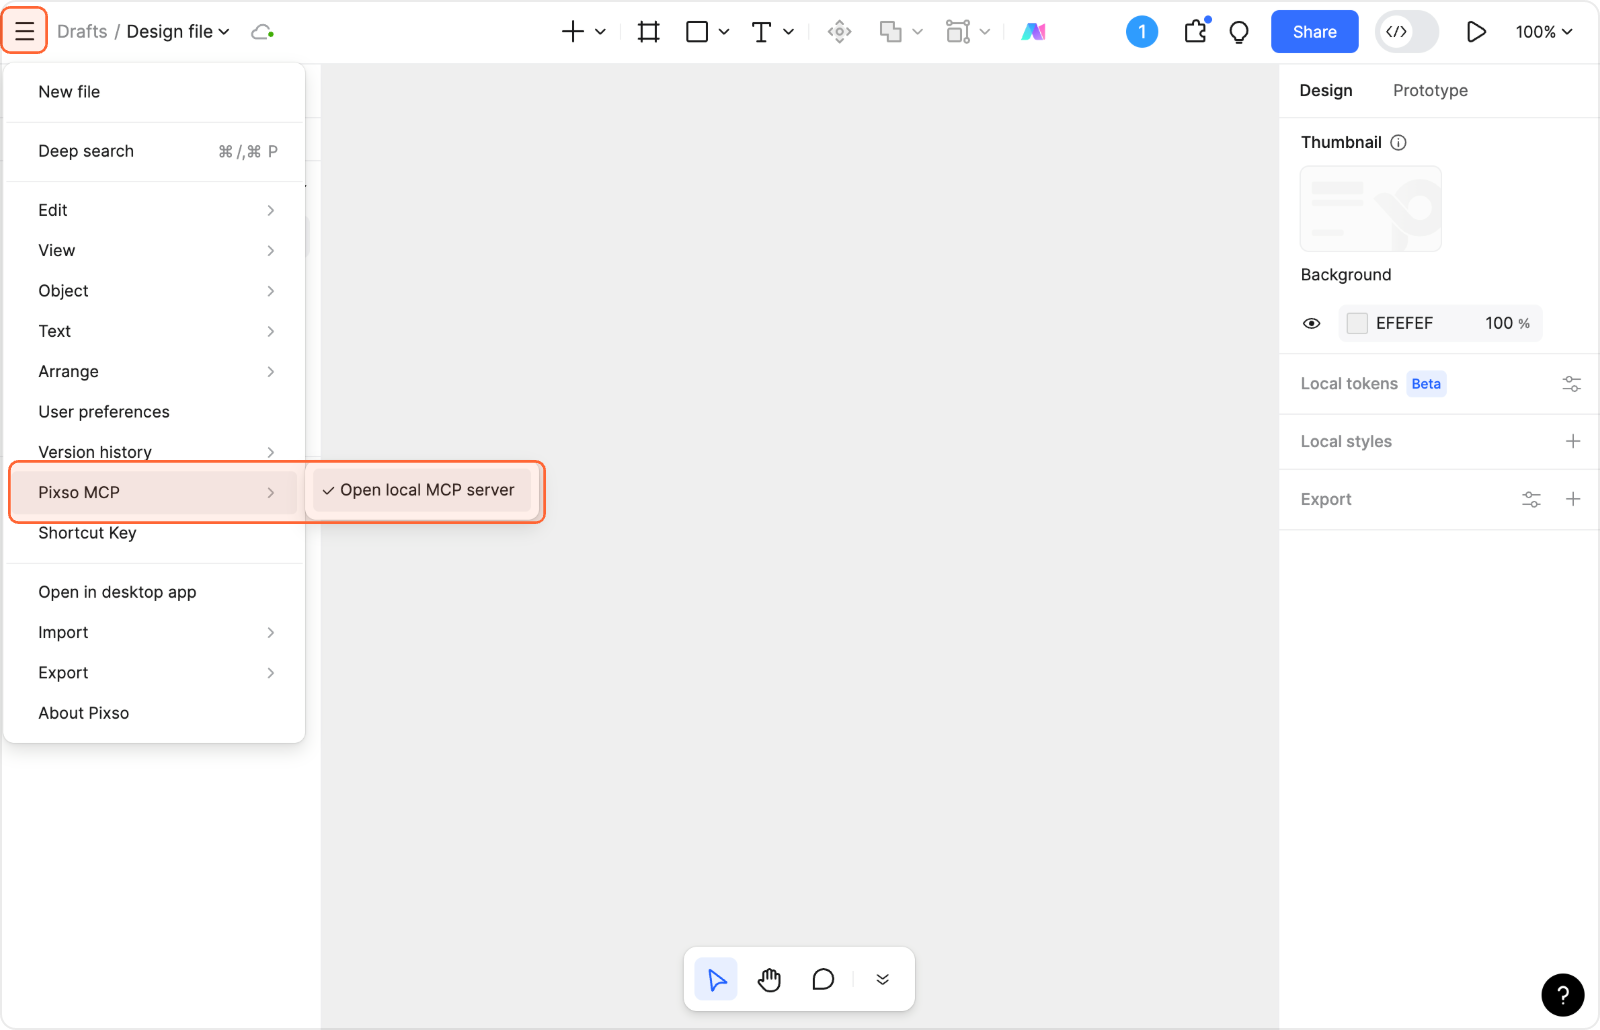
- In the top-left File menu of the design file, locate and enable Pixso MCP.
Once Pixso MCP is successfully enabled, a notification will appear at the bottom of the current canvas confirming that Pixso MCP has been activated.
The local address of the Pixso MCP server is: http://localhost:3667/mcp
Step 2. Integrate Pixso MCP into the Client
Once the Pixso MCP server is successfully started, configure it within the MCP client to establish a connection to the server.
For supported clients and configuration instructions, see below:
🔵Cursor:
- Open Curosr→Cursor Settings→MCP & Integrations
- On the MCP & Integrations page, find MCP Tools and click New MCP Server.
- Paste the following configuration into the mcp.json file and save it.
{
"mcpServers": {
"Pixso MCP": {
"url": "http://localhost:3667/mcp",
"headers":{}
}
}
}
After saving, return to the MCP & Integrations page and start Pixso MCP. During the startup, tools will load; once the tools appear, it indicates that the connection to the Pixso MCP server has been successfully established.
🔵Visual Studio Code:
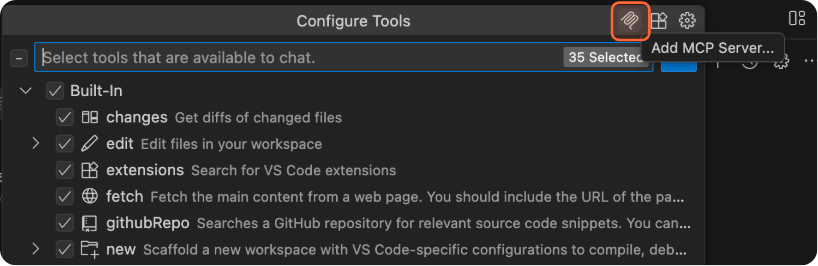
Open VS Code → Open the Chat Window (Ctrl+Alt+I) → Configure Tools
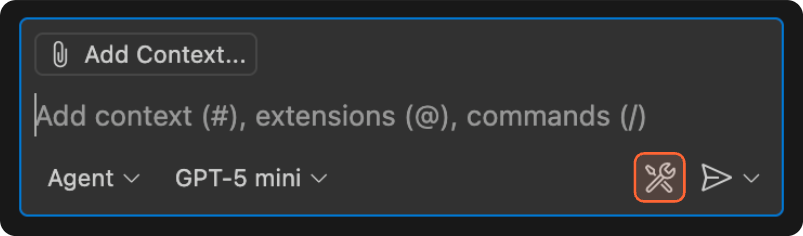
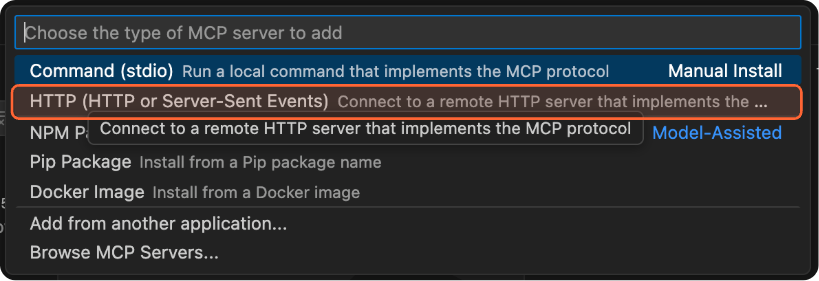
On the Configure Tools page, select Add MCP Server → Choose HTTP. For first-time use, enter any content to open the mcp.json file.

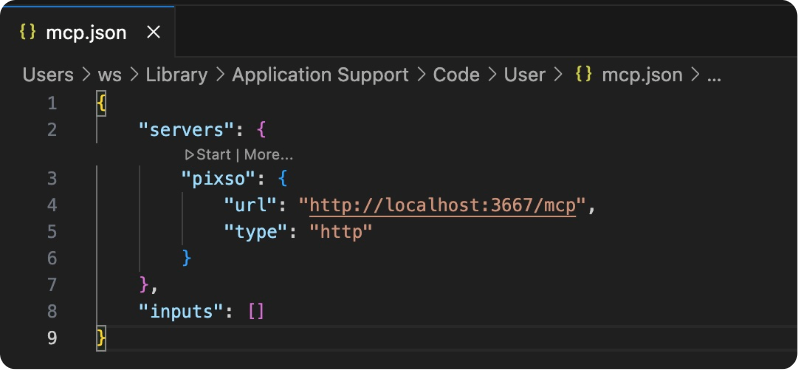
- Paste the following configuration into the mcp.json file and save it.
{
"servers": {
"pixso": {
"url": "http://localhost:3667/mcp",
"type": "http"
}
},
"inputs": []
}
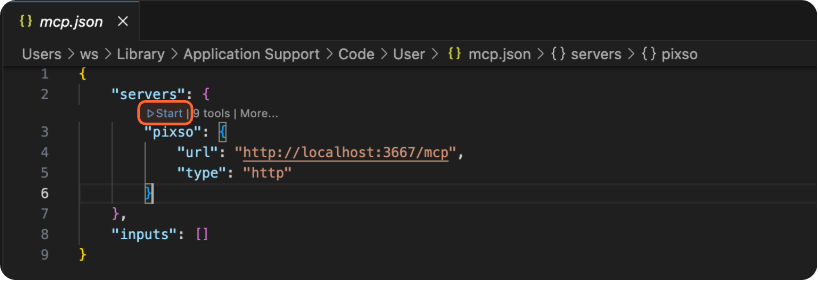
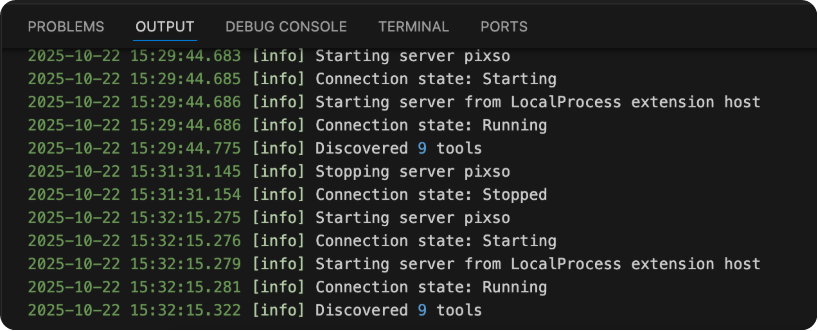
- After saving, the MCP server settings will appear in the input box. Click Settings → Click Start Server to launch the MCP service within the client. When the console displays Connection state: Running, the connection is successful.
💡Note: MCP is only supported in version vs code1.99 and later. Make sure to check your version before use.
🔵Windsurf:
- Open and log in to Windsurf → Click Settings → Open Windsurf Settings
- On the General page, locate MCP Servers → Click Manage MCPs to open the MCP configuration panel.
- In the MCP configuration panel, click View raw config to open the mcp_config.json file. Paste the following configuration into the JSON file and save it.
💡Note: The following configuration is also compatible with other IDEs.
{
"mcpServers": {
"pixso": {
"serverUrl": "http://localhost:3667/mcp"
}
}
}

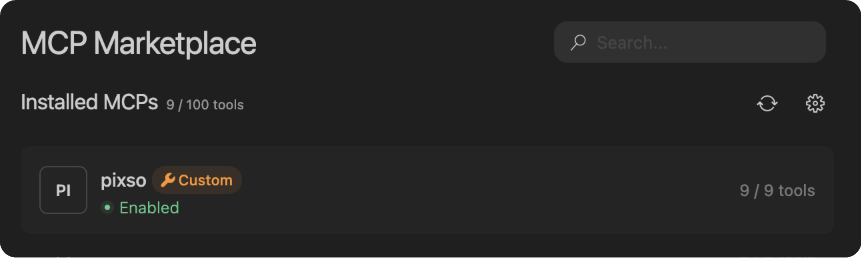
- After saving, return to the Manage MCPs page and click Refresh. Once the following content is loaded, it indicates that the configuration has been successfully completed.
🔵Claude:
- Configure it in the terminal using the following command:
claude mcp add --transport http pixso-desktop
http://127.0.0.1:3667/mcp
Step 3. Interact within the MCP Client
Once the MCP client is successfully connected to the Pixso MCP server, you can start using it within the client.
Pixso MCP supports the following two methods for retrieving Pixso design data:
- Copy Link
- Select Frame
💡Notes:
1. To ensure a stable MCP service connection:
a. Keep the Pixso client running at all times.
b. Make sure the design file containing the frame remains on the active tab.
2. Use advanced large language models (e.g., Claude 4.0 Sonnet, etc.).
Method 1: Copy Link
- Open the design file in the Pixso client.
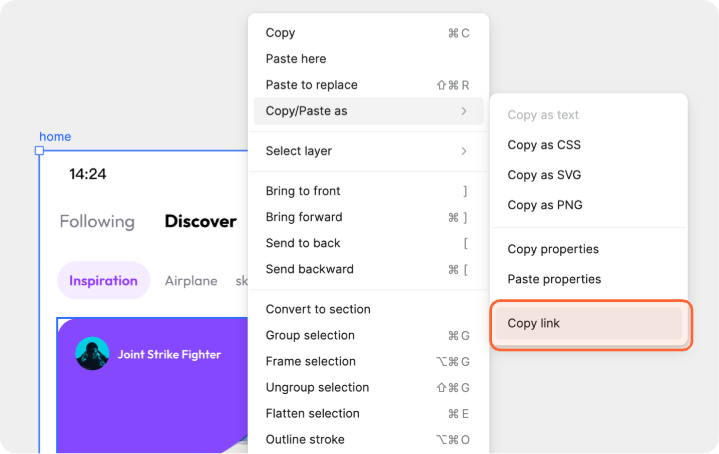
- In the design file, select the frame and copy its link.
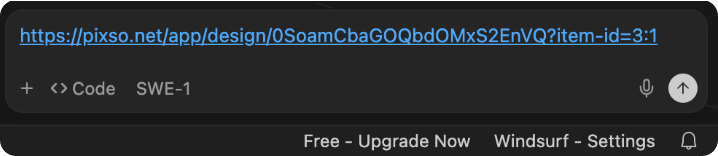
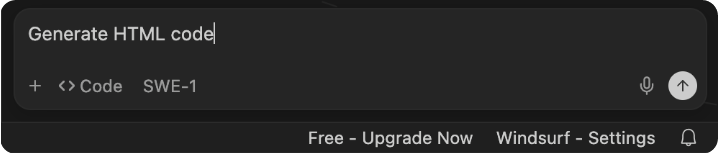
- In the client IDE (e.g., Cursor), open the chat mode, paste the frame link into the conversation, and provide a relevant instruction — for example: Generate HTML code.
Method 2: Select Frame
- Open the design file in the Pixso client.
- On the design file canvas, select a single frame layer.
- In the client IDE (e.g., Cursor), open chat mode and interact with it — for example: Generate HTML code.
FAQ
Q1: What data formats does the Pixso MCP server provide?
The Pixso MCP server provides the following tools for LLMs to retrieve and interpret design data:
① get_code: This tool allows you to obtain the HTML data corresponding to the design file.
② get_image: This tool allows you to retrieve image assets from the design file.
Q2: What should you do if code generation fails in the MCP client IDE (e.g., Cursor) and reports that it cannot retrieve Pixso design file data?
If code generation fails in the MCP client, possible causes and solutions are as follows:
① Pixso client is not open or not running properly: Check the Pixso client to ensure it is open and functioning correctly. Restart the client if necessary.
② Pixso MCP server or client is not running properly: Verify the MCP-related settings in both the Pixso client and the IDE to ensure the MCP service is running and connected successfully.
③ Design file in Pixso client is not open or is on an inactive tab: Make sure the design file containing the linked or selected frame is open in the Pixso client and is on the active tab.
④ Multiple frames selected in frame mode: Currently, the frame selection mode only supports selecting a single frame layer.
⑤ Selected large language model does not support MCP: Some models are incompatible with the MCP protocol. Use advanced models that support MCP, such as the Claude series or Qwen3 series.
Q3: What should I do if the generated code does not meet expectations?
The quality of the generated code can be influenced by multiple factors, including but not limited to:
① Complexity of the design content: If the design is overly complex (e.g., contains multiple masks) or has a large number of layers, it may exceed the LLM’s context processing capacity, causing context overflow. This can result in poor fidelity when reproducing the design or incorrect code generation.
② Type of code being generated: The Pixso MCP server sends HTML data corresponding to the design to the LLM to facilitate high-fidelity front-end code generation. If you request front-end code in a non-HTML framework, the output may be affected.
③ Intelligence level of the LLM: Different models have varying levels of intelligence, affecting their understanding of input semantics and code generation capabilities. To improve results, use advanced LLMs with strong coding abilities.
Q4: What should I do if I cannot find the MCP configuration entry in the client IDE?
If you cannot find any MCP-related options in the client IDE, it is likely that the current version of the IDE does not support MCP. Please check your IDE version and ensure it is updated to a version that supports MCP.
Conclusion
Ultimately, technology should serve creativity, not complicate it. Pixso Meets MCP proves that when an MCP client connects seamlessly to an MCP server like Pixso, the creative process becomes faster, smarter, and more intuitive. We have moved beyond asking what is MCP to experiencing its real-world value: the days of copy-pasting context are over. Whether you are building complex design systems or rapid prototypes, this integration invites you to rethink what’s possible when your design tool and your AI finally speak the same language.