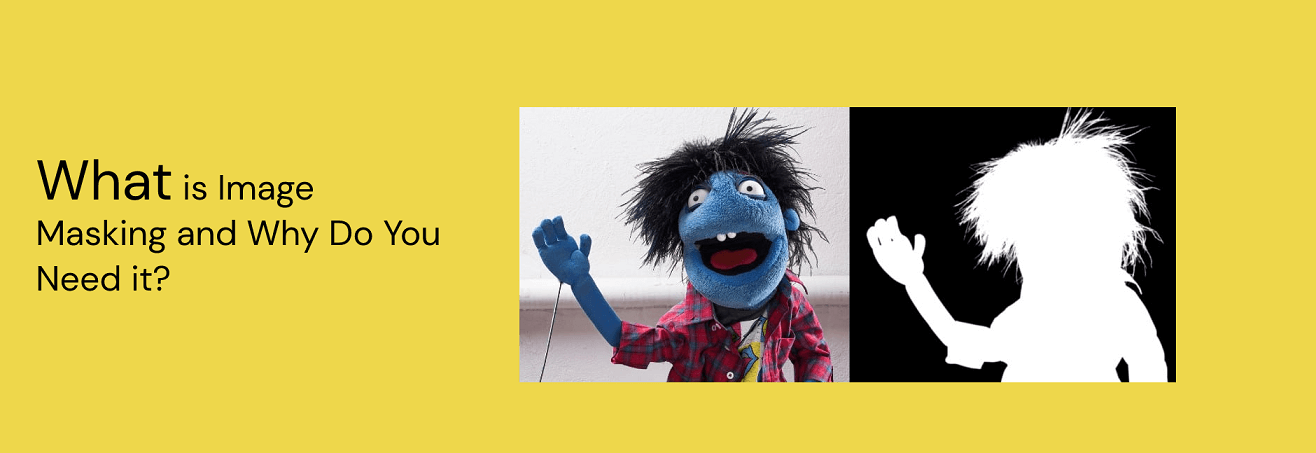
Image masking is the act of hiding or displaying bits of an image by implementing a layer mask over it. Having a mask can be an essential skill to have as a designer when designing intricate designs and beautiful UI.
In this blog, we will go through the importance of masking an image, the types of image masking, and also how to mask an image on Figma. Let’s head straight in.
Part 1. Benefits of Image Masking
Before we dive in to learn more about image masking, we must understand why designers use this technique. What’s so special about image masking, after all? Here are a few benefits of image masking:
1. Hides or reveals any portion
Image masking is mainly used to hide or reveal specific portions of an image. This allows designers and editors to separate the image from its background.
2. Edits multiple design elements
Another major reason for using image masking is that it allows designers to edit multiple elements without much hassle. If done manually, it may take hours to edit individual design elements but with image masking, you are removing that mundane work.
3. Easy to implement
Image masking can easily help you hide or reveal any portion of your image within a few clicks. In addition, it makes it easier for you to restore multiple images than you would manually. As a result, this makes it easy for designers and editors to change the structure of the image completely without worrying about ruining the design.
Part 2. Types of Image Masking
Learning how to mask an image is fun. However, it is important to understand the different types of image masking one can use. Here are the three common types of image masking used by designers:
#1 Layer Masking
Layer masking is the most commonly used image masking in design. You can edit parts of an image separately without altering other portions. As a result, you can change the transparency of different “layers”. With layer masking alone, you can alter and design the opacity of different parts in multiple images—making a beautiful modern-day design.
#2 Vector Masking
Vector masking also sometimes referred to as clipping masking, helps to also work with different layers of your image. In this type of image masking, you can create a vector clip path using software pen and shape tools to clip out a part of an image.
#3 Alpha Channel Masking
Alpha channel masking helps you to conduct advanced editing by removing complexity such as the background and turning that selected area into an alpha channel. You can easily mask an image even if the background has contrast that may disrupt the quality of your designs.
Part 3. How to Mask an Image
Let us get into the practical stuff and learn how to mask an image. Let us use Pixso in this example and make a basic image mask.
Pixso is a highly collaborative design tool and it is free to use. Pixso offers advanced graphic design and prototyping functionalities that make the interface suitable for designing detailed graphics and designing user interfaces.
Whether your project is big or small, or you work in a small or large team, Pixso will cater to your design needs and have everyone on board to accomplish projects together without any hassle.
Follow these steps to get started and create your image mask in Pixso:
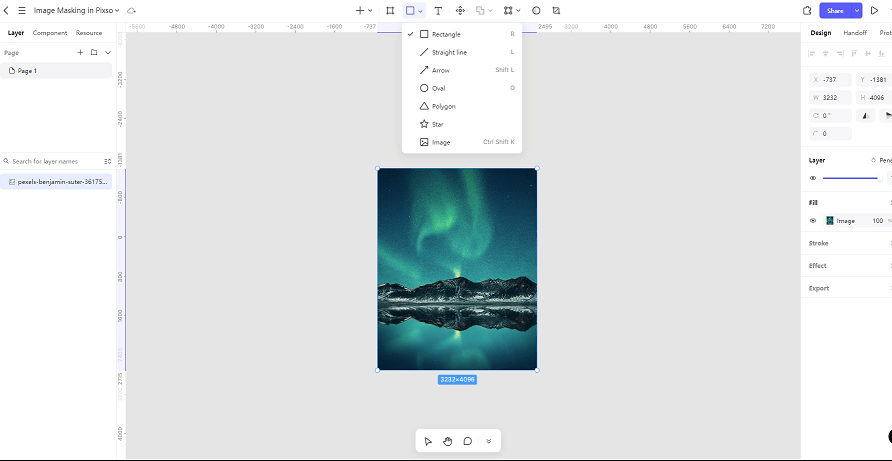
Step 1. Insert a beautiful background image to your Pixso canvas by clicking the picture icon under the shapes icon or by using the keyboard shortcut Ctrl + Shift + K.
Step 2. Once you have inserted the background image, add a portrait image to the canvas.
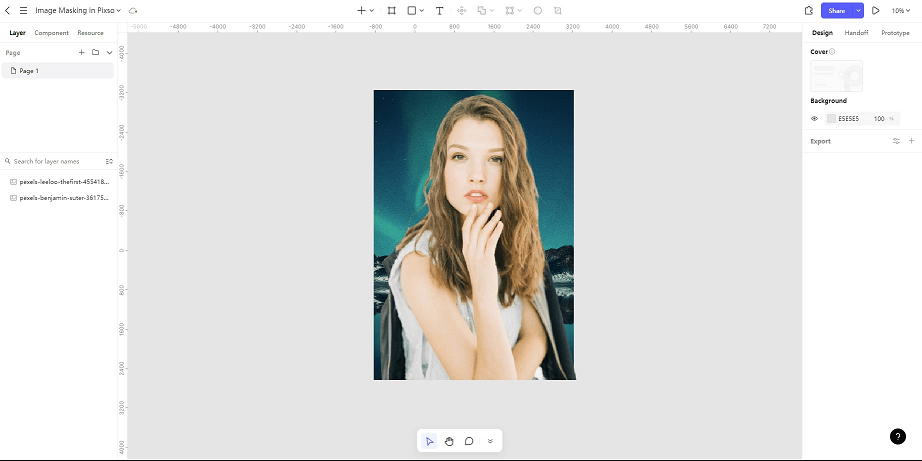
Step 3. Head over the layer tab on the left-hand side of your screen and rearrange the layer names by simply putting the portrait layer below the background image — making the portrait go behind the background image.
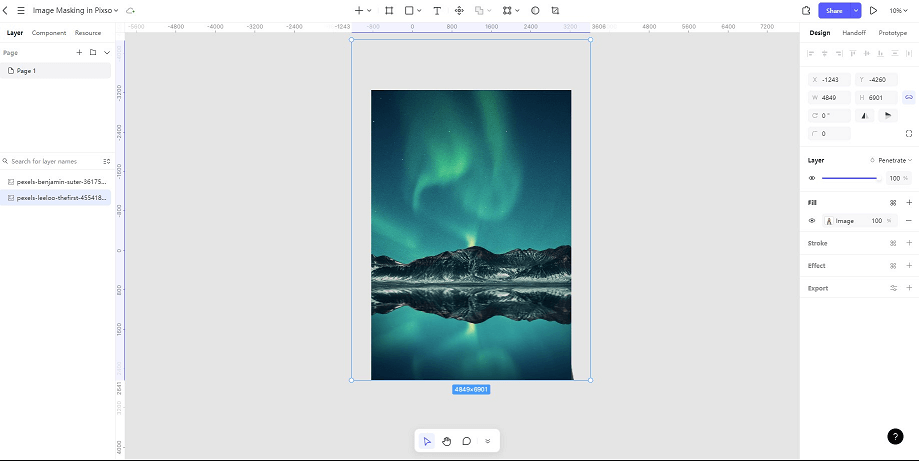
Step 4. After that, select both layers and click on the mask icon or simply use the keyboard shortcut Ctrl + Alt + M.
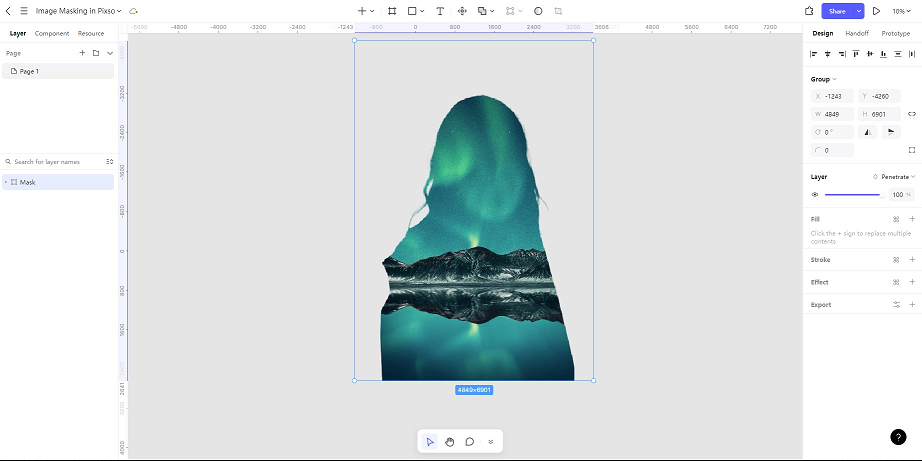
Part 4. Bonus - How to Mask an Image in Figma
Over here, you will be shown how to mask an image in Figma. In this example, we will use different images and see how fascinating and scalable image masks can be.
Example 1: Creating avatars using image masks
Step 1. In this example, you have a portrait and a circle. Similar to the technique we learned in the previous section, place the circle behind the portrait by placing the layer name below the portrait layer. You can also right-click and select send to back.
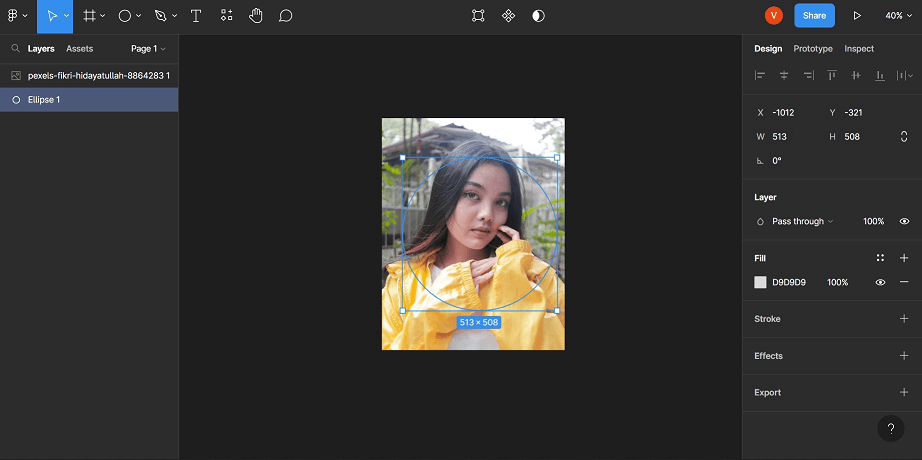
Step 2. Then, select all your layers and click on the mask icon on top of Figma. You can also use the keyboard shortcut Ctrl + Alt + M.
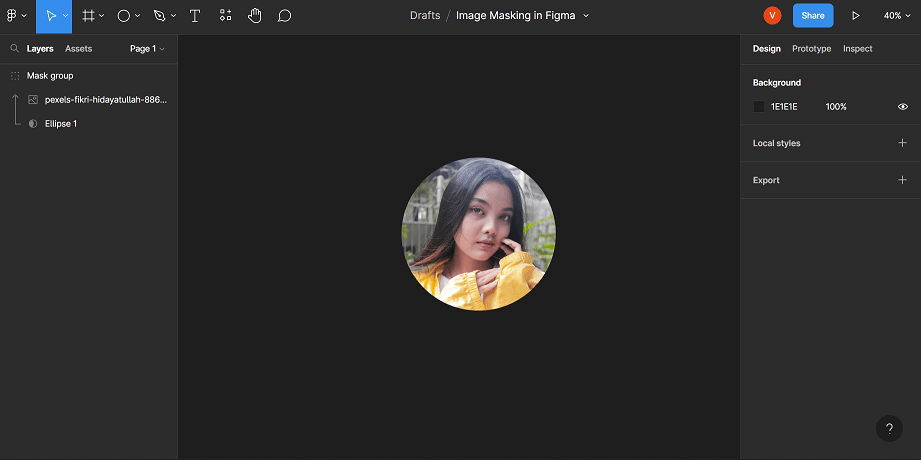
Example 2: Putting an image mask over text
Step 1. In this example, you have a beautiful background image and text. Once again, place the text behind the background image by placing the layer name below the background image layer or by right click and selecting send to back.
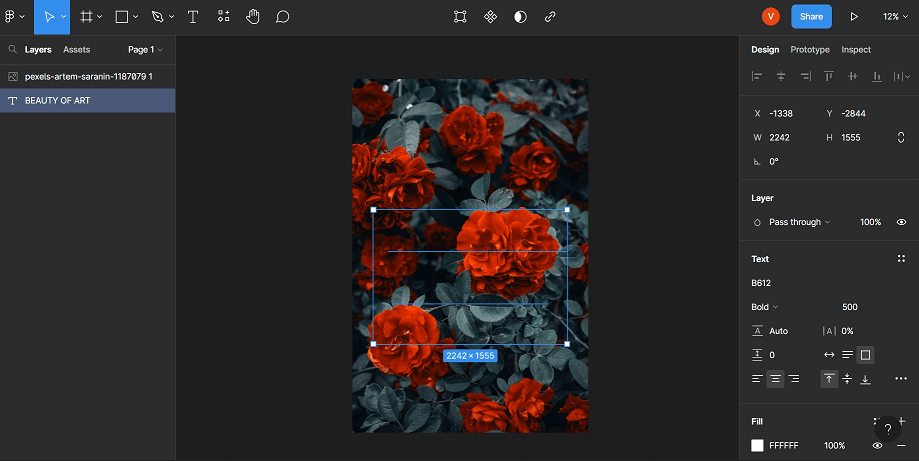
Step 2. Select all your layers once again and click on the mask icon or the keyboard shortcut Ctrl + Alt + M.
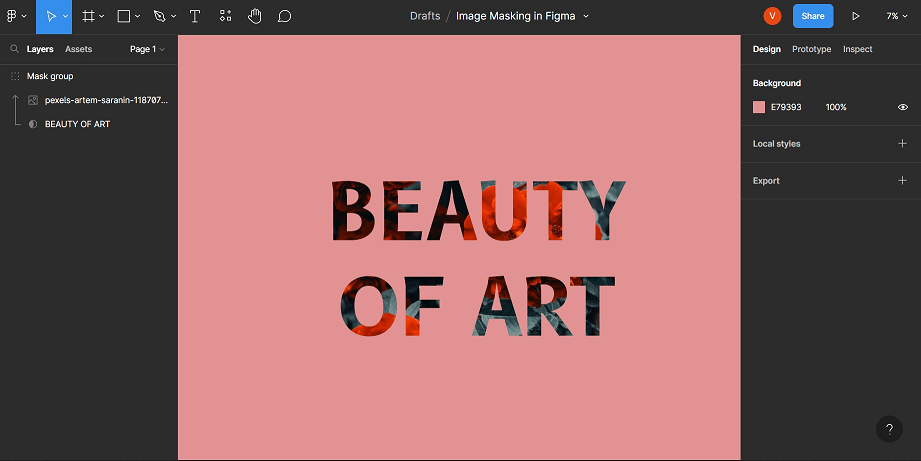
Amazingly, you will see the background image blend inside the text and you can drag around the image for proper positioning. In addition, you can type different texts now and see the image masked around it. Pretty cool, right?
Mask Your Designs to Perfection…
Image masking is an important skill to have in designing. If you are a graphic designer or a UI designer, you can improve your designs significantly by implementing these masks and adding more detail to your art.
Start practicing masking images, texts, and other components today and bring excitement to your images.


