Scott
To bring an Axure prototype into Pixso, publish it locally from Axure, compress the complete output folder into an unencrypted ZIP, then choose Import files → Axure in the Pixso workspace. Before importing, decide what your team needs next: an editable design or a static HTML presentation that preserves the original interactions for review. These are different outcomes; neither should be described as a perfect conversion of every Axure rule.
If the next task is rebuilding screens and refining their visual design, use the editable option and continue in Pixso's prototyping workspace. If stakeholders need to click through the existing Axure behavior, choose the HTML presentation option and treat it as a viewable reference, not editable source.
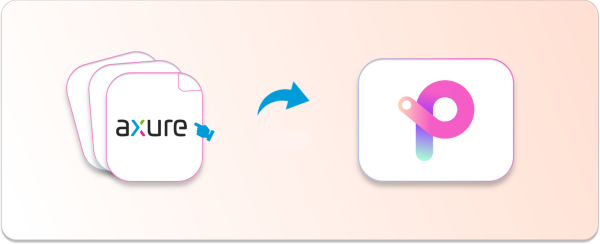
Export and import the Axure prototype
1. Publish the full project locally
Open the source project in Axure and select Publish → Publish Locally. Choose an empty destination folder. Wait for publishing to finish, then open that folder and confirm it contains the generated HTML and supporting folders. A screenshot or a single HTML page is not the complete export.
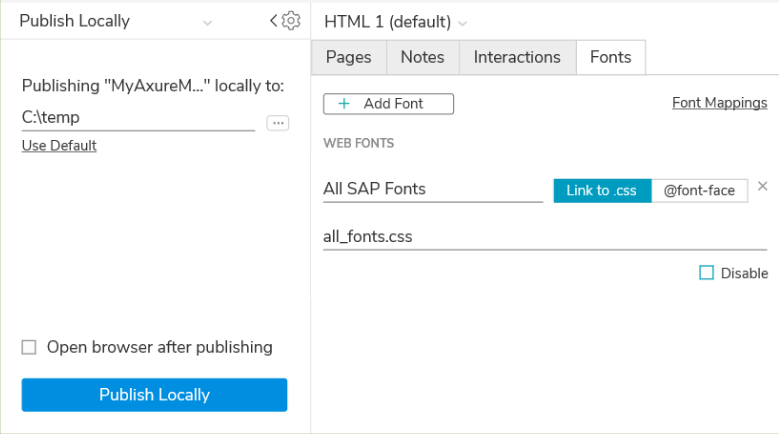
2. Make an unencrypted ZIP
Compress the generated output as one ZIP archive. Keep the directory structure intact and do not password-protect the archive. Before uploading, open the ZIP once: its pages, scripts, images and other assets should still be present. Save the original Axure project separately so you can return to its logic if a conversion needs adjustment.
3. Import in Pixso and choose the right mode
In the Pixso workspace, select Import files → Axure and upload the ZIP. Where the import dialog offers a choice, select editable Axure import when you intend to revise screens in Pixso, or HTML static import when you need to share and inspect the existing interactive presentation. The static version retains the Axure presentation behavior but its contents are not editable in Pixso.
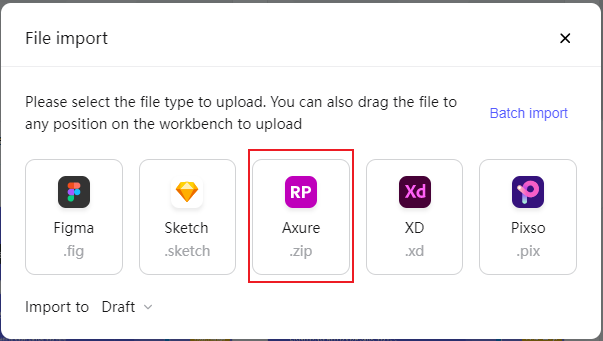
Check the result before sharing
Open representative screens rather than assuming the upload finished perfectly. Check typography, images, overlays and long pages at the viewport sizes your team actually uses. For an editable import, inspect a few layers and components and try a small change. For the HTML presentation, follow a critical user path—including its error or alternate state—and verify that the click targets, conditional behavior and navigation still make sense. If a behavior does not carry over, use the Axure original as the reference and rebuild or document that behavior explicitly.
Share the Pixso file with reviewers only after checking its access settings. Axure itself also supports team projects with check-out and check-in; moving a prototype to Pixso is a workflow choice, not a remedy for a nonexistent Axure collaboration feature.
If the import looks incomplete
- Missing images or styling: confirm the ZIP includes the entire local publish output, not just its top-level HTML file.
- Upload rejected: recreate an ordinary ZIP without encryption and check that it opens locally.
- Interactions differ: check which import mode was selected. Editable import and HTML presentation serve different purposes.
- Unexpected layout: compare a small set of source and imported screens, then adjust the editable file or retain the static presentation for reference.
After import: export a selected image
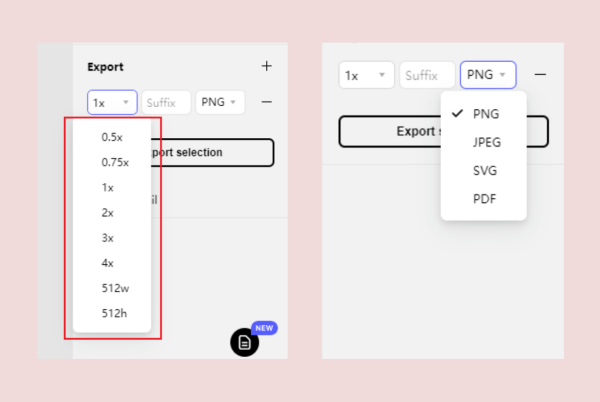
The original guide also covered a useful follow-on task. In an editable Pixso file, use the Slice tool to mark the area you want and the Export controls in the right panel to choose a format and scale. This is a design-asset workflow, not an additional step required to import an Axure prototype.
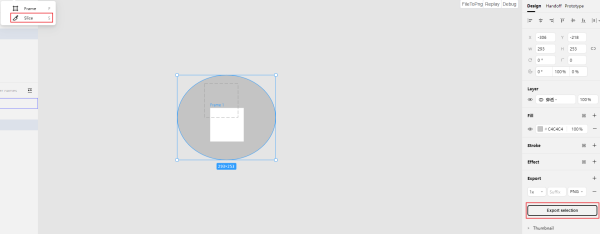
If the same asset is needed at multiple sizes, add export settings for the relevant scales instead of manually repeating the slice. Name the output clearly so developers can tell variants apart.
Open Pixso and test one representative Axure screen before moving an entire project. That quick comparison reveals whether your team needs an editable design, a faithful presentation, or both.