Elodia
Learning a new design tool can never feel easy on the eye. Whether you are using another design tool or probably going to use your first-ever tool, you will need a well-detailed tutorial. Figma is awesome, and it is not a complicated design tool to use. It is free to start with, runs on both Windows and Mac, and has a killer real-time collaboration feature.
Hence, this Figma tutorial blog will cover the fundamentals of getting started on this remarkable tool. It is the most complete Figma tutorial for beginners, and you will learn Figma from scratch and start enjoying its functionality like other designers are doing now. So without further ado, let’s dive straight in.
Part 1. Getting Started and Familiarizing the Interface
First and foremost, hop on to figma.com and sign up — It is free! Then, head to drafts and click on a new file so we can take a dashboard tour.
Getting used to the UI
In the center of the screen, you will find a blank canvas to work on. Over here, you can insert frames as they are simply the most crucial feature of Figma. You can create a new frame by pressing the F key and going through all the frame options on the right-hand side panel—ranging from an iPhone screen to a social media post layout.
On the left-hand side, you can locate the Layers tab. Over there, when you work on a Figma file, you can view different layers, frames, and elements that are part of your canvas. You can rearrange each layer by simply performing a drag and drop. Each frame, component, and other UI elements are indicated by mini-icons besides the text.
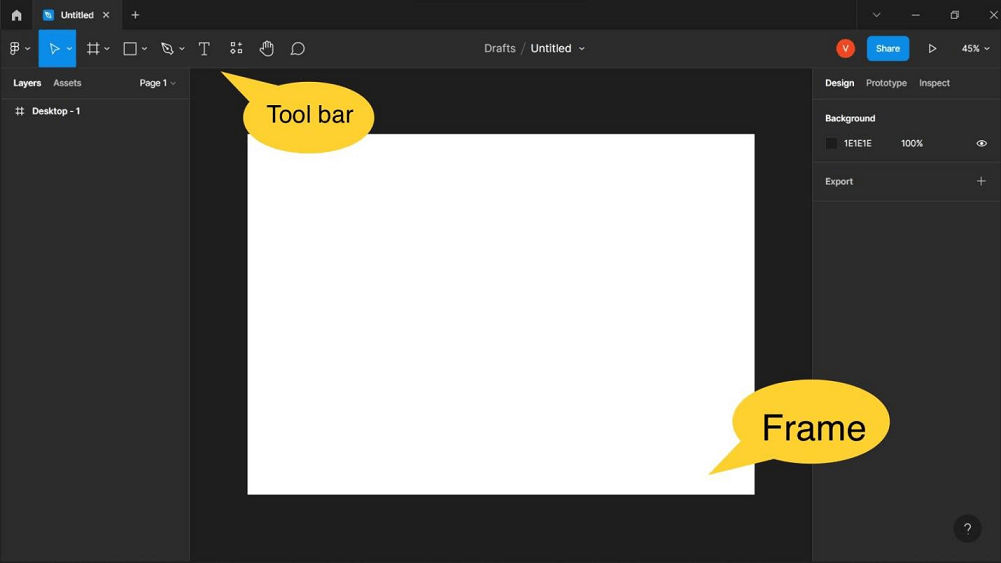
Other than layers, you can find the Assets tab when all your components are stored and give you easy access to them, and Pages, where you can set up different sections of your design file.
Operating the basics
On the top-left corner of your screen, you will find the toolbar. You will find the Figma icon, where you can browse your file settings and import and export anything. Head over the shape tools icon or vector shapes button so you can create shapes like rectangles, circles, lines, etc. Also, you can move to the Text button or press the T key to add text to your canvas.
On the right-hand side panel, you can view other details in the Design tab like your frame’s coordinates and size. You can even corner the radius for independent frames and objects. You will find the layout grid where you can use a standard 8-point grid or the most commonly used 12-column grid. You can head over to grid properties and customize them per your needs.
You can also add images and place them in a frame or object. To optimize them, you can head over to the Fill section on the right-hand side panel and adjust the visibility of the image. Moreover, you can set the Constraints of where you want to pin your images in a specific frame or object.
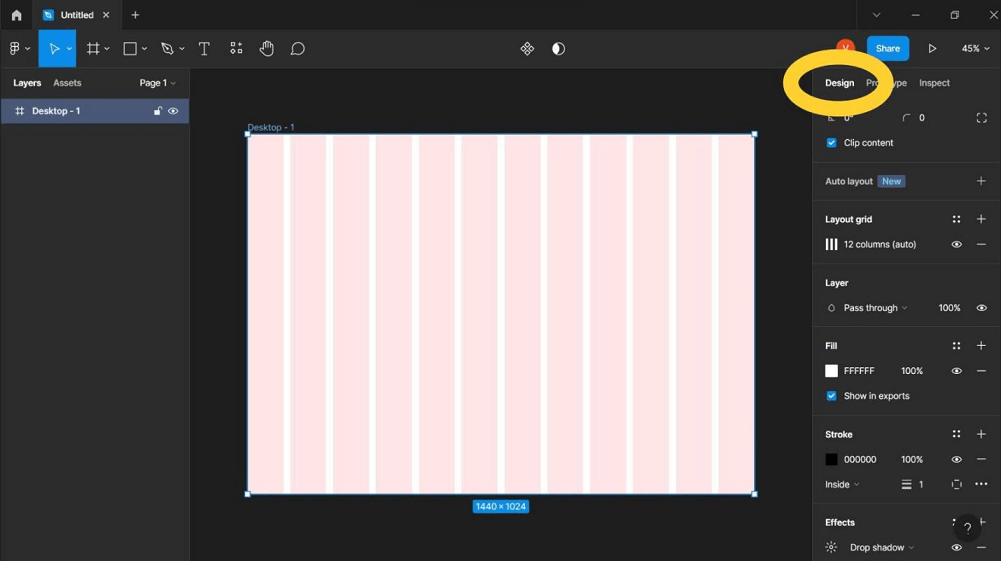
On top of that, you can add thick or thin Strokes to your images or shapes. Furthermore, you can add Effects such as a drop shadow, inner shadow, background blur, etc. The best part of operating these functions is you can easily disable their features by clicking on the eye icon on the side of each element to hide their visibility.
Part 2. Exploring Added Features on Figma
Now, let us explore other features which help a big deal in optimizing your design workflow:
Auto Layout
It is a game-changer of a feature where you can create frames that grow or shrink the contents inside them when you resize the frame. As a result, it allows you to create responsive designs and saves you time significantly.
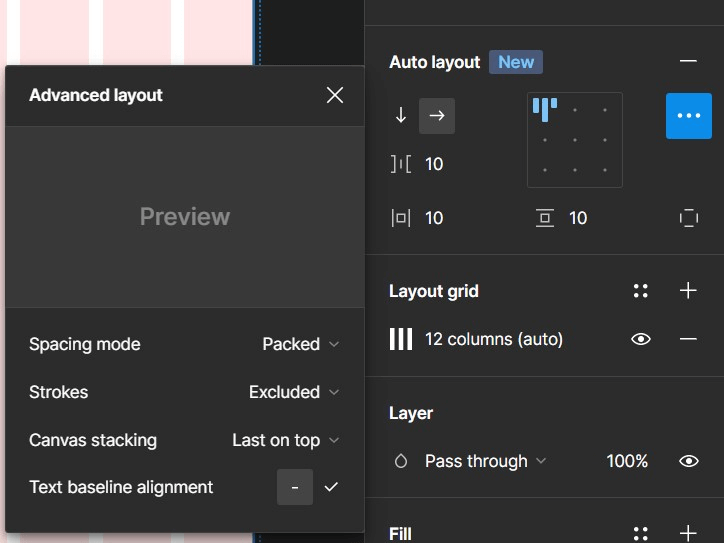
Just press Shift + A to create an auto layout frame around the layer you want to. You can use the Figma auto layout properties on the right-hand side panel to optimize your auto layout frame.
Components
These are UI elements that are reusable in your design file, it’s another useful Figma feature that can save you time. You can create a component by pressing Ctrl/Cmd + Alt + K. Then, you will notice the frame or shape changes into a purple component icon. As a result, you can create instances or copies of your master component across your design file.
And do you want to know the best part? All you need to do is to make changes in your master component, and it will automatically transfer those changes to your instances. How amazing is that!
Prototyping
On the right-hand side panel, you can view the Prototype tab. It is where you can add and optimize interactions of your UI screens to tell a story.
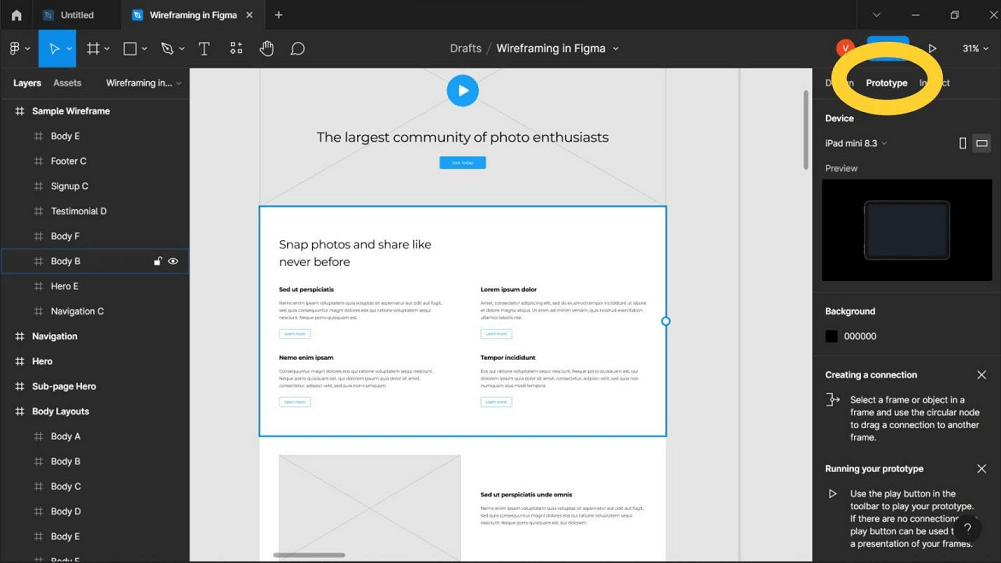
You can head to prototype properties and make necessary adjustments to make your interactions meaningful by connecting each screen back and forth. You can also preview these prototypes by downloading the Figma Mirror app.
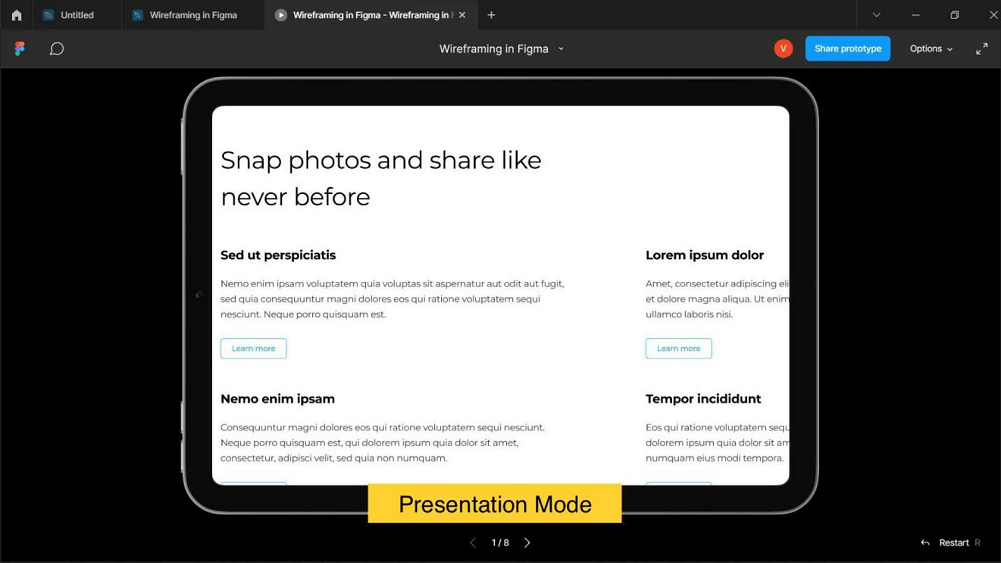
Presentation
You can press the play icon on the top right corner of your screen to view the presentation screen on a new tab. It will display your UI screens and their interactions after you have worked on the prototyping.
Importing and Exporting Files
You can import various design files and images into your Figma design file. When it comes to exporting assets, you can export them in SVG, JPG, PNG, etc.
Sharing and Collaboration
On Figma, you can invite people to work on your design file by clicking on the blue share button on the top right corner of your screen. You can add their email address or copy the link to share the file. Moreover, there will be a chat where you can converse in real-time and add comments to the design file. To wrap it up, it is a great team-collaboration feature for various design projects.
Community
Lastly, we have the Figma community, where you can find other designers and creators who share their work and frameworks that bring value to other designers. You can copy or import their design templates to your Figma file comfortably. Additionally, you can get Figma plugins from there to optimize your workflow and be more efficient with your time.
Part 3. Figma FAQs
Q1. Is Figma easy to learn?
Yes. Figma is pretty simple, and you can move around the interface comfortably at your own pace. It takes only a few days to get used to its user interface.
2. What is the best way to learn Figma?
For beginners, the best way to learn Figma is to watch Figma step-by-step tutorials from YouTube playlists or read blog posts to understand the most used features and other basics.
Q3. Is Adobe better than Figma?
Adobe is great, but when it comes to team collaboration, Figma beats many design files on this aspect alone. Moreover, its customizability of third-party plugins and added features make it an outstanding tool.
Part 4. Alternative to Figma: Free Templates Available!
Do you want to know an alternative tool that matches the functionality of Figma? Then, look no further than using Pixso as your alternative design tool. Pixso supports importing various design files from Figma to Sketch. Moreover, Pixso offers free unlimited files and templates for teams to work on design projects together. Another amazing feature is you can preview prototype interactions without needing to download any apps.

Conclusion: Design Your Work with Ease…
That concludes our Figma tutorial. As you have learned, it is a fascinating and user-friendly tool to have. Because of its exciting features, plugins, and community, you will find Figma your go-to tool for making effective designs.