Scott
Why typography is a product decision
Typography determines how quickly people can scan a screen, distinguish an action and recover from an error. It also changes when content grows, a browser uses a fallback font, a person increases text size or a translation expands. A type system is therefore more than a font choice. It defines roles, sizes, line height, spacing, language support, loading behavior and the boundaries that a component should respect.
Start with the screens and content a product actually needs. A marketing headline can tolerate a dramatic display face; a compact field label needs a different level of clarity. A data table needs readable digits and predictable alignment. A multilingual interface needs glyph coverage and a fallback plan. The useful question is not “Which font is best?” but “Which type behavior helps this task remain understandable?”
Begin with a real specimen
Build a small specimen before choosing a final scale. Include a navigation label, page title, section heading, paragraph, button, price, table value, helper text and error message. Add a long label, an accented string and one sample for every required script. View the specimen on a narrow screen and at the size people will actually read.
| Specimen | What it reveals |
|---|---|
| Navigation and button | Width, case and action clarity |
| Long paragraph | Line length, line height and wrapping |
| Price and table value | Digit width, alignment and symbols |
| Error and helper text | Contrast, hierarchy and vertical space |
| Localized string | Glyph coverage and expansion |
This exercise catches problems that a large headline on a design canvas hides. Compare similar characters such as I, l and 1. Inspect small counters and openings. A light weight may look elegant at a large size and become hard to read in a compact control. Judge the complete interface, not an isolated word.
1. Define roles before picking numbers
Name the job of each role: page title, section heading, body, label, caption, data, hint and error. Record family, weight, size, line height and letter spacing for each role. Give a role one source of truth so a change is reviewable rather than scattered across individual text layers.
Roles also need boundaries. Decide where a page title can wrap, whether a button can grow to two lines and what happens when a caption is too long. Do not solve every exception by shrinking the type. A component that cannot accommodate its content needs a content or layout decision as well as a typographic one.
2. Choose a type scale that supports hierarchy
A modular scale can help you generate starting values, but it is a design aid rather than a requirement. The most important relationship is the hierarchy between roles. Make the difference visible at the intended viewport, then test whether the hierarchy survives a long section heading and a narrow column.
Keep display and interface roles separate when their needs differ. A marketing heading may use a distinctive family while controls use a more practical companion. One family can also serve every role if it remains clear.
A starting scale for a project screen
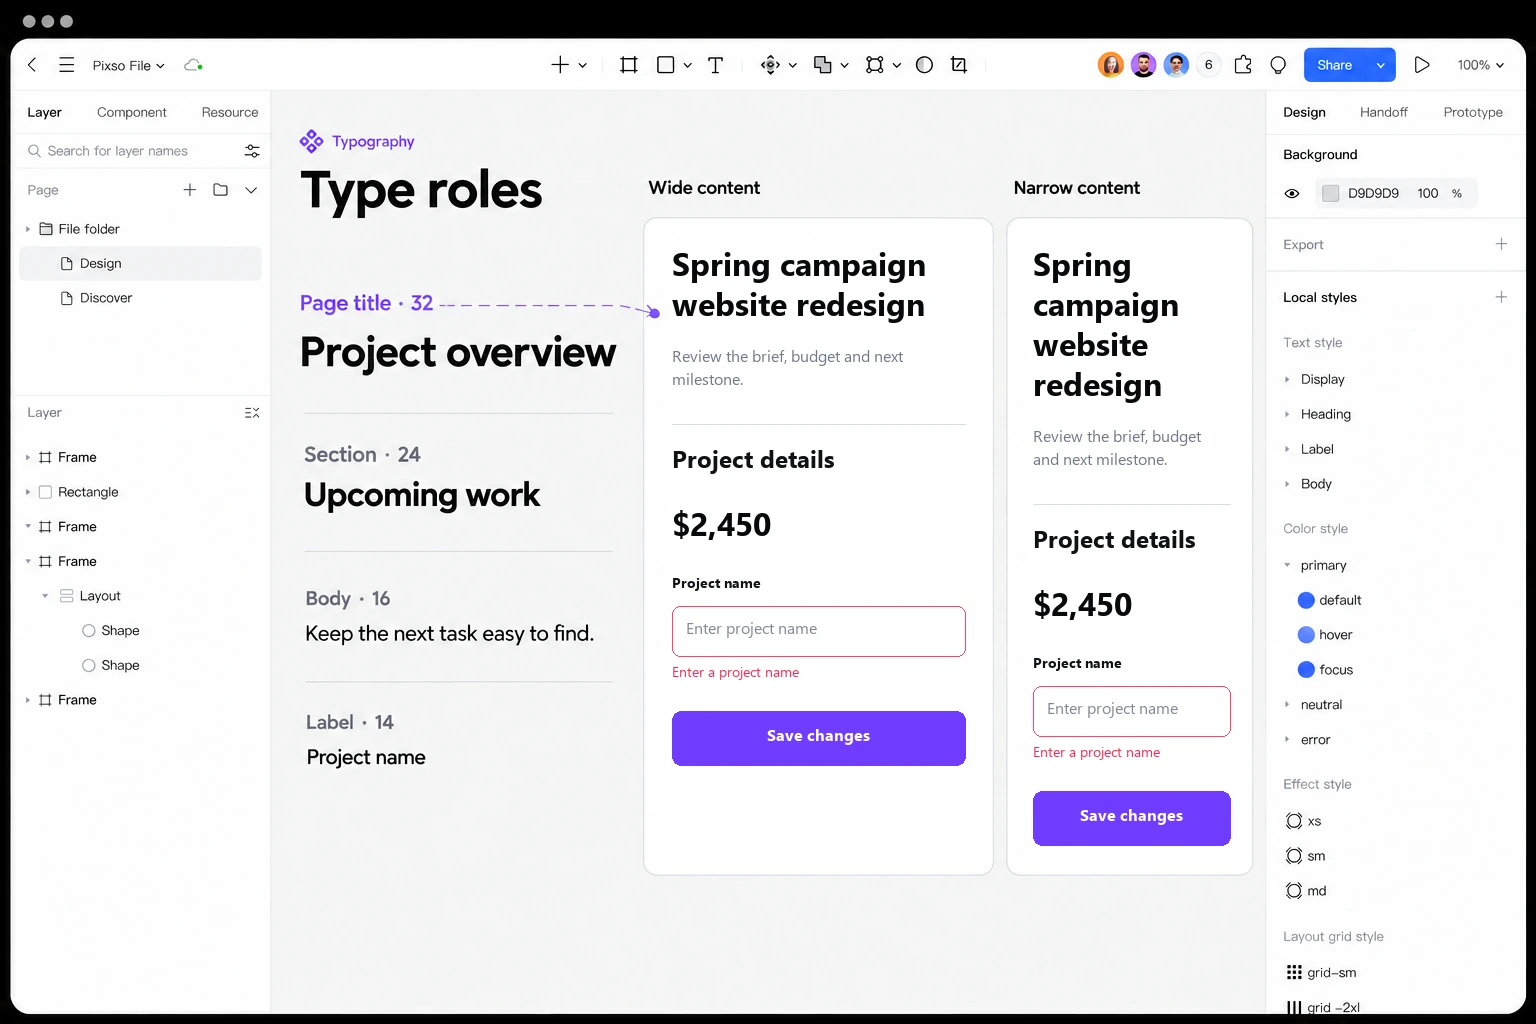
Consider the project screen below. Its title is “Spring campaign website redesign”; the “Project details” section contains a $2,450 price, a “Project name” field and a “Save changes” button. The table pairs the role sizes shown in the image with starting line heights to test in your chosen font.
| Role | Size / line height | Behavior on a narrow screen |
|---|---|---|
| Page title and price | 32 / 40 px | Allow the title to wrap; keep the currency and amount together |
| Section heading | 24 / 32 px | Wrap above the content it introduces |
| Body and button | 16 / 24 px | Let body copy take more lines; let the button grow if its label wraps |
| Field label and error | 14 / 20 px | Keep both visible and allow space below the field |
Use the same role sizes in the wide and narrow versions first. In the image, “Spring campaign website redesign” expands from two lines to four while retaining its prominence. Let the title occupy more height, allow the description to wrap within the available width, and keep “Project details” below it. Then check whether the price, field and button remain distinct. Introduce responsive type changes only when a particular role needs them.
3. Evaluate readability at the reading size
Check x-height, stroke weight, counters, punctuation and spacing in the context where people read. Compare normal, bold and italic states, not only the regular cut. If digits appear in a dashboard, include decimals, currency symbols, negatives and a large value. Tabular figures may help alignment, but they do not fix an overcrowded column or unexplained formatting.
Read a complete paragraph aloud or silently at the intended distance. A typeface that looks distinctive in a specimen may become tiring when a person scans several paragraphs. Content quality and typography interact: unexplained jargon makes a visually clear sentence difficult, while a precise label can reduce the need for visual emphasis.
4. Contrast, enlargement and reflow
WCAG 2.2 contrast minimum sets a 4.5:1 threshold for normal text and 3:1 for large text. “Large” means at least 18 pt, or 14 pt bold—roughly 24 CSS px or 18.7 CSS px bold. A 16 px label does not qualify merely because it looks prominent. These ratios are a baseline: very thin letterforms can still be difficult to read.
Keep error text understandable without its red color. “Enter a project name” beside the “Project name” field is more useful than an unexplained red outline. Placeholder text still needs sufficient contrast and should not replace a persistent label. Inactive controls are exempt from this particular contrast criterion, but their unavailable state and the reason for it should remain understandable.
Check text resizing to 200% and reflow at a width equivalent to 320 CSS px in the implemented screen. For this project screen, the expected result is simple: the title, price, “Project name” field, error and “Save changes” action remain available, and ordinary text does not require horizontal scrolling. Data tables and other content that genuinely need two dimensions have specific exceptions; a fixed-height text card does not.
5. Text styles and tokens in a design tool
In Pixso, define text styles for recurring roles and give them names that describe their purpose. Apply the styles to representative screens, components and states. Keep foundation values—families, weights, sizes and spacing—separate from semantic roles such as body/default or field/error. This allows a visual system to evolve without changing every usage manually.
Check the text inside actual components. A text box’s measured bounds and the visible letterforms are not identical, so compare the design with the implemented component before adjusting padding. A one-line button should remain understandable when it wraps or when a translation is longer. Name local exceptions and give them a review owner rather than creating an untraceable override.
Build the “Spring campaign website redesign” screen in Pixso with its description, “Project details” heading, price, project-name field and error message. Define named text styles for these recurring roles, then duplicate the screen at a narrower width while keeping the same content and role sizes. Compare the title wrapping, section spacing and position of “Save changes” side by side. If the team shares a library across files, publish the relevant changes and review the updates in the files that use it. A change in font size can alter a button or field height, so check representative layouts again before handing the styles and spacing values to development.
6. Webfonts, fallbacks and loading
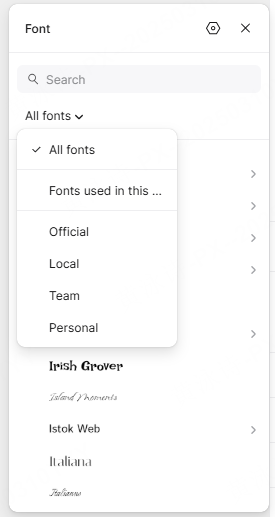
Keep approved font files and licensing information with the project. Record permitted uses—desktop design, web embedding, app distribution or other contexts—and send the license question to the responsible owner. Local font access in a design tool does not grant distribution rights.
Document the fallback stack and what a reader sees before the webfont arrives. The fallback may have a different width and line height, so the first render can shift a button or move an error below the fold. List the weights, styles and languages the product actually uses. More typographic options mean more files and can affect loading performance; do not assume that a variable font or a single file is automatically smaller.
The MDN @font-face reference explains the implementation controls. Test the real files and subsets in the browsers and languages the product supports. Set a font-loading budget with the developer and measure the chosen files on a representative connection.
7. Variable fonts and optical choices
A variable font may contain a range of values such as weight, width or optical size in one file. The available axes and ranges depend on the family; upright and italic styles may still be separate files. A variable font can reduce the need for several static files, but the benefit depends on the subsets and browser behavior shipped.
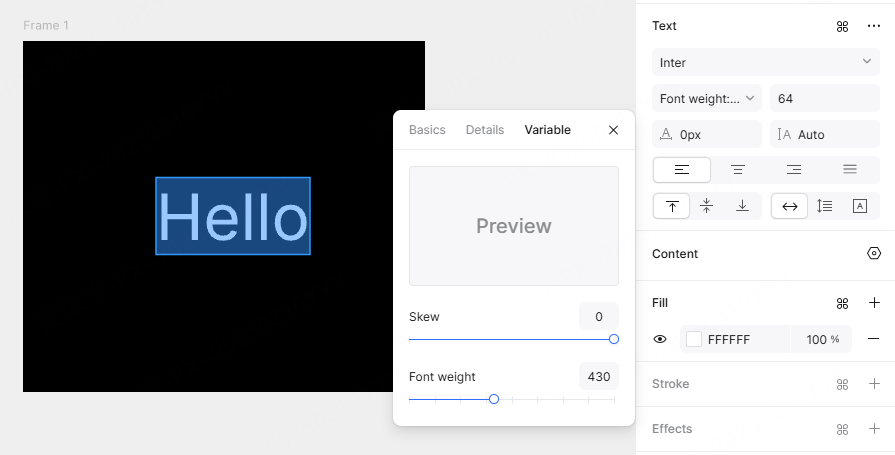
Choose a small, intentional set of values for the interface. If optical sizing is available, compare the face at body and display sizes. Record the chosen settings for developers and inspect the browser result. A precise weight value cannot compensate for poor contrast, crowded spacing or a label that does not explain the action.
8. Localization and text expansion
Localization belongs in the typography review, not after handoff. Include accented Latin text, Cyrillic, Greek, Arabic, Japanese, Korean or other required scripts in the specimen. Check fallback glyphs, punctuation direction, line breaks, numerals and date formats. Some scripts need different line heights or shaping behavior; do not force an English rhythm on every language.
Test a long German compound, a concise Chinese label, a right-to-left sample and a string with a plural or variable number when the product supports them. Decide whether a button can wrap, grow, scroll or change hierarchy. Record truncation rules and ensure the full value is available to assistive technology. Never “fix” expansion by silently reducing the type below a usable size.
9. Pairing and content hierarchy
When pairing typefaces, compare apparent size, weight, rhythm and punctuation in a real heading-and-paragraph layout. Similar x-heights can help two faces feel compatible, but they do not guarantee a good pairing. Give each family a job and keep the number of jobs small enough to maintain.
Content hierarchy is not decoration. A heading should tell a reader what decision or section is next; supporting text should supply context without competing with the primary action. Use whitespace and grouping to reinforce hierarchy instead of increasing every font size. Review the order at 200% zoom and on a small viewport.
10. Handoff and acceptance
A type handoff should contain styles, tokens, font files or loading instructions, license notes, sample content, fallback behavior and responsive rules. Include an implementation specimen that shows default, focus, error, long text, translated text and loading states. A developer should not have to infer whether a line height is intentional or a default.
Use this table during acceptance:
| Check | Pass condition |
|---|---|
| Roles | Each recurring text role has a named source of truth |
| Contrast | Text and focus states meet the agreed baseline in the implementation |
| Reflow | Enlarged text and narrow widths preserve task completion |
| Fallback | Missing or late fonts do not hide critical content |
| Localization | Required scripts, expansion and direction are tested |
| Licensing | The shipped use is documented and approved |
| Handoff | Developer can reproduce a role without guessing |
Fix the layout before shrinking the text
When a specimen breaks, first identify the cause. A long field label may need more width; an error may need a growing content area; a fallback font may change the line breaks. Reducing every role by two pixels hides the symptom while weakening the hierarchy across the whole interface.
For the project screen, preserve the body size as the description wraps. Keep “Project details” below that description, keep $2,450 on one line, and leave room for “Enter a project name” beneath the field. “Save changes” should move down with the content instead of overlapping the error. These layout decisions preserve the hierarchy when the same screen becomes narrower.