Scott
Design-to-code workflows are redefining how designers and developers collaborate. With D2C, Pixso designs can be instantly transformed into production-ready front-end code, eliminating repetitive manual work while ensuring pixel-perfect accuracy.
I. Introduction to D2C
D2C stands for Design to Code. As an assistive tool for front-end developers, it effectively accelerates the design implementation process and reduces the costs of manual front-end coding.
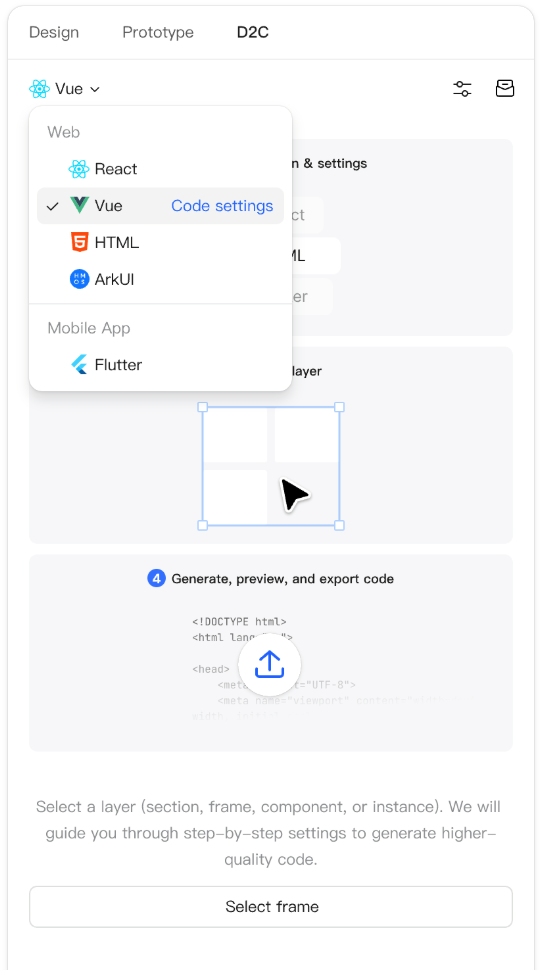
Supports one-click recognition of layer layouts and design system components within Pixso pages, achieving pixel-perfect design implementation. It currently supports conversion into React, Vue, HTML, ArkUI, and Flutter code.
Thanks to the continuous enhancement of Pixso's component capabilities, the usability of D2C in production environments has significantly improved. It can now support the integration of complete design systems, achieving component-level recognition and code output.
- Pixel-perfect design implementation. Accurately reproduces design details, ensuring zero discrepancy between the final product and the original design intent.
- Supports design system & component recognition. Identifies and extracts styles, design tokens, and components directly from design files.
- Reduces manual front-end coding costs. Shortens the development cycle, enabling faster and more stable delivery.
II. Feature access & Mode restrictions
D2C is available in both Design Mode and Dev Mode, but their focuses differ:
Design Mode: Provides viewing, code generation, and export capabilities. It also allows you to modify design layers using the "Optimize design" feature.
Dev View: Only provides viewing, code generation, and export capabilities.
- Access in Design Mode.
- Access in Dev View.
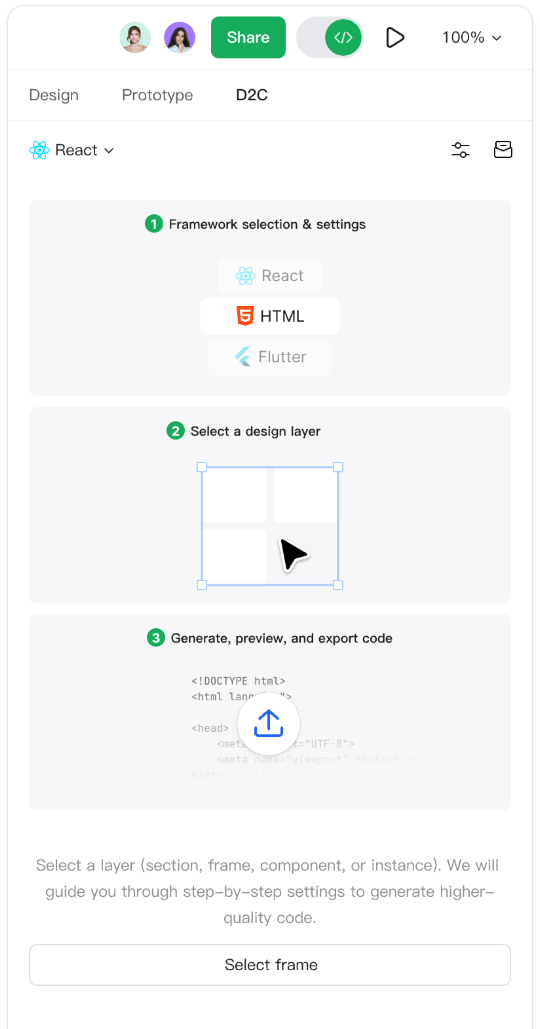
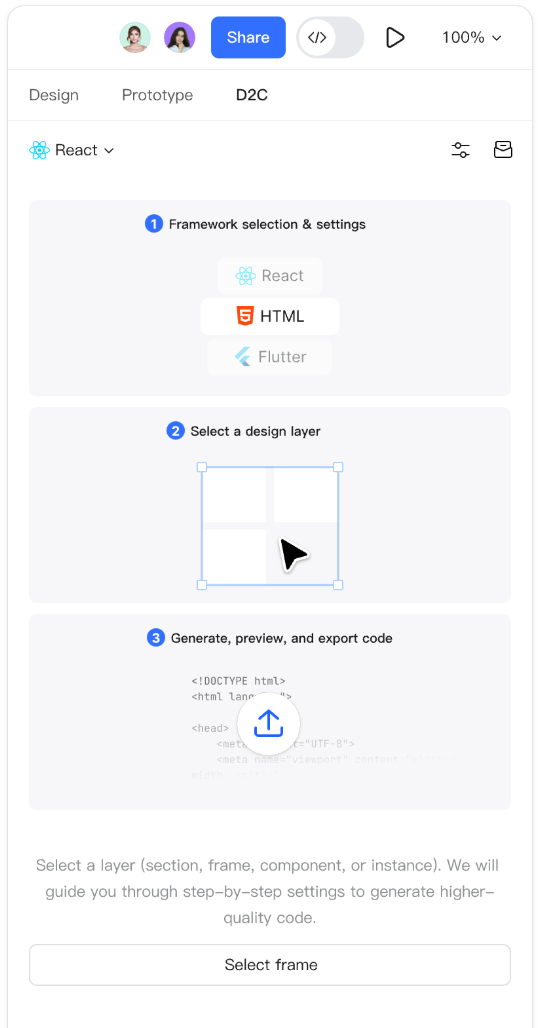
III. Select code framework & Settings
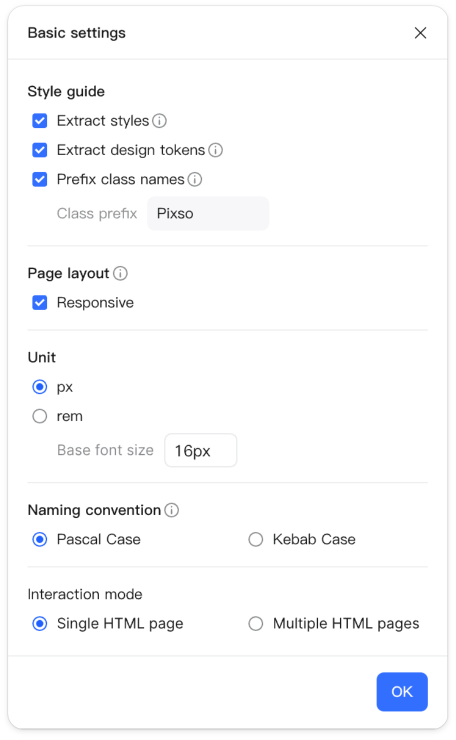
Select a code framework from the dropdown menu and configure its settings. The available setting options vary depending on the selected framework.
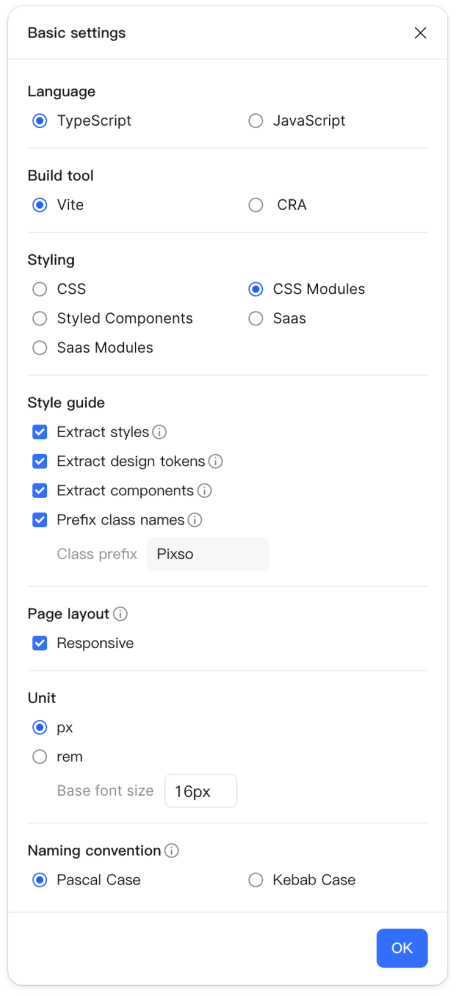
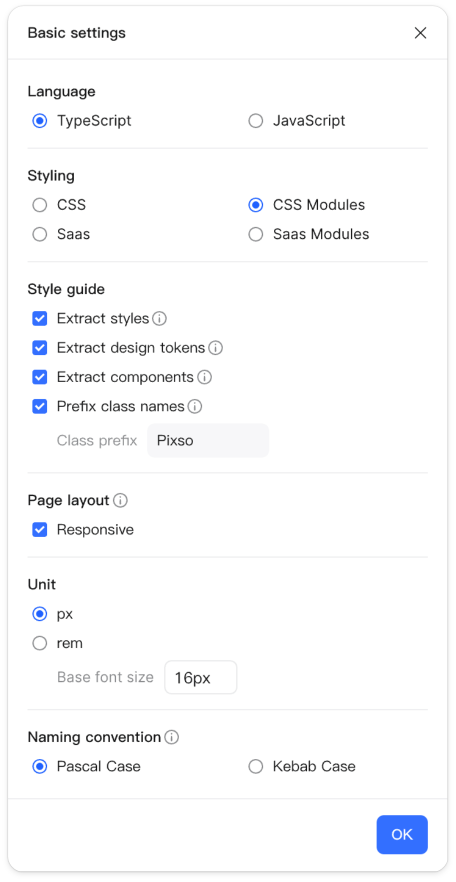
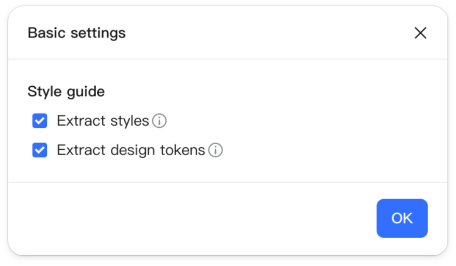
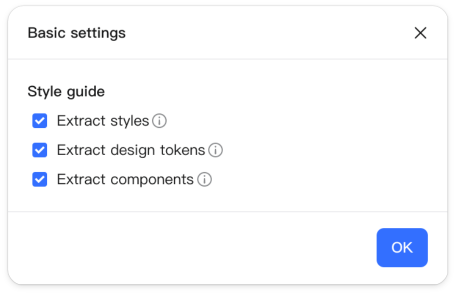
Style extraction: Identifies and extracts all styles from the design file, using style names in the code to improve readability.
Design token extraction: Identifies and extracts all design tokens from the design file, using design token names in the code to improve readability.
Component extraction: Identifies components in the design file and generates them into reusable code, using component names in the code to improve readability.
Add class name prefix: Adds a uniform prefix to all generated CSS class names to prevent naming conflicts with other style libraries in your project.
Page layout:
Responsive: When the browser window width changes, all elements within the page that have corresponding layouts configured will try to maintain their original layout structure and relative positions.
Units: The measurement units used in the generated code.
Naming convention: Provides two formatting options for file names:
Pascal Case:SamplePixsoFile
Kebab Case:sample-pixso-file
Interaction type (HTML only):
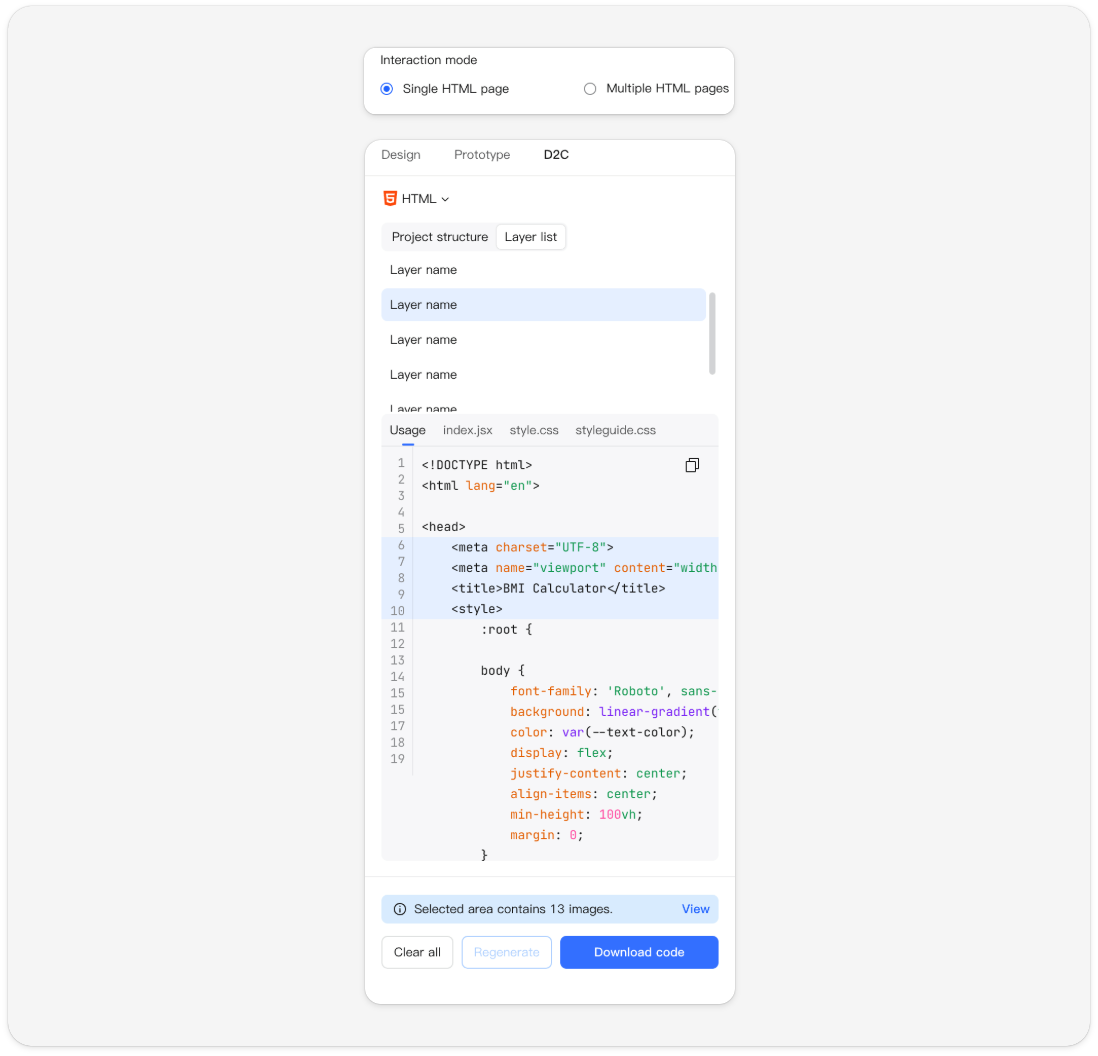
Single-page HTML: Consolidates all design page layers into a single HTML file, implementing most of the prototype interactions created in Pixso.
Multi-page HTML: Generates an independent HTML file for each design page, implementing only a few basic prototype interactions.
Select code framework
Code settings-React
- Code settings-Vue
Code settings-HTML
Code settings-ArkUI
Code settings-Flutter
Style extraction: Select the common.css file in the project structure to view the style code.
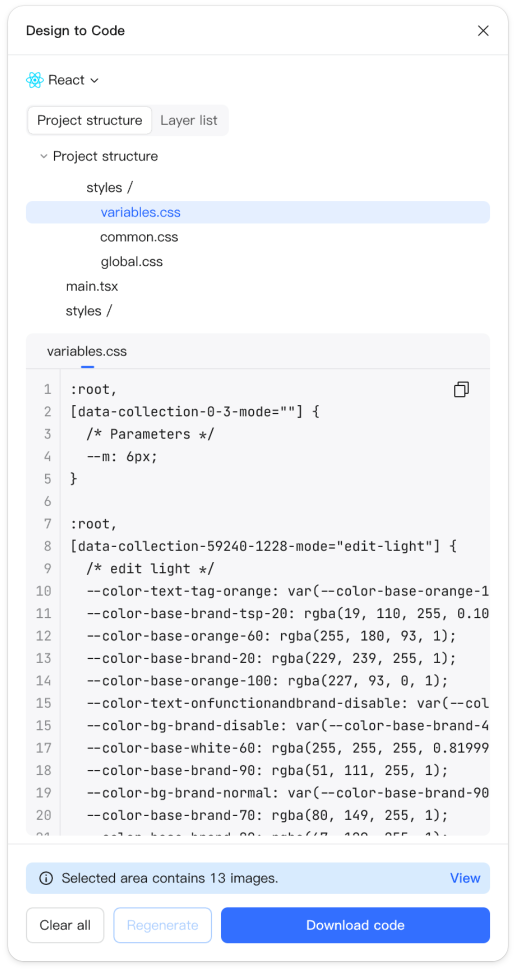
Design token extraction: Select the design tokens.css file in the project structure to view the design token code.
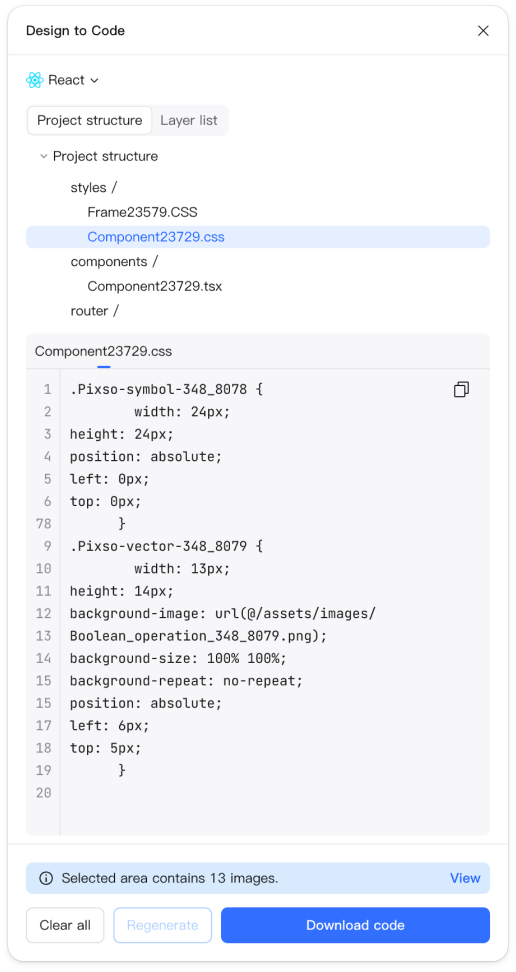
Component extraction: Select the component.css file in the project structure to view the component/instance code.
IV. Select design layers
Before generating code, we need to select the target design layers first.
Method 1: Click "Select frame" and check the layers in the list.
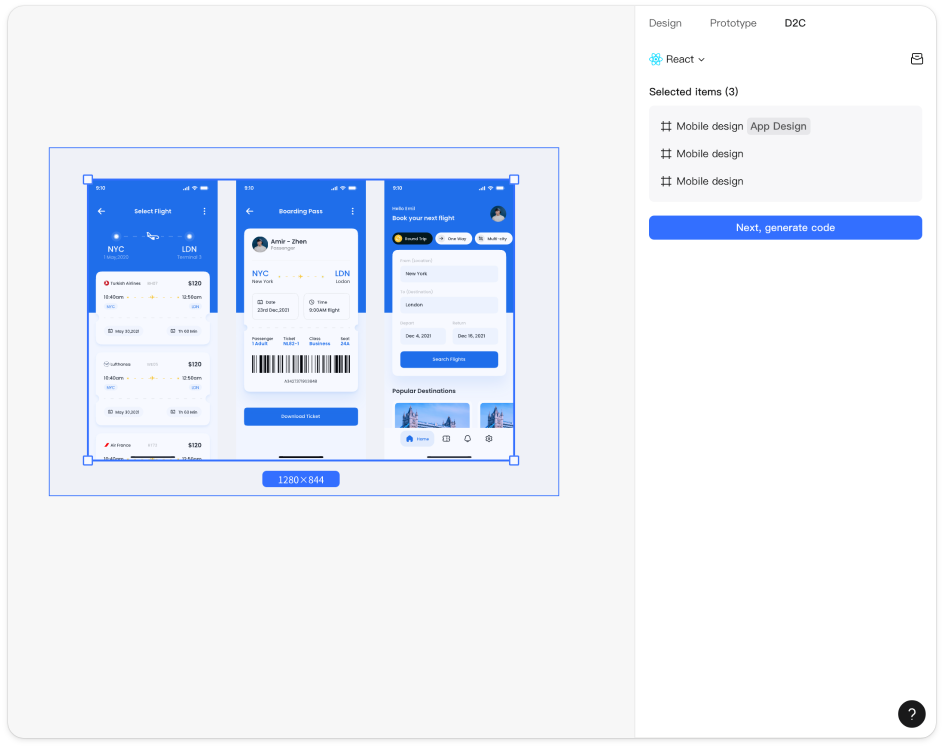
Method 2: Marquee select (drag to select) the target layers on the initial D2C interface.
- Click "Select frame".
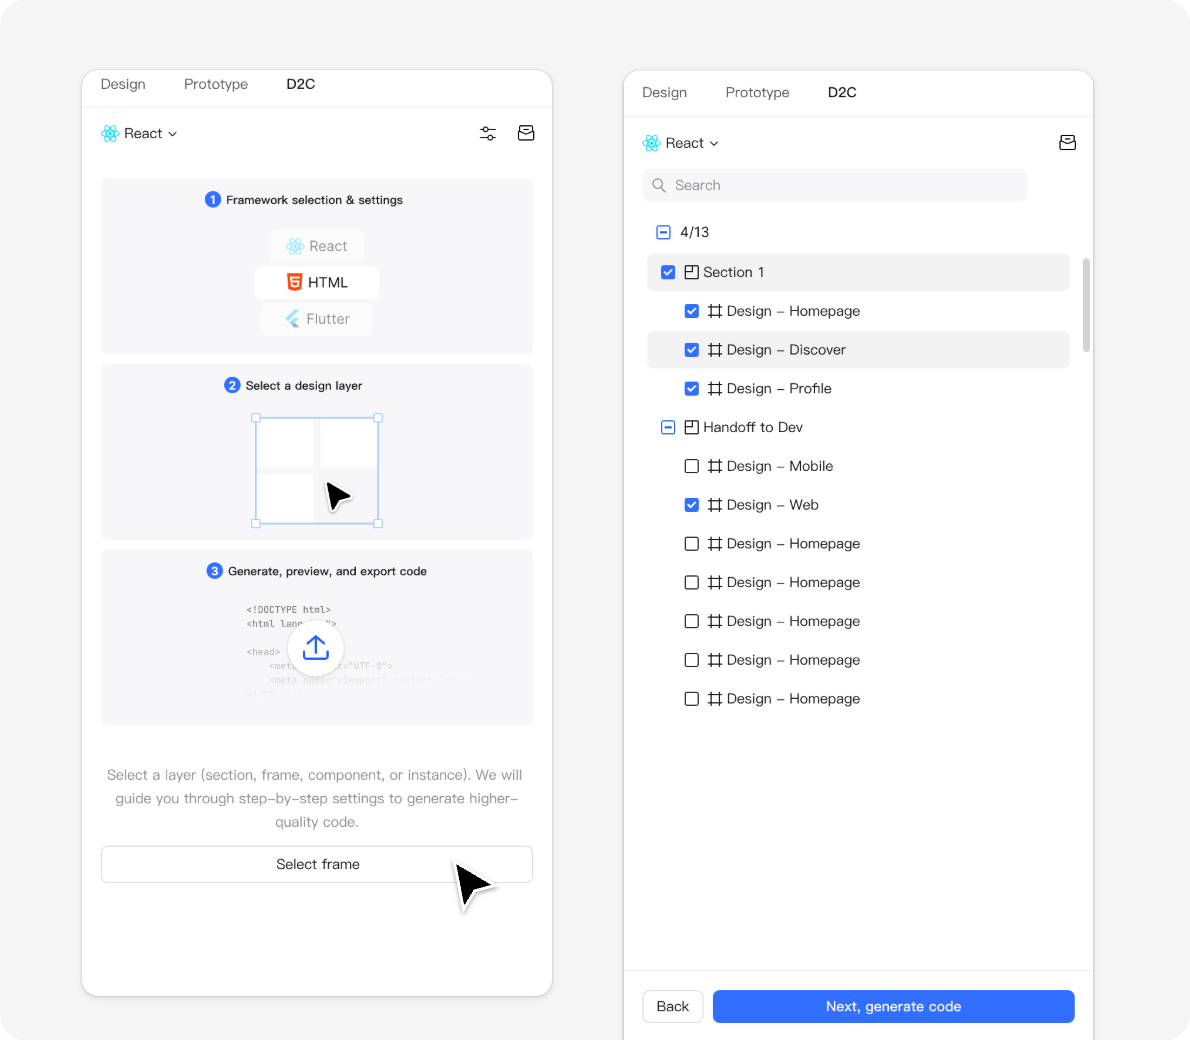
Marquee select the target layers on the initial D2C interface.
V. View & Export generated code
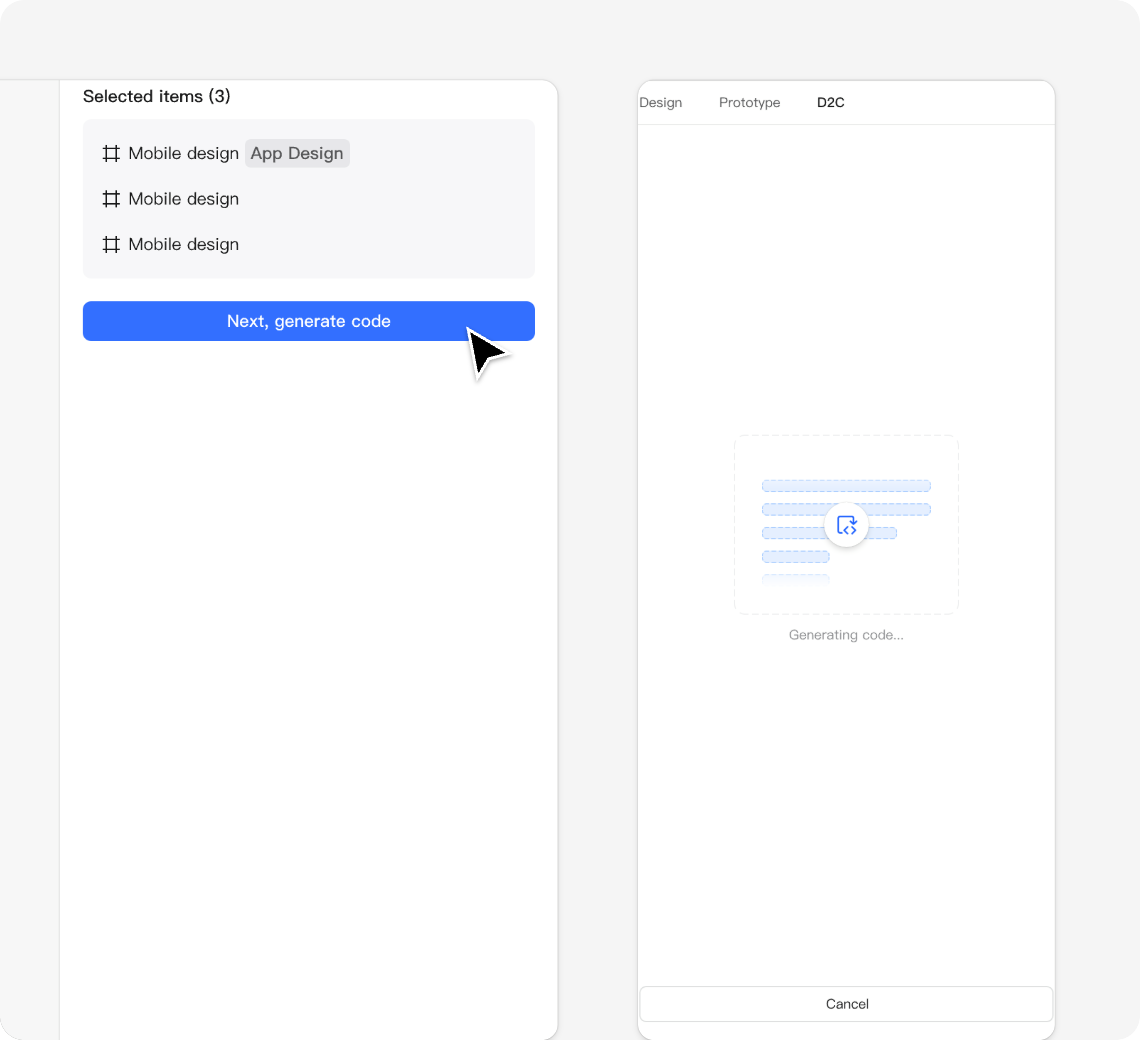
Once the design is confirmed, click "Next, generate code" to complete code generation.
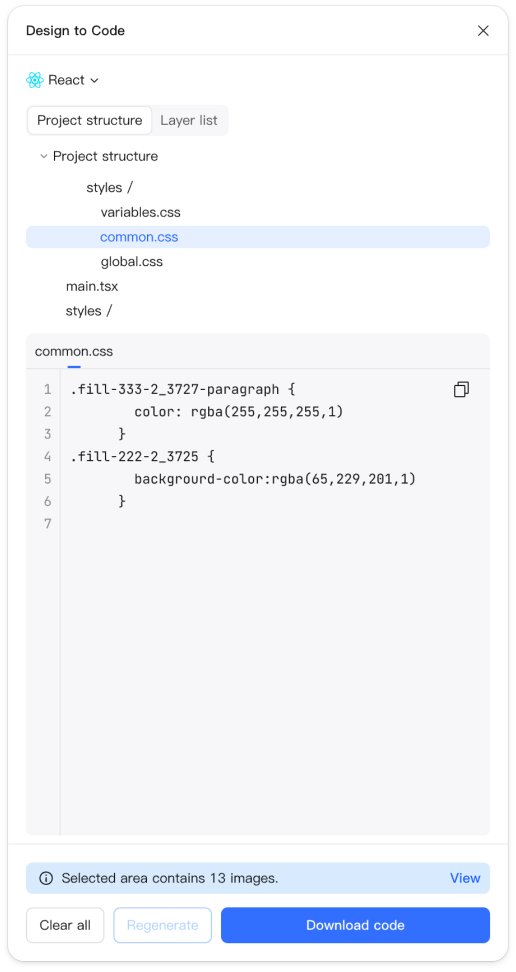
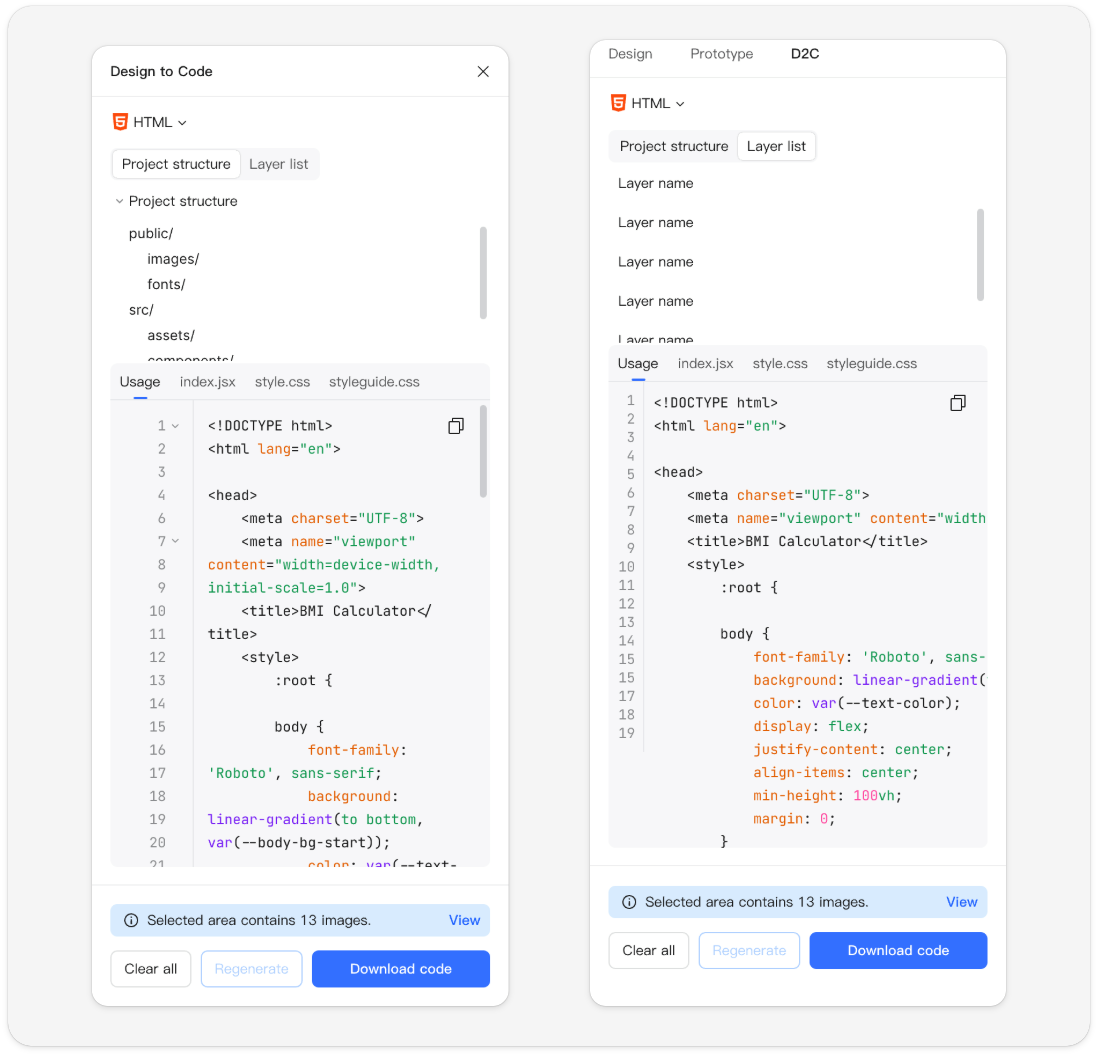
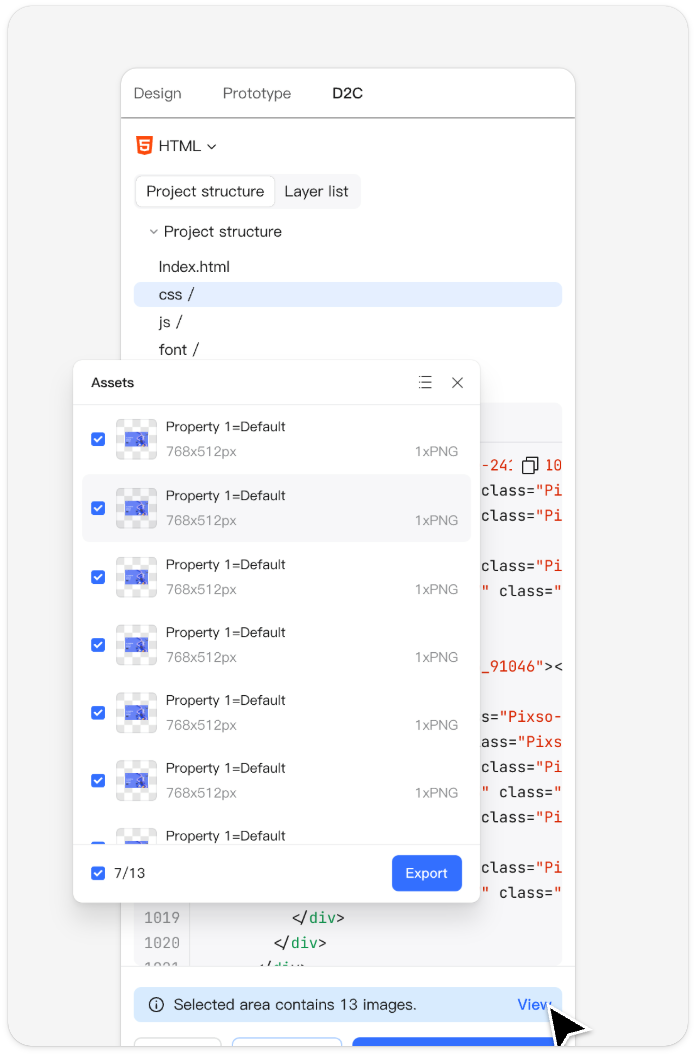
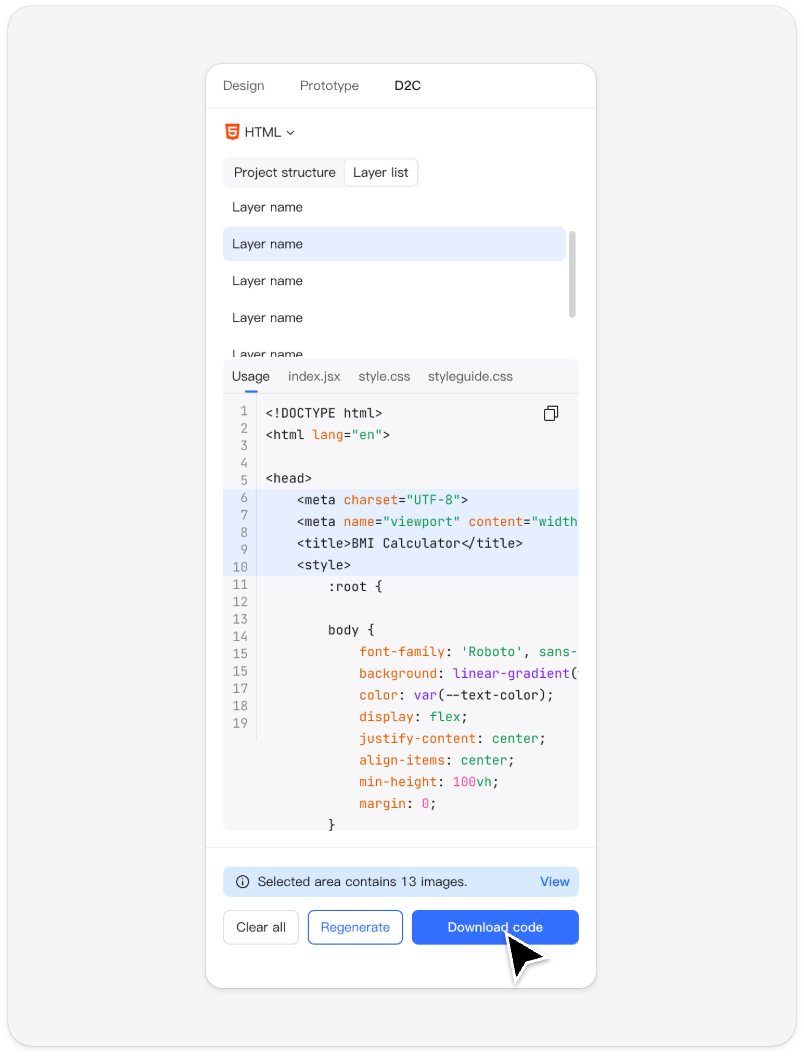
After generation, you can view the corresponding code content in the "Project structure" and "Layer list", and browse image assets of all converted layers via "View".
If you need to adjust the code framework or modify settings, you can click "Regenerate" to generate the code again.
Click "Next, generate code".
View code. You can view the corresponding code content in the "Project structure" and "Layer list", and browse image assets of all converted layers via "View".
Note: when converting multiple layers into code under the single-page HTML setting, the code for all layers will be merged into the same HTML file. In this case, switching between them via the layer list will locate and highlight the corresponding code block within that file.
Click to view image assets.
Regenerate code. To adjust the code framework or modify settings, you can click "Regenerate" to generate the code again.

Export code. All set! Click [Download Code Package] to export the complete code project package.
Conclusion
D2C is no longer just a productivity booster, it’s becoming a core part of modern front-end workflows. By bridging the gap between design systems and development, it enables faster delivery, lower costs, and truly consistent UI implementation.