Scott
The design paradigm is shifting completely. In the past, a designer's competency was measured by their proficiency with professional software. Now, we are entering the era of "Vibe Design", where the core skill is how well you can convey your imagination through natural language. Released recently as a research preview, this innovative tool sent shockwaves through the market, even impacting the stock prices of existing design software upon announcement, and is opening up new visual possibilities for both experts and non-designers alike.
How can you optimize this AI interface for your daily work, a tool that goes beyond generating simple mockups to automatically learning your team's brand identity and building interactive prototypes? For those looking to dramatically speed up their workflow by instantly converting ideas into high-quality deliverables, this guide will detail the core steps of using Claude Design alongside practical workflows to overcome its current limitations.
Part 1. When and why did Claude Design emerge?
On April 17, 2026, the AI research company Anthropic released 'Claude Design' as a Research Preview. It wasn't just a simple feature update. On the day of the announcement, Figma's stock plummeted by approximately 7%, showing that the industry immediately recognized this tool as a direct competitor in the design software ecosystem.
The dawn of the "Vibe Design" era
In the development field, Claude Code had already popularized the concept of "Vibe Coding," fundamentally changing how code is written. Claude Design extends this exact movement into the design realm. The market is buzzing with the expectation that "Vibe Design", generating design mockups, interactive prototypes, slide decks, and one-pagers purely through natural language prompts, could soon become the industry standard.
3 reasons why Claude Design is gaining traction
- Dedicated AI design mode: While the original Claude focused on text and code, Claude Design is a standalone mode specialized strictly in visual outputs.
- Instantly usable by non-designers: Planners, marketers, and PMs can get expert-level design drafts from just a simple sentence.
- Automated brand consistency: By uploading a codebase or design file, it automatically applies your team's colors, typography, and components, eliminating the need to manually match styles every time.
📌 Current Supported Plans: Pro/Max/Team/Enterprise (Enterprise requires admin activation). Check weekly usage limits per plan before integrating it into your daily workflow.
Part 2. How to use Claude Design
① Access the site
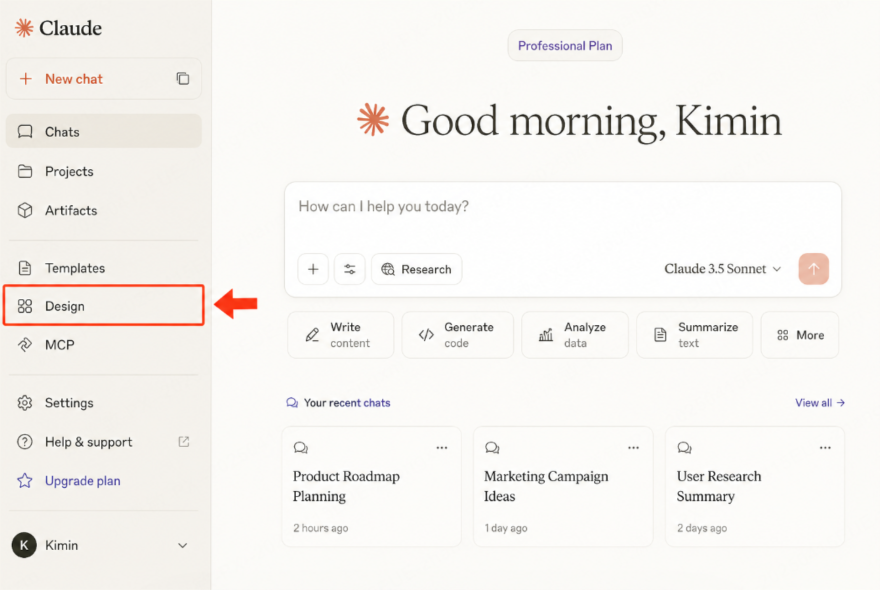
There are two ways to access Claude Design:
- Click the 'Design' button on the left navigation bar of the Claude web interface.
- Type https://claude.ai/design directly into your browser's address bar.
(Note: As it is currently in the Research Preview phase, it cannot be accessed via the Desktop App and must be used through a web browser.)
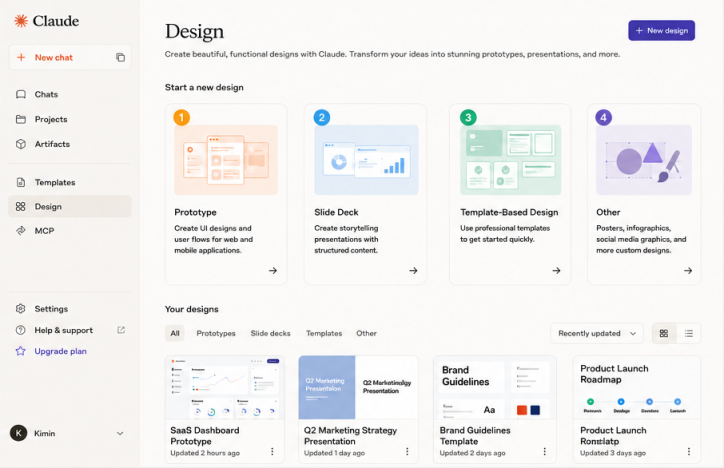
② Explore the dashboard
Upon accessing, you'll see the Claude Design dashboard. You can resume previous projects, explore the sample gallery, or choose from four types of work:
- Prototype: Visualize app/web user flows in Wireframe or High-Fidelity.
- Slide Deck: Generate presentation materials conversationally.
- From Template: Adjust content and styles from a pre-built structure.
- Other: Free-form generation like one-pagers, infographics, and marketing assets.
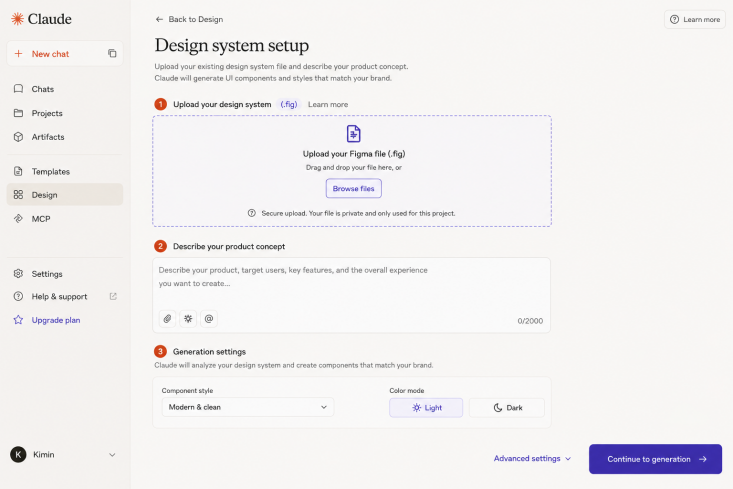
③ Set up a design system (optional, highly recommended)
One of the core strengths of Claude Design is its ability to automatically learn brand assets. Click 'Design System' on the top right → 'Set up design system' on the left to configure the following:
- Input design concept text (e.g., 'Minimalist and trustworthy B2B SaaS brand').
- Upload a GitHub link or codebase files.
- Upload a .fig file (Figma file) to sync an existing design system.
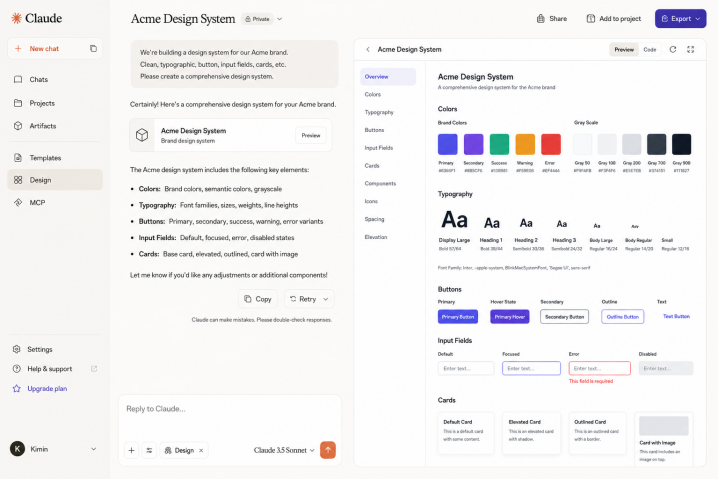
After setup, click the 'Continue to generation' button. Within about 5 minutes, a design system integrating your team's colors, typography, and UI components will be generated. This system will automatically apply to all future outputs.
④ Create a project and write prompts
Once you select a workspace type, a chat window opens. Describe the desired output using natural language. Anthropic's official documentation recommends these four elements for a highly effective prompt:
- Goal: What are you building?
- Layout: How should it be arranged?
- Content: What information will be displayed?
- Audience: Who is the end-user?
Prompt Example: "Create a monthly revenue dashboard with region and product line filters. Place key metrics at the top and charts at the bottom. The users are non-developer sales team members."
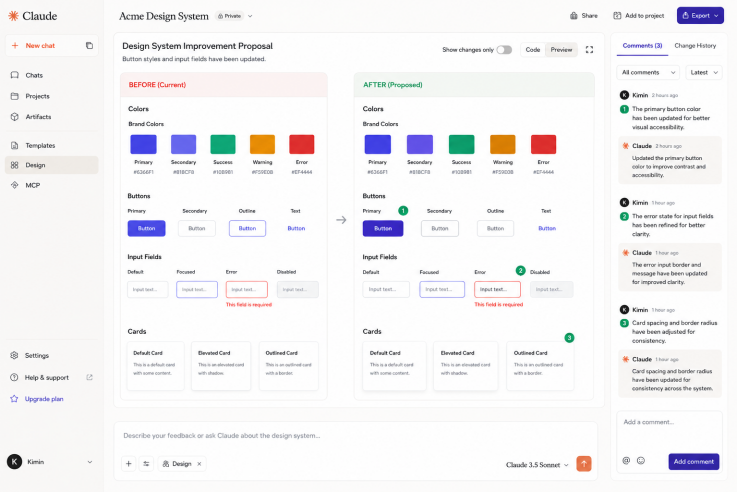
⑤ Iterate and refine outputs
The first generated result is just the starting point. Because Claude Design is conversational, iterative refinement is key. There are two ways to edit:
- Global edits via chat: Ideal for broad changes like overall layout, color scheme updates, or adding sections.
- "Change the color scheme to be darker and more minimal."
- "Add a settings panel on the right."
- "Show me 2-3 alternative layouts for this design."
- Targeted edits via inline comments: Click specific elements directly on the canvas and leave comments to target adjustments.
- "Make the padding on this button larger."
- "Change this to a dropdown instead of radio buttons."
(⚠️ Limitation: Sometimes inline comments disappear before the AI reads them. In this case, simply paste the comment directly into the chat window.)
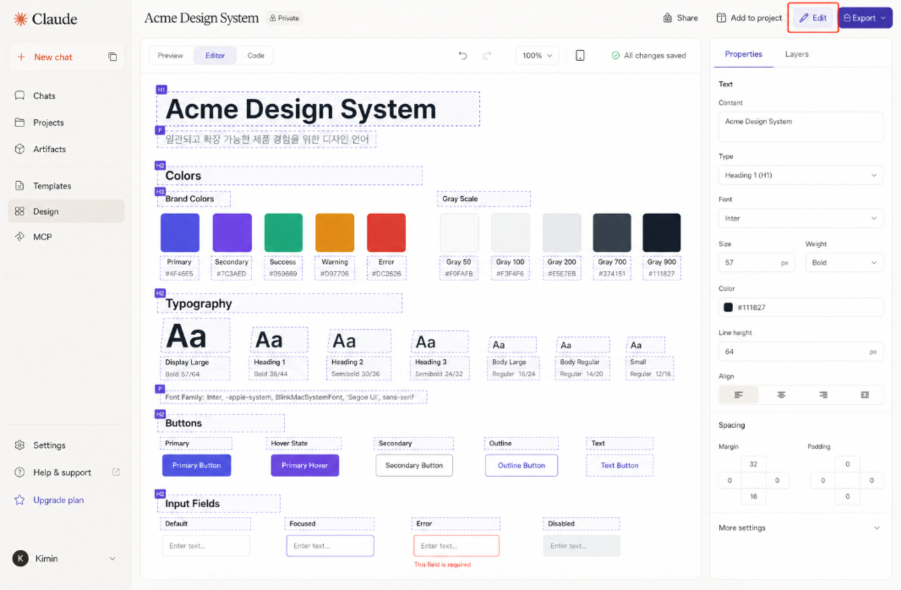
⑥ Direct text editing via the editor
To directly tweak font size, letter spacing, line height, colors, or copy in the generated design, use the Editor function:
- Step 1: Click the 'Design Files' button top center (shows a list of generated design source files).
- Step 2: Select the file to edit and click 'Open'.
- Step 3: Click 'Edit' on the top right (activates the Editor mode for text elements).
- Step 4: Modify the desired text elements and save.
⑦ Export and share
Once the design is complete, use the 'Export' button on the top right to export in various formats:
- Download as a .zip file
- Export to PDF
- Export to PPTX (PowerPoint)
- Send to Canva
- Export as standalone HTML
- Hand off to Claude Code (Local coding agent or Claude Code Web)
Sharing within an organization is simple with shareable links offering View-only, Comment, or Edit permissions.
The drawback of Claude Design — lack of direct editing
There is a major constraint you must know before using Claude Design. Unlike Figma or Pixso, "Direct Manipulation"—dragging and dropping elements on a canvas with your mouse or double-clicking to freely type text—is currently not supported.
In other words, all edits must be done via text prompts or the Editor feature (which is limited strictly to text attributes). For UI/UX designers, this requires a massive paradigm shift in workflow. For tasks requiring pixel-perfect refinement, the most realistic workflow is to generate a draft with Claude Design and then import it into a professional design tool like Pixso for final polishing.
Bonus tip: from draft generation to actual editing with Pixso
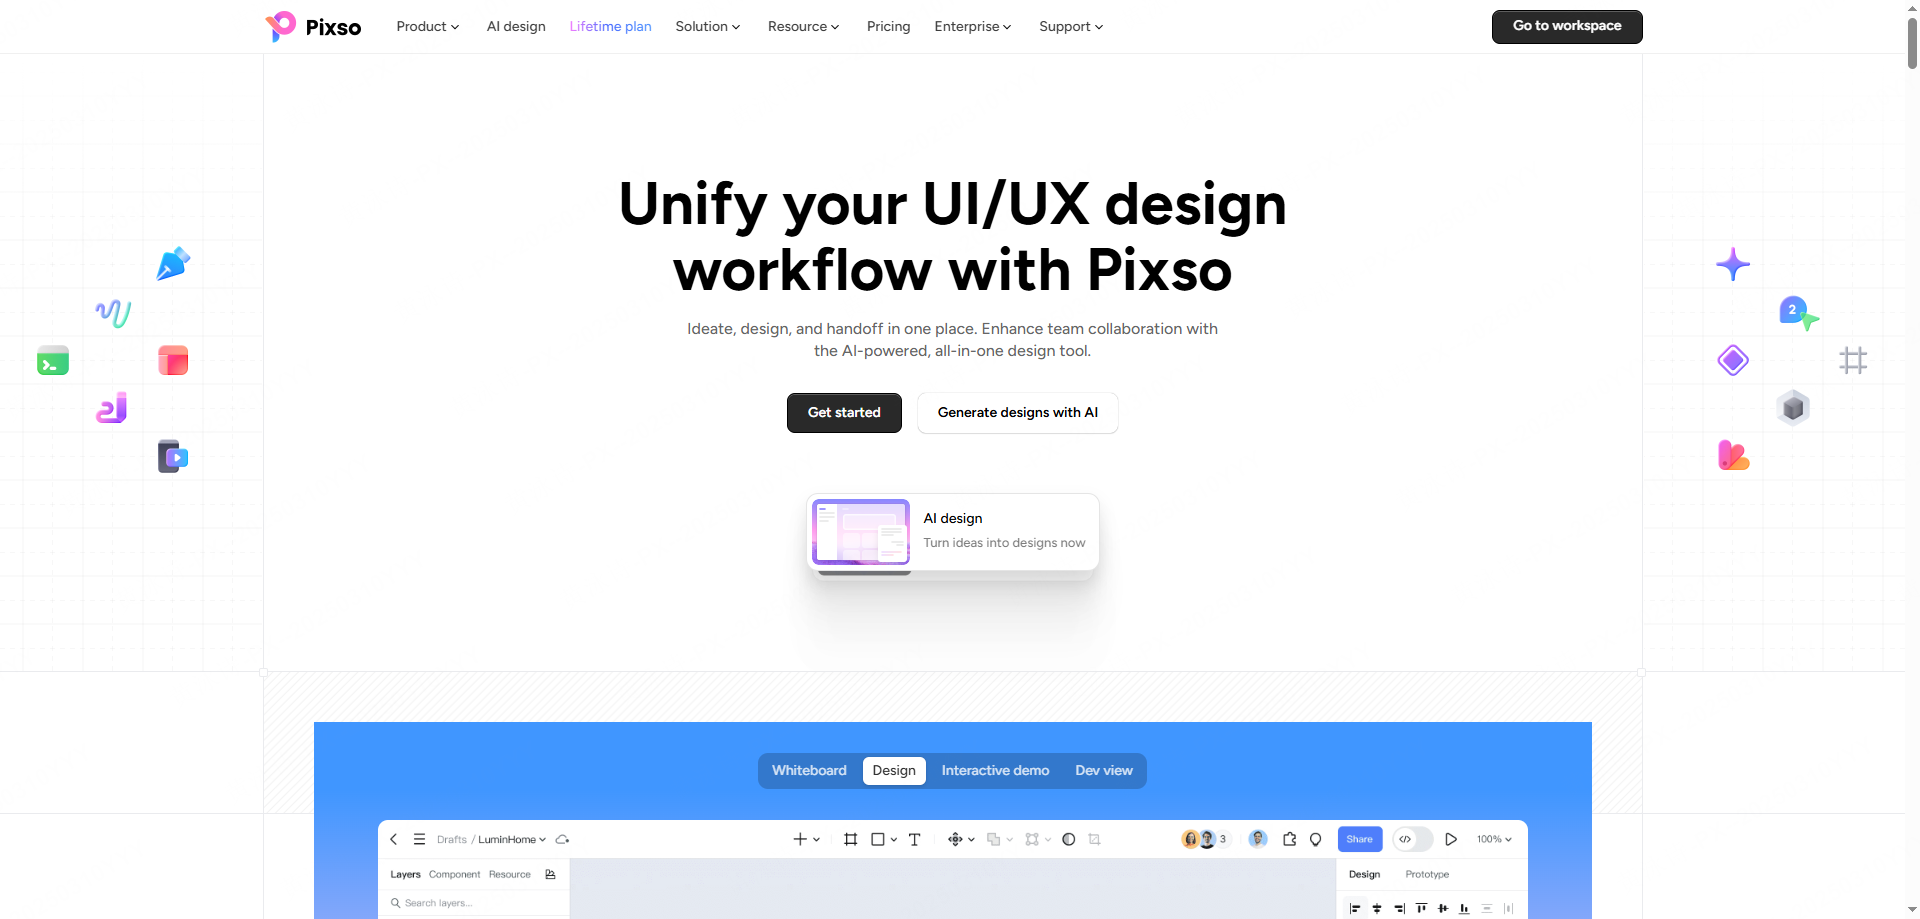
The most practical alternative to supplement the editing limitations of Claude Design is the combination of Pixso and Paico. Pixso is a robust Figma alternative natively optimized for localization. By leveraging Pixso AI features alongside Paico, you can handle everything in a one-stop process: from AI design generation and direct canvas editing to team collaboration, ensuring a seamless design to code transition.
4-Step Workflow Using Paico
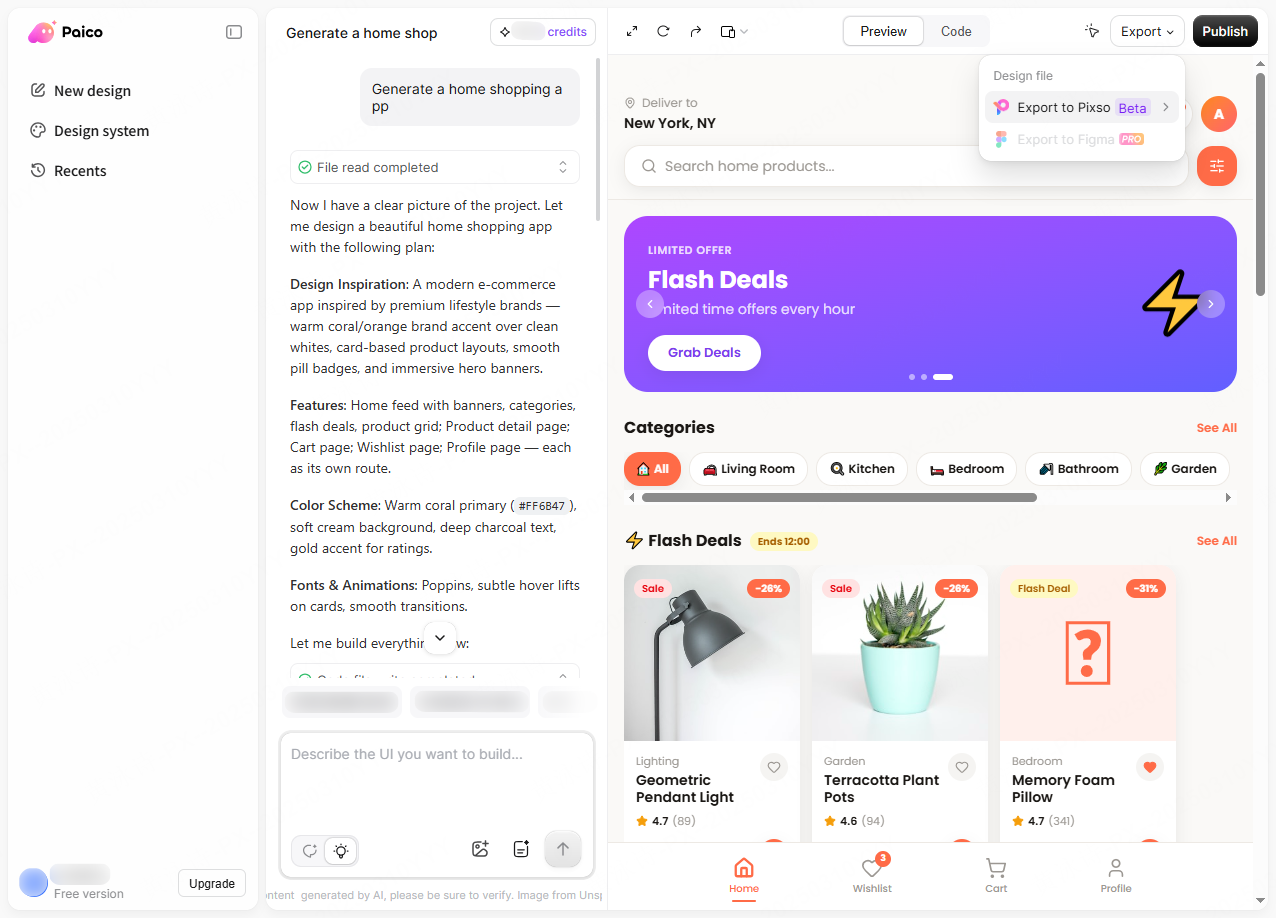
Step 1: Access and Log In to Pixso: Click the 'AI Design' menu at the top of the official Pixso website to access Paico. Once on the homepage, click 'Start Creating with AI' to log in or sign up.
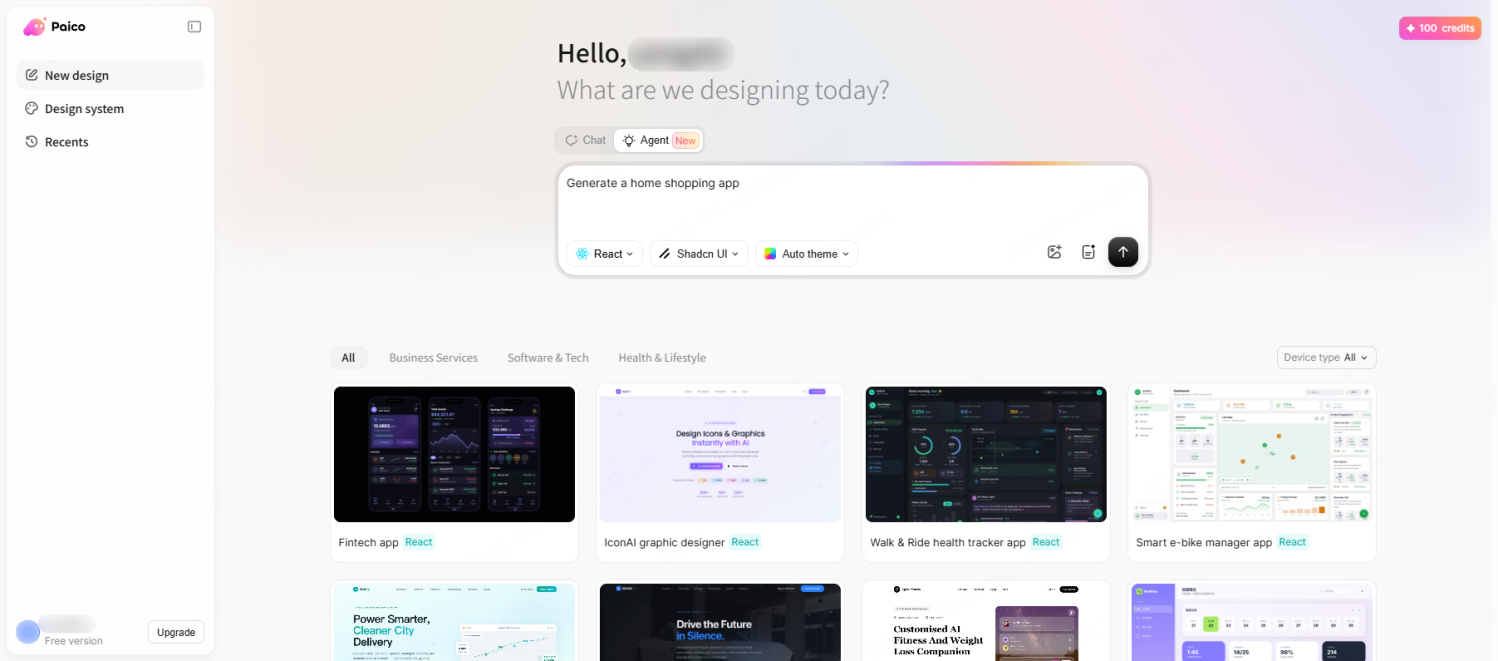
Step 2: Input Prompts and Generate Web Design: Enter a prompt describing your desired UI design. Select the base model, tech stack (HTML/React, etc.), and web page mode, and the AI will immediately start generating. Writing detailed prompts combining English and local languages yields higher-quality results.
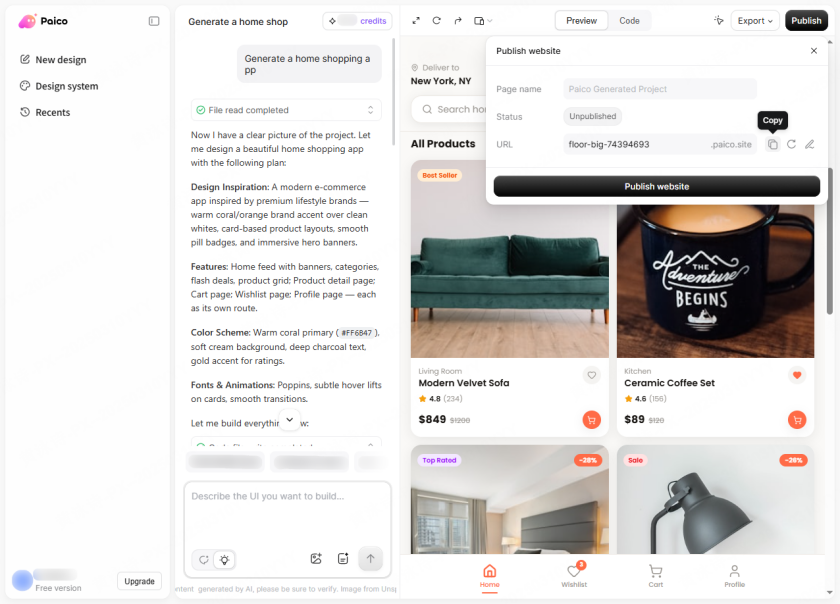
Step 3: Preview Web Outputs via URL and Download Code: Once generated, check the HTML/React code in the 'Code' tab at the top. You can preview the actual page rendering in a browser via the provided URL. If satisfied, download the code to further refine it with AI coding tools like Cursor before launching.
Step 4: Bring Directly to the Pixso Canvas for Editing: Click the 'Pixso' button on the top right, and the AI-generated web design is instantly converted into a Pixso design file (fully .fig compatible). Now, on the Pixso canvas, you can drag elements to adjust layouts or double-click to edit text—unlocking the direct editing capabilities that were missing in Claude Design.
(✅ Recommended Workflow: Solidify design direction and generate drafts with Claude Design & Paico → Direct editing & team collaboration on the Pixso canvas → Export HTML/React code and hand off to developers.)
FAQ
Q1. Is Claude Design free to use?
No, Claude Design is currently available only on Pro, Max, Team, and Enterprise plans. Free plans are not supported. Check the weekly usage limits per plan on Anthropic's official page before full implementation. Also, note that Enterprise plans are disabled by default and require an admin to manually activate them.
Q2. Can I directly drag and drop elements to edit them like in Figma?
No, this is currently not supported. As a prompt-based AI conversational tool, direct manipulation via a mouse is not supported beyond the Editor function (limited to text attribute tweaking). For pixel-level detailing, we recommend generating a draft with Claude Design and completing it in a professional UI design tool like Pixso.
Q3. Can I hand off the designs made with Claude Design straight to the dev team?
Yes. You can export deliverables in .zip, PDF, PPTX, or standalone HTML. Specifically, the 'Hand off to Claude Code' feature sends it directly to a local agent or Claude Code Web. However, for production-ready frontend code, it's highly recommended to polish the source code using Paico or Claude Code first.
Conclusion
Today, we explored the ultimate guide to mastering Claude Design. This tool is rapidly dismantling the notion that "only design experts can design." Generating interactive prototypes with a single text prompt, iterating via chat, and exporting instantly severely drastically cuts down the time to visualize ideas. However, realistic constraints like the lack of direct editing remain. At this stage, the most efficient AI design workflow is establishing the foundation with Claude Design and finalizing the pixel-perfect details on the Pixso canvas.