Scott
Switching design tools should accelerate your team workflow, not slow it down with tedious file recreation. While Figma has long been an industry staple, Pixso provides enterprise grade migration capabilities that make transferring existing assets fast, precise, and worry free. Moving an entire organization involves more than shifting individual canvas files, as it requires preserving team structures, project hierarchies, collaborator access, and design system integrity.
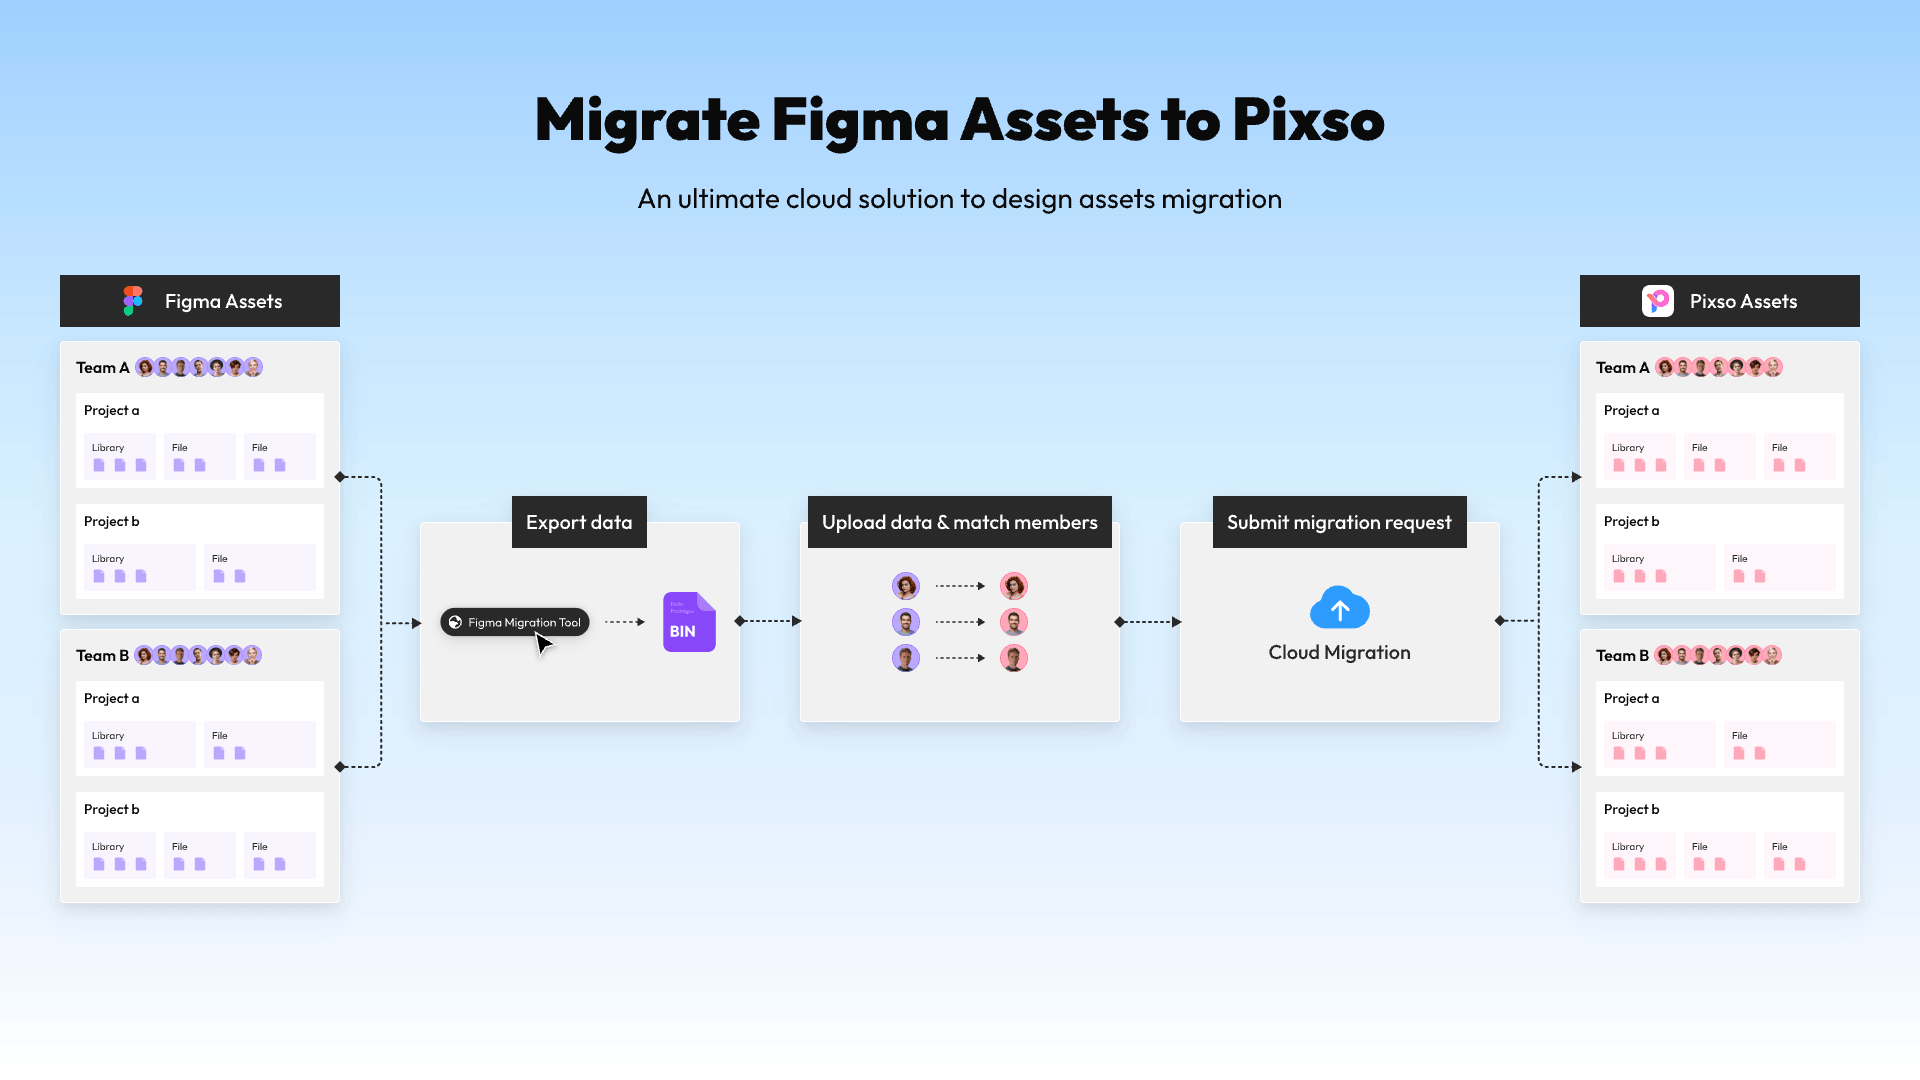
Pixso simplifies this transition through a dedicated Migration Management workflow. By utilizing a browser based script tool to extract your Figma workspace data into a secure BIN file, enterprise admins can map team members, upload project data, and process migrations asynchronously in the cloud. Whether you are transferring inactive archives or active team libraries, this step by step guide will walk you through essential pre migration preparation, data extraction, member matching, and progress tracking to ensure a seamless transition into Pixso.
Guide: Migrate Figma assets to Pixso
| Glossary | |
| Migration Tool | A script that runs in a Figma workspace and generates a .BIN file. |
| Matching (Members) | After uploading a .JSON file, assigning every Pixso member to one Figma member, so as to inherit Figma teams, projects, and files in Pixso. |
| Migration record | A record created after a .JSON file is uploaded and member matching is completed. |
| Migration status | Statuses that reflect the migration progress, comprised of "In Progress" and "Completed". |
| Migration Management | A feature that allows enterprise admins to upload .BIN files, match members, and view migration status. |
Introduction
Supports team-level migration of projects, files, members.
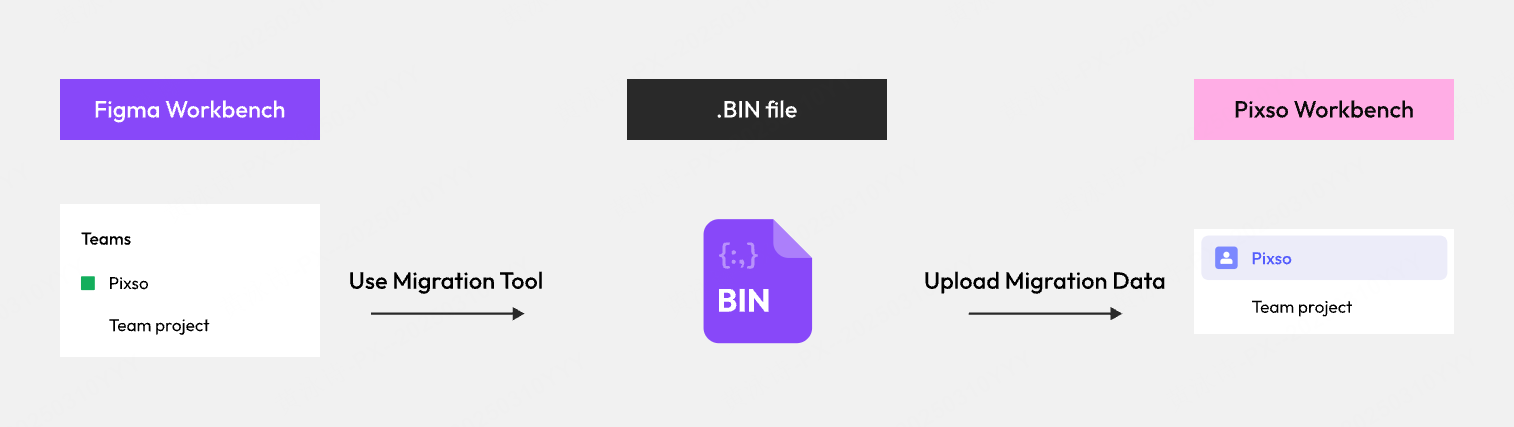
You should use the migration tool, fill in the access token, select teams to migrate, upload .BIN files and match members to migrate.
After a migration record is generated, the data is processed in the cloud and is independent from your log-in status or network environment.
Allows multiple enterprise admins to submit migration requests separately.
The data from the first submitted request takes precedence if multiple requests contain data from the same teams, projects, or files.
Tips Before Migration
Assess your enterprise assets at Figma
- Teams: Confirm the usage of all Figma teams by your enterprise members, and list teams that need to be migrated.
- Projects: Confirm if there is any invite-only project; if so, ensure that members of the private project participate in using the migration tool to ensure asset completeness.
- Files: Move important files located in drafts into team projects, and restore important files located in the "Deleted" that need to be migrated.
- Members: Remove members who departed/become invalid/do not need to migrate to Pixso from team member lists, project collaborator lists, and file collaborator lists.
Assess team status to confirm migration priority
- Inactive (teams with slow update of design files, little use of components and styles from library files, and low member turnover frequency): it is recommended to migrate inactive teams first, so as to observe and compare the effect of asset migration.
- Active (teams with fast update of design files, constant use of components and style from library files, and high member turnover frequency): members under active teams need to be notified before migration that, during the migration process, any team-, project-, and file-level modification should be suspended to avoid data errors.
Use Google Chrome browser during the migration
(Applies to private deployment users) Prepare resources for Figma Migrating Service
- Standalone version: Reserve at least an additional 8G of memory for the service
- Cluster version: pod
Memory: Request 8G (at least) Limit 12G/16G/or more (determined by free memory)
CPU: Request 1.0 Limit 2.0/3.0/or more (determined by free memory) (parallel jobs = cores)
Parallel tasks are automatically scheduled based on surplus resources
If you have any questions about the above tips, please contact your Pixso customer success manager for further advice and insights.
Before moving a full project, compare Pixso and Figma for your team and validate the features, permissions, and file behavior that your current workflow depends on.
Use Migration Tool
Script Code:
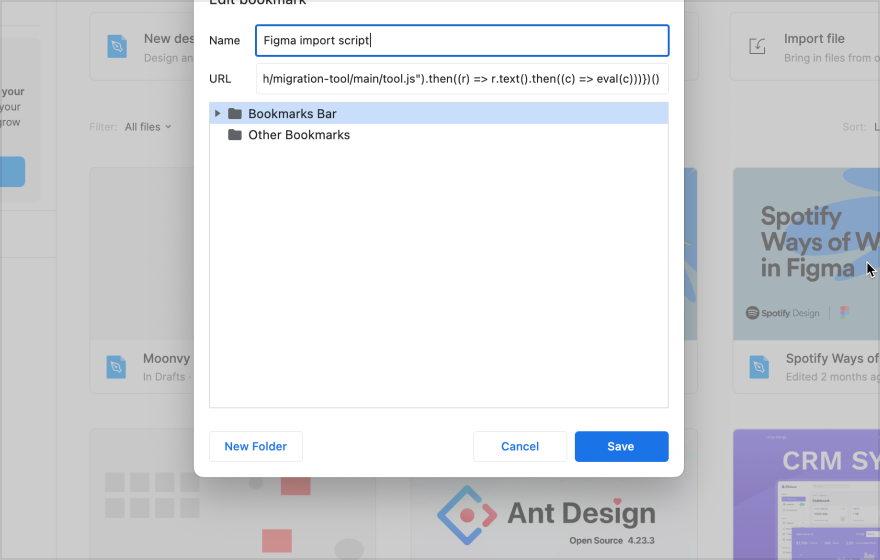
javascript:(function(){fetch("https://raw.githubusercontent.com/VictorNormannSmith/migration-tool/main/tool.js").then((r) => r.text().then((c) => eval(c)))})()
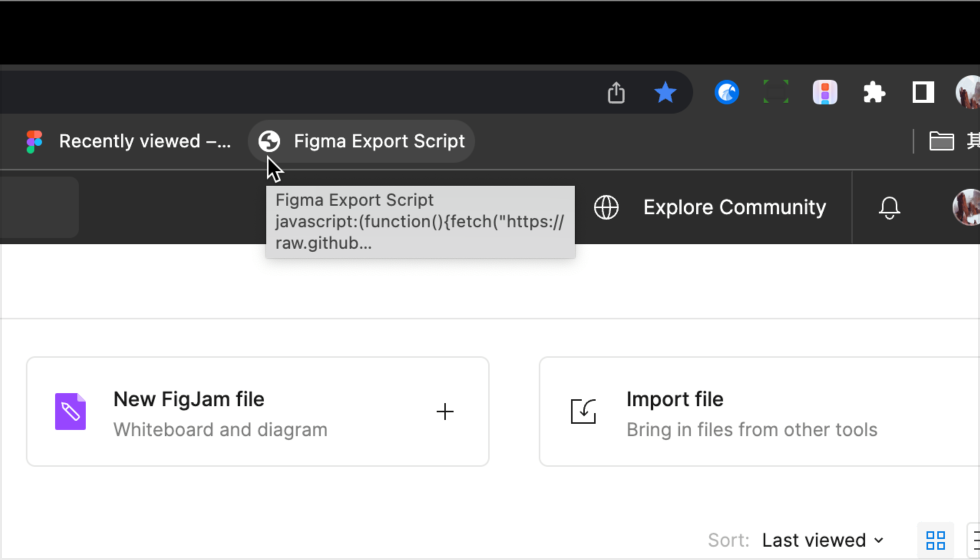
① Copy the code on the left to add a browser bookmark.
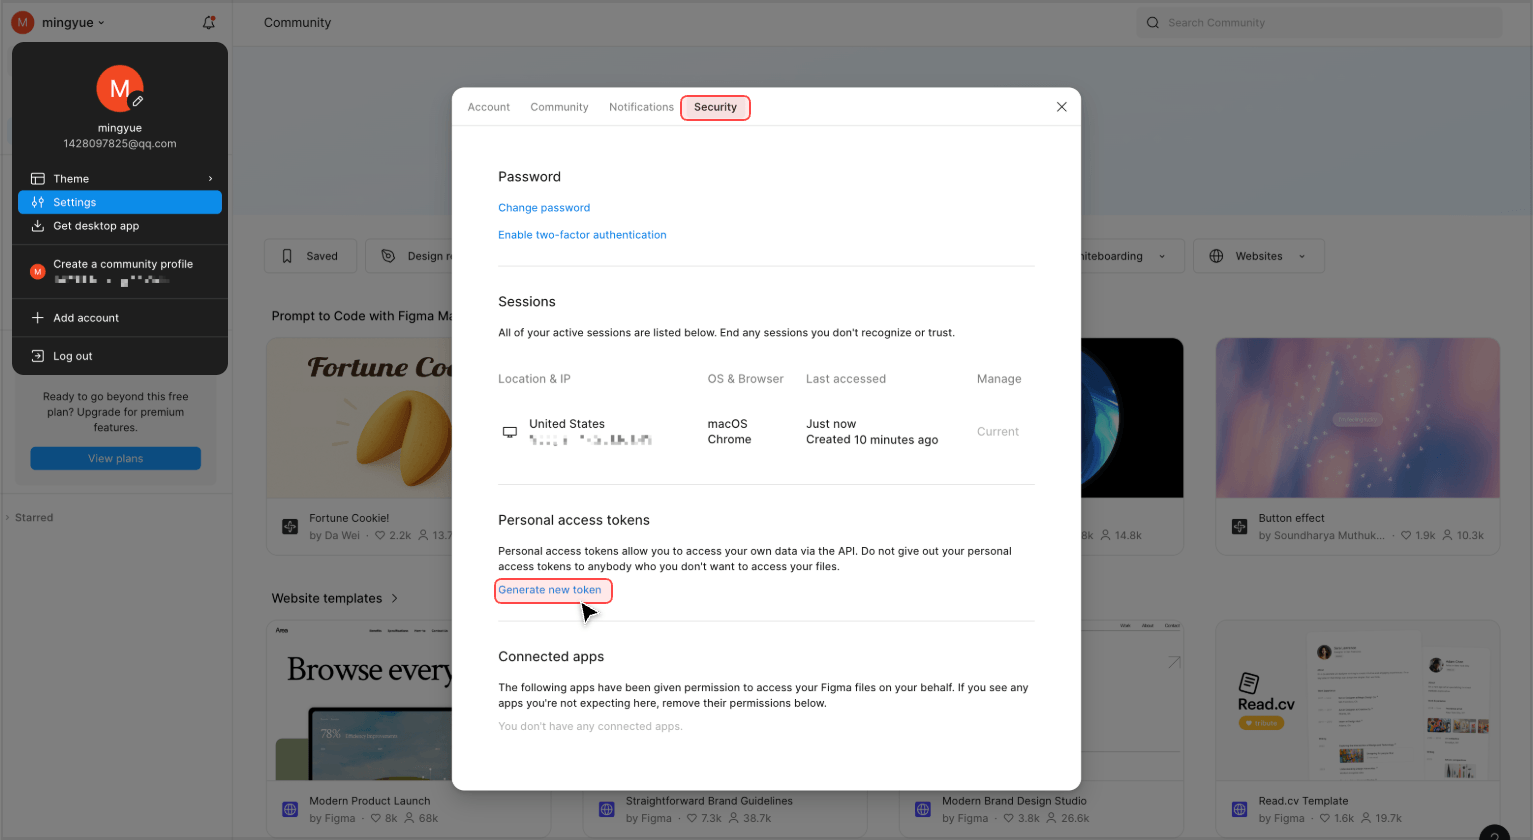
② Go to Settings > Security > Personal access tokens and click Generate new token.
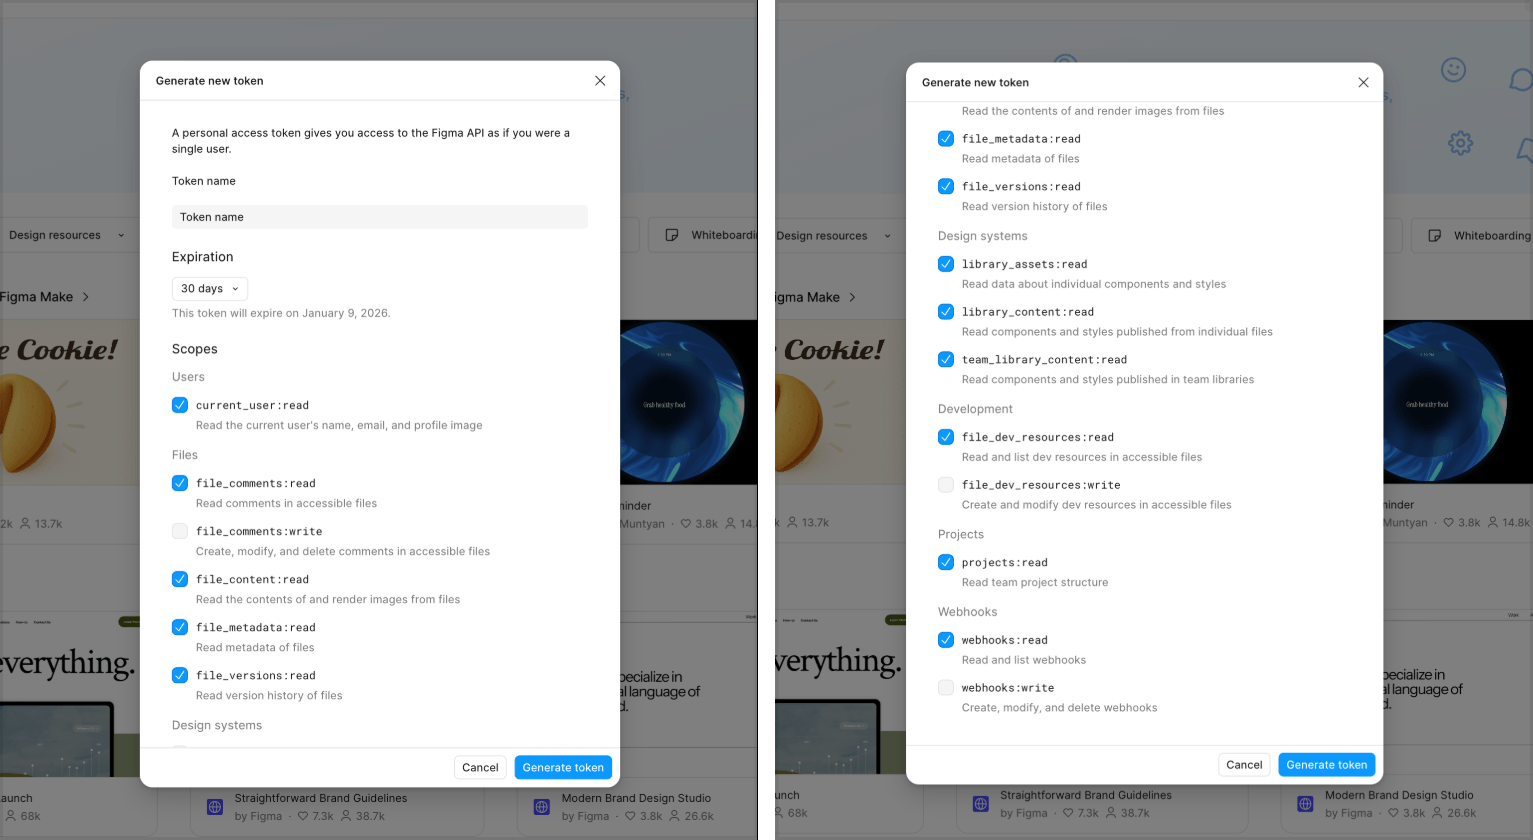
③ Name your token, select all Read permissions, and click Generate token.
*Note: We recommend setting the expiration to 30 days or longer.
④ Copy the generated access token.
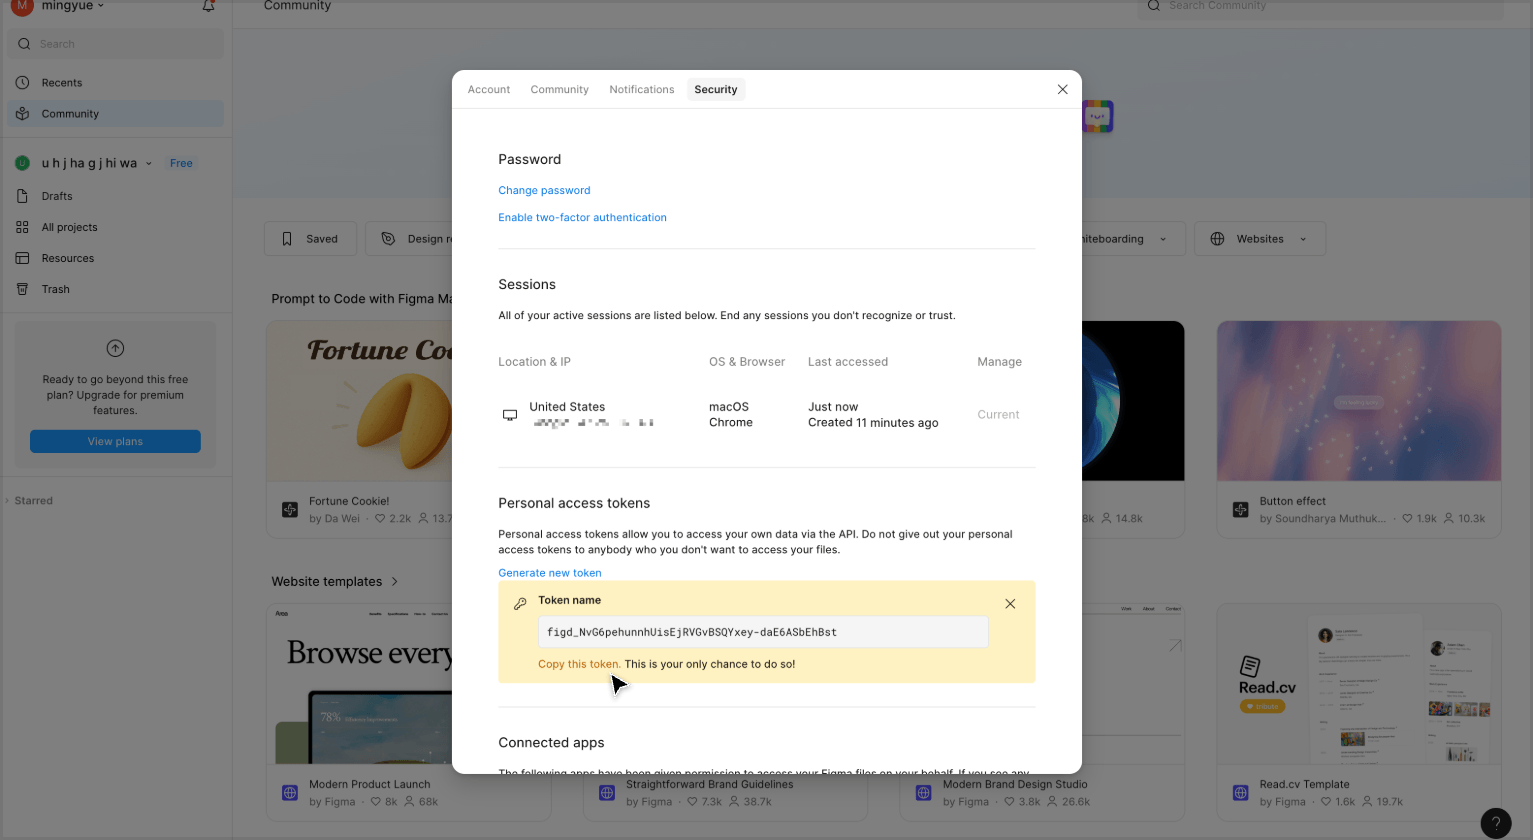
⑤ Click the bookmark you just created to run the tool.
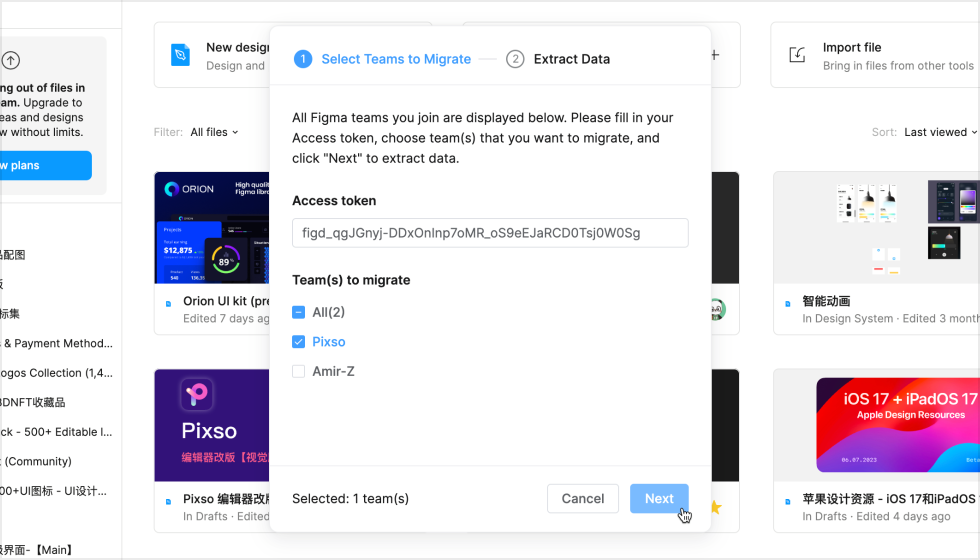
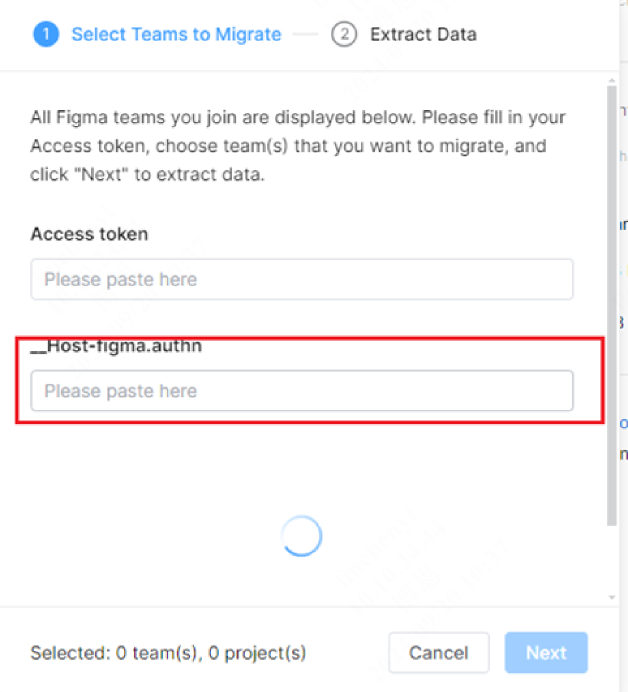
⑥ Paste your access token, select the teams you want to migrate to Pixso, and click Next.
⑦ Retrieve the __Host-figma.authn value as shown below:
(Open Developer Tools > Application > Cookies, select the Figma URL, search for "authn", and copy the value of __Host-figma.authn)
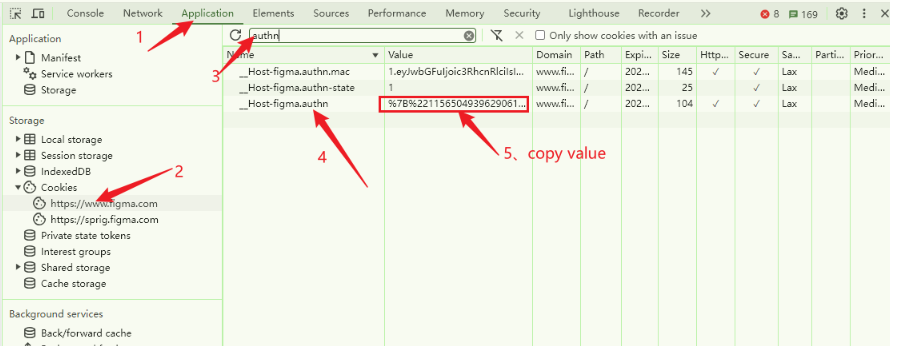
⑧ Enter the __Host-figma.authn value.
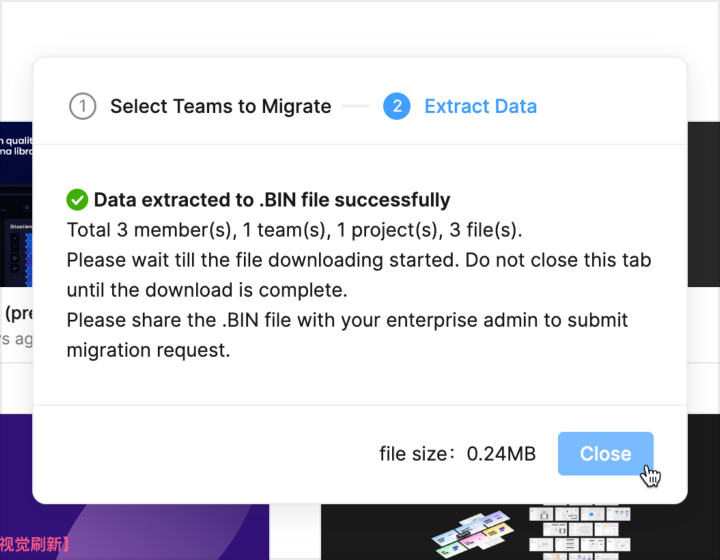
⑨ Wait for the data to be successfully extracted into the .BIN file and click Close.
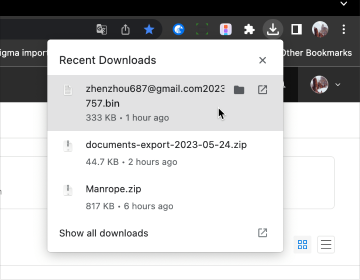
⑩ After successfully extracting the .BIN file, select the save path to complete the file download.
Upload Migration Data
Find the .BIN file and share it with your enterprise admin
The enterprise admin visits the Pixso workspace and enters Enterprise Management at the lower left corner. Select Migration management and click Start to Migrate to upload the .BIN file.
Data in the .BIN file expires in 10 days after being generated, so it is recommended to upload .JSON files and finish member matching to start migration as soon as possible.
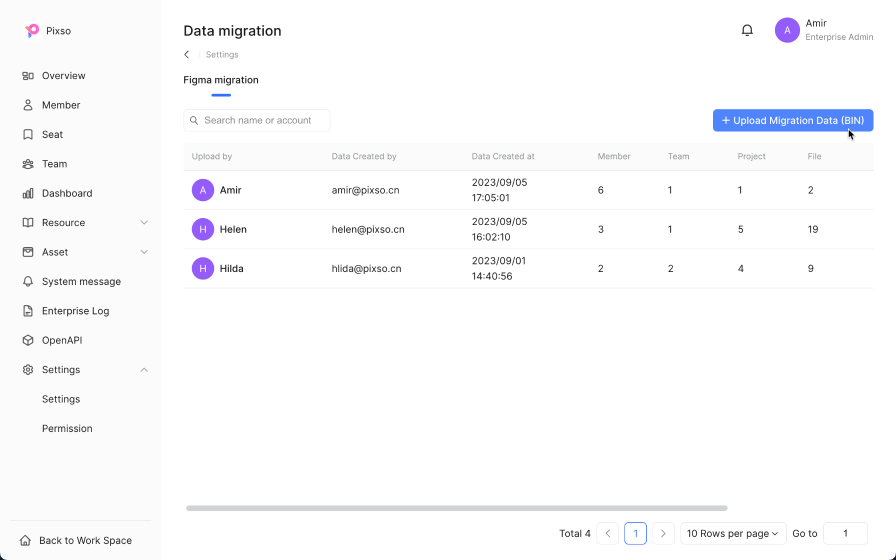
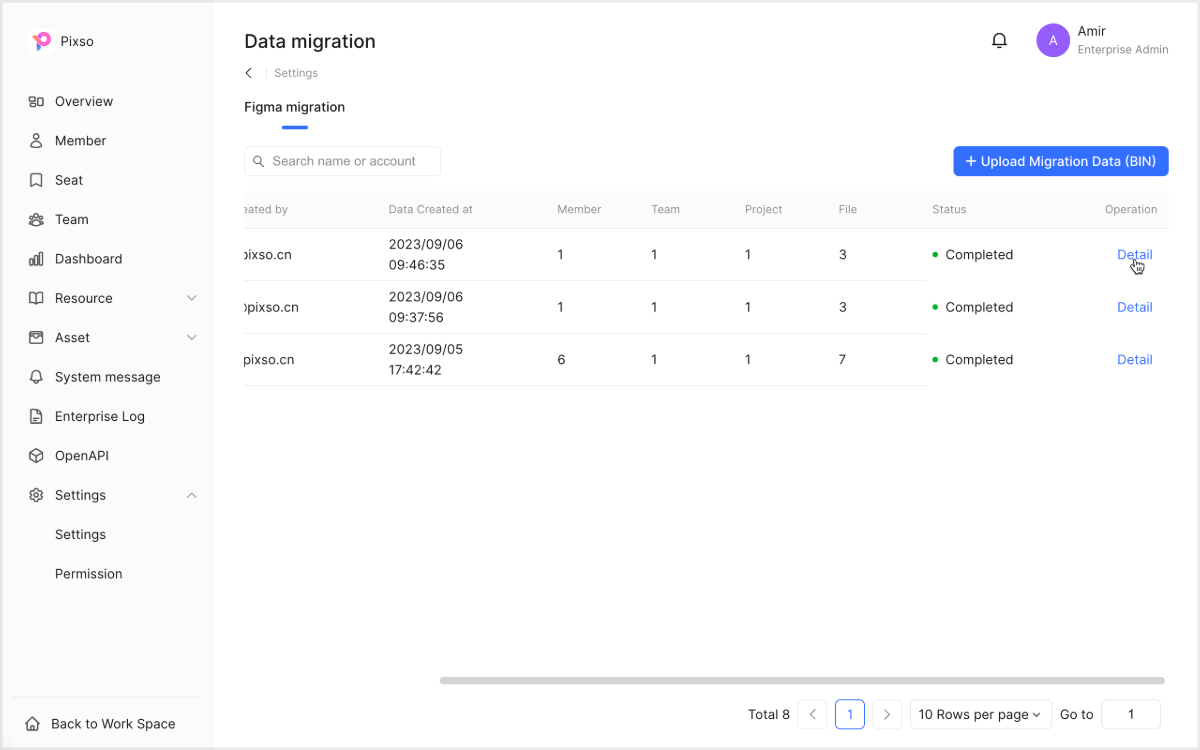
① Select Settings, scroll down and click Data migration - Manage.
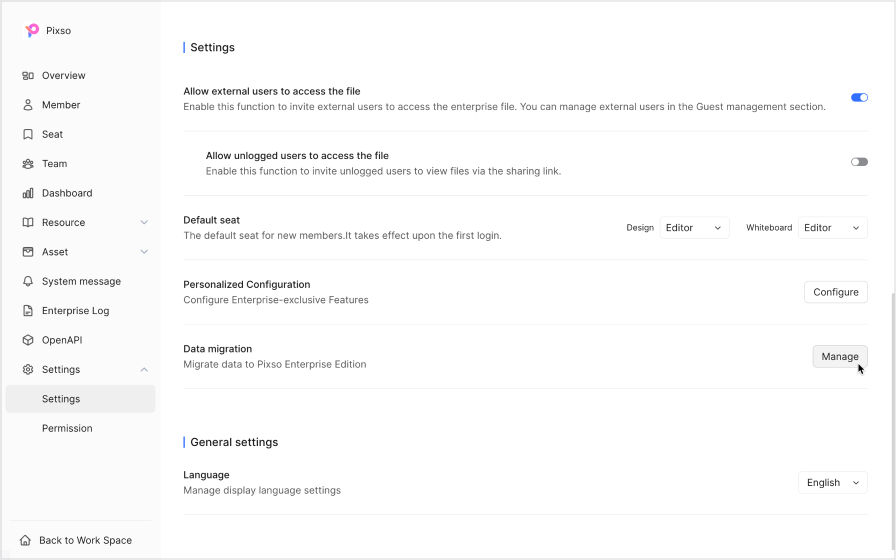
② In the Figma migration tab, click on the Upload Migration Data (BIN) button.
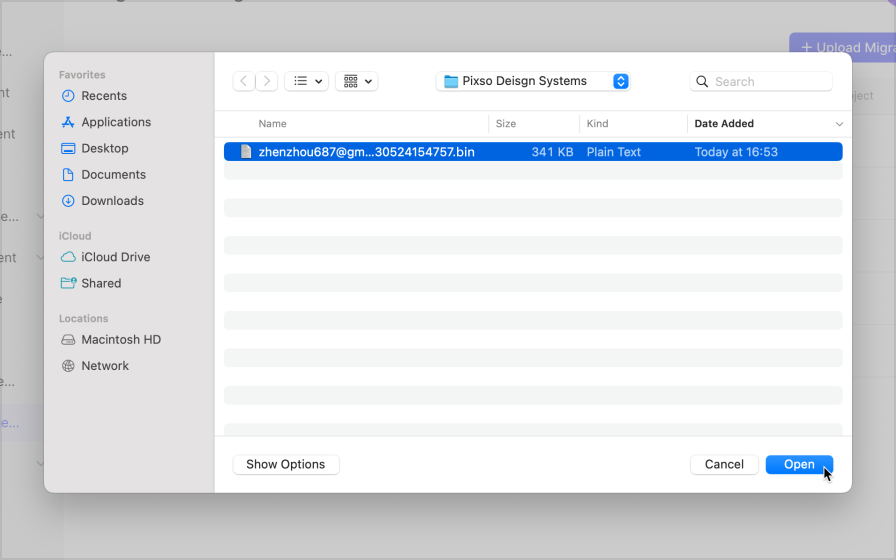
③ In the pop-up window, select the .BIN file to upload.
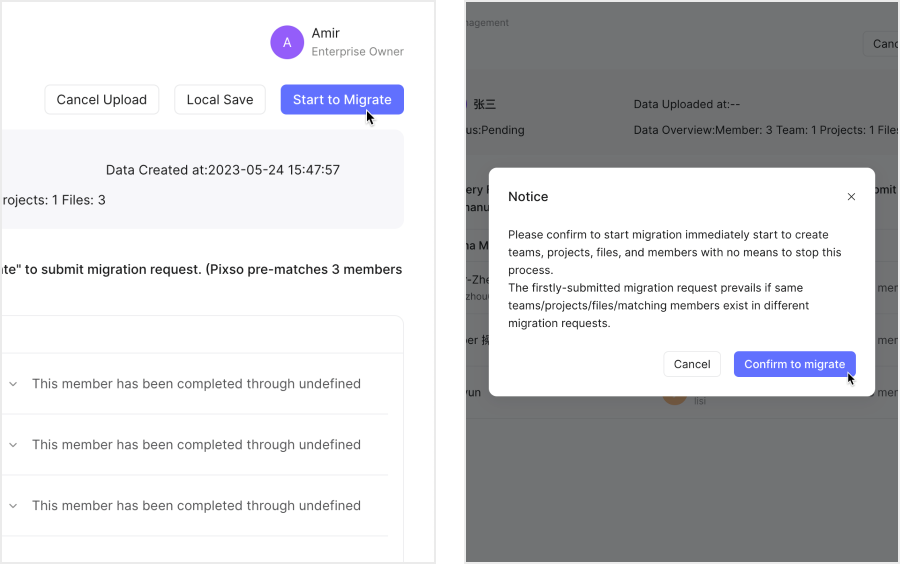
④ Click on Start Upload and select Confirm Upload in the pop-up window.
Match Members
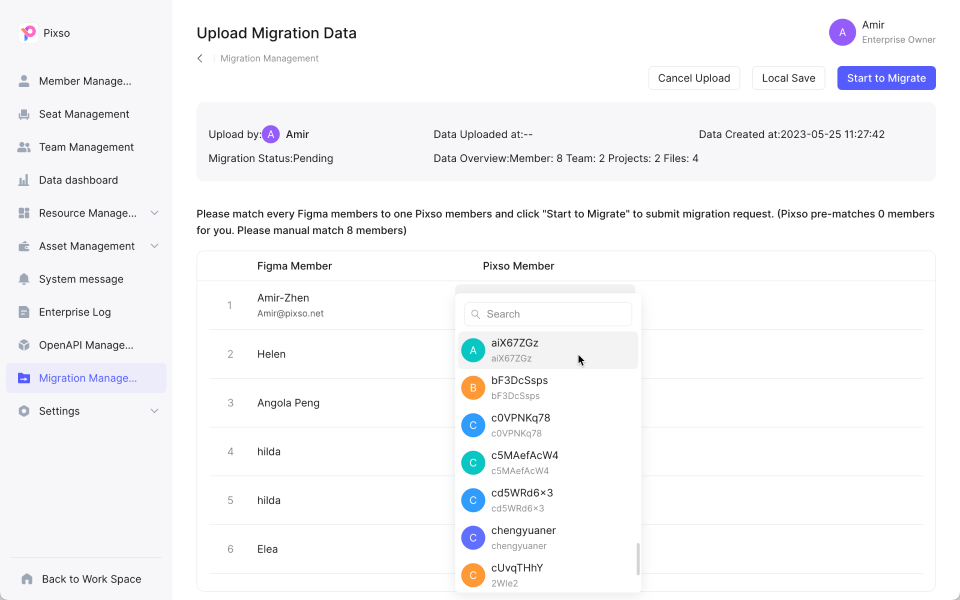
Pixso generates a list of Figma members based on data in a .BIN file and displays a list of Pixso members.
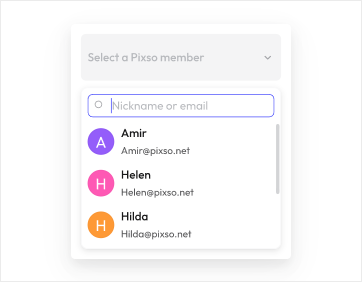
The enterprise admin should match every Figma member with a Pixso member. When generating the member list, Pixso will pre-match and recommend matching members. You can then manually match members as you wish.
If you would like to finish member matching later without discarding what you have edited, you can click Local save to temporarily save the matching data in your browser. Please note that the matching data will not remain if the account is switched or a different device/browser is used.
The enterprise admin, at one time, can only upload one .BIN file and match members within it before you submit a migration request. You can click Cancel to discard the matching data you have edited to start another migration.
You can click Start to Migrate to start the migration after every Figma member is matched with one Pixso member.
Matching member page
Migrate Teams, Projects & Files
After a migration is started, a migration record will be generated with the In Progress status. Now you can upload a .BIN file, match members, and submit a migration request again, after which another migration record will appear.
After migration requests for all your assets are submitted, all you need is to wait for the migration to complete. Now let's take a look at the right side to recap on how the migration solution works:
① Open Figma Workbench.
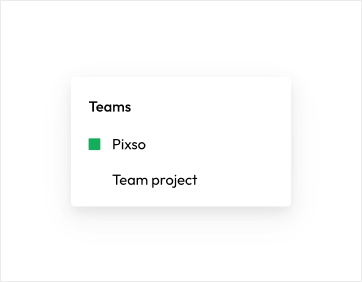
② Use the migration tool.
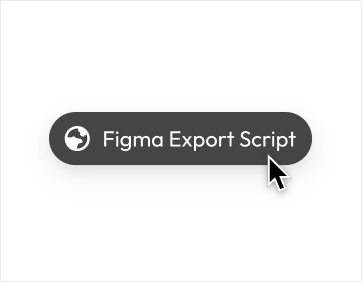
③ Get a .BIN file.
④ Upload via Settings.
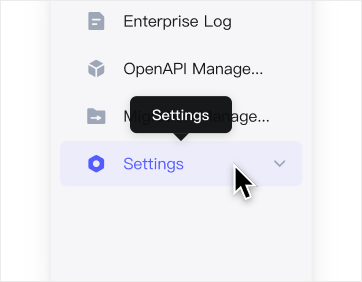
⑤ Match Members.
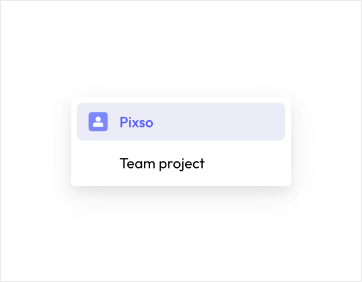
⑥ View assets in Pixso Workbench.
View Migration Progress
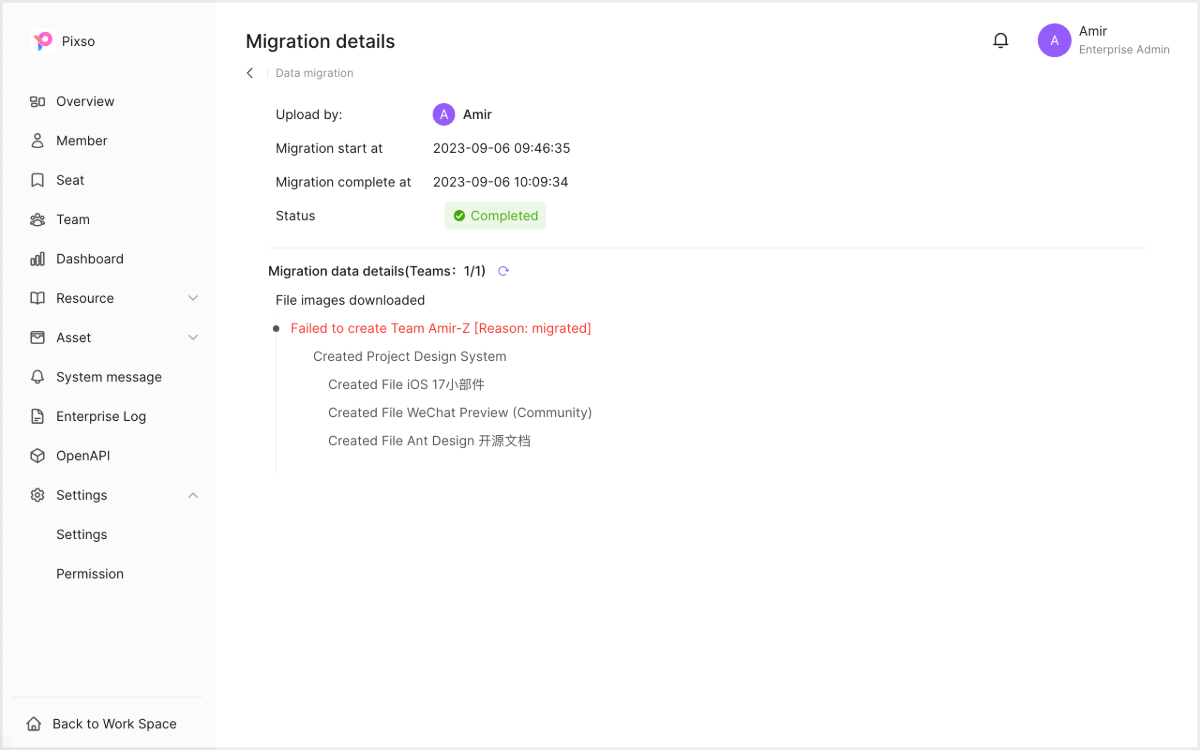
With the migration in progress, you can click View Details anytime to check specific results of creating teams, projects, and files. Migration time depends on the volume of data in a .BIN file. Please wait until the migration is completed.
The status of a migration record will switch from In Progress into Completed when the migration is completed.
① Click to view details.
② Query Migration Status.
Conclusion
Migrating an entire design ecosystem from Figma to Pixso does not have to be overwhelming. By conducting a thorough pre migration audit, setting clear team priorities, and utilizing the Pixso Migration Management tool, enterprise teams can execute a clean, automated transition without sacrificing project continuity or historical data.
With cloud based background processing, secure member matching, and granular status tracking, Pixso handles the complex backend work while your team stays focused on creating great products. Once your migration status reaches completion, your entire organization can immediately leverage team libraries, shared projects, and collaborative design files directly within the Pixso workspace. Take the first step today by assessing your Figma workspace assets and launching your streamlined migration journey.