
Scott
We have all taken or received a photo only to discover that the face is out of focus or the overall shot looks soft. Even when the framing, pose, and lighting are ideal, a lack of clarity makes it difficult to use the image for corporate headshots, e-commerce product pages, or social media graphics.
Traditionally, fixing soft photos required professional editing software like Photoshop to manually tweak contrast, sharpness, noise reduction, and skin tones slider by slider. Today, using an intuitive AI image editor allows you to restore clarity to soft areas and refine facial details in seconds.
In this guide, we will explore when photo restoration AI is most effective, key considerations when refining portraits, and a step-by-step workflow for editing images in Pixso.
Part 1. What Is AI Photo Restoration and Enhancement?
AI photo restoration uses machine learning algorithms to analyze subjects, backgrounds, lighting, and edge contrast across an image. Instead of applying a uniform clarity filter across the entire canvas, AI identifies key subject areas, such as eyes, lips, hair strands, and clothing edges, and applies localized enhancements where they matter most.
Key capabilities of modern photo enhancement AI include:
- Enhancing clarity on out-of-focus portrait photography
- Refining facial contours, eye reflections, and lip definitions
- Restoring natural textures to hair strands and fabric details
- Balancing lighting contrast and atmospheric depth
- Correcting color tones and overall visual balance
- Increasing asset clarity for low-resolution images
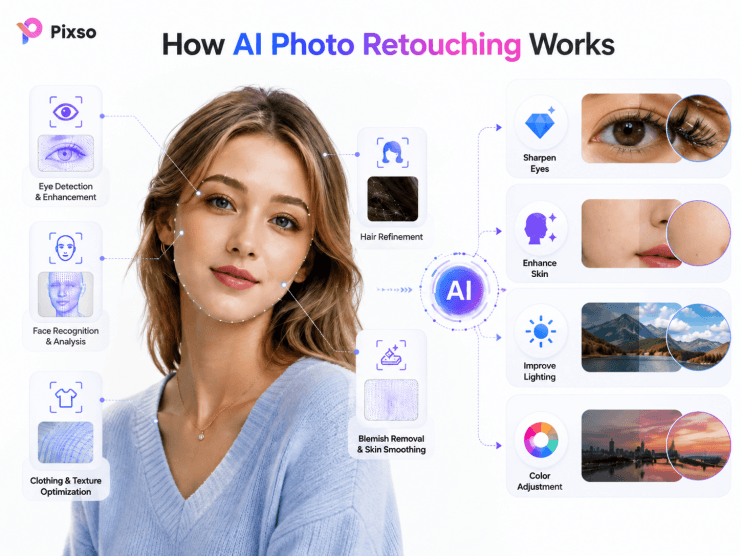
Conventional editing techniques force designers to locate problem areas and adjust technical values manually. In contrast, an AI image editor evaluates visual context automatically, filling in missing edge detail and soft features to dramatically speed up design workflows.
When working with prompt-based editing tools, you can simply describe your desired output in natural language, such as "keep facial features natural while restoring hair sharpness." This enables designers of any skill level to achieve clean results without touching complex technical sliders.
Part 2. When Should You Use AI to Enhance and Unblur Images?
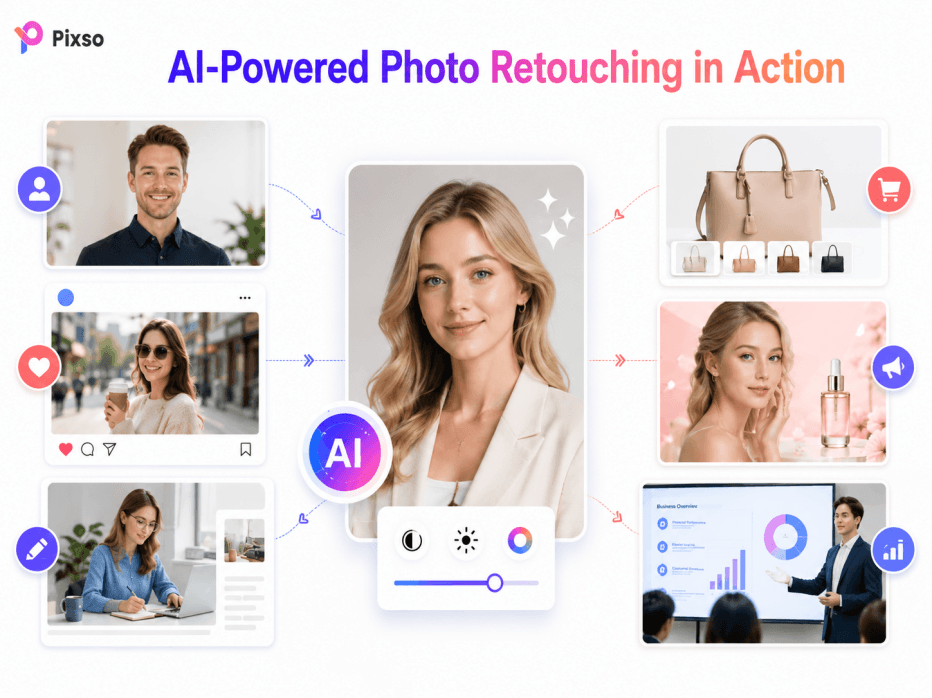
AI photo enhancement is far more than just a tool for restoring vintage photographs. It is a practical asset for digital creators, marketers, and product designers building modern visual assets.
- Corporate Headshots: Clean up soft-focus facial features and blurred hair on team pages or professional profiles.
- E-commerce Product Pages: Restore crisp detail to model portraits and product close-ups.
- Social Media Graphics: Adjust brightness, tone, and sharpness to match channel visual guidelines.
- Blog Thumbnails: Ensure primary subjects remain distinct and crisp even on smaller mobile viewports.
- Ad Banners: Highlight eye contact and main focal points cleanly to catch viewer attention.
- Pitch Decks & Presentations: Polish low-resolution reference images to match the executive quality of your slides.
However, increasing sharpness indiscriminately does not always yield natural results. Over-smoothing skin, flattening textures, or generating unnatural facial features can ruin an otherwise great image. When choosing a photo restoration workflow, the key is finding a tool that preserves authentic personal features while sharpening only the areas that need it.
Part 3. Pixso AI Before & After Case Studies
To understand how AI photo restoration performs in practice, let’s look at two common portrait scenarios where enhancement turns a soft portrait into a sharper image.
Case 1: Refining Soft Profile Photography
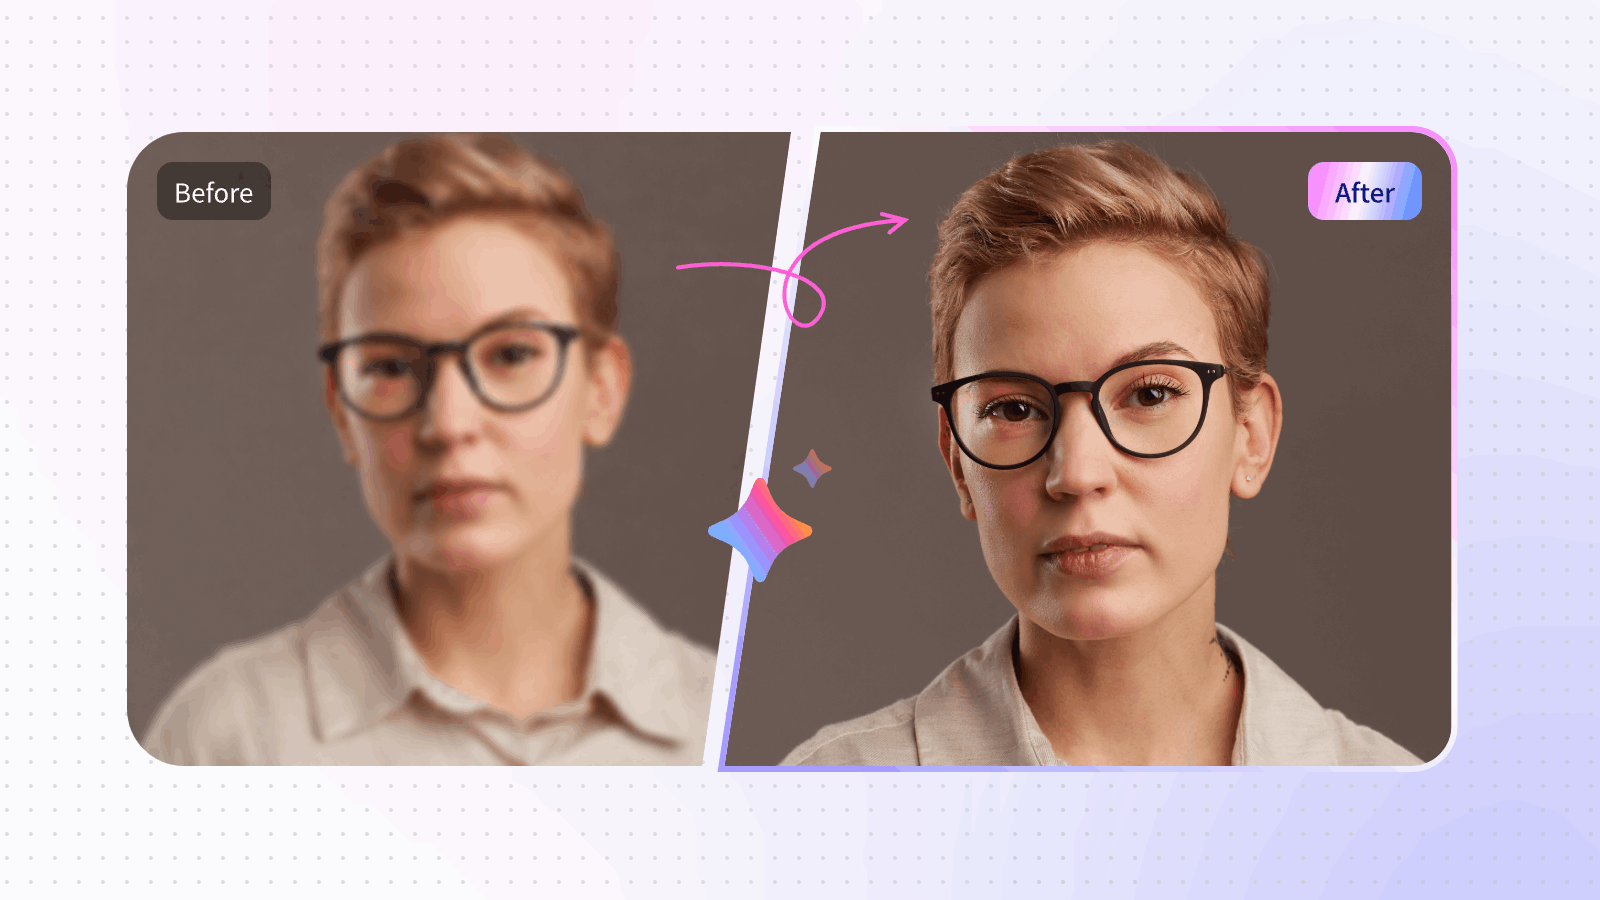
In out-of-focus headshots, the camera is often focused in front of or behind the eyes, leaving glasses frames, eyes, and lip lines blurred. Additionally, hair and apparel blend softly into the background, creating a flat, unpolished look for corporate or profile use.
Applying AI enhancement yields noticeable improvements:
- Edges around eyeglasses, eyelids, and pupil reflections become distinct.
- Hair direction and strand textures gain realistic definition.
- Facial contours and lip outlines retain clean boundaries.
- Transitions between clothing, skin, and backgrounds are sharply defined.
- Original facial expressions and unique features (such as freckles) remain completely intact.
Even in cases where extreme blur obscures eyes and nose details, AI restoration brings natural focus back to the face without erasing subtle skin textures or artificially altering facial structure.
Case 2: Correcting Focus Errors on Dynamic Portraits
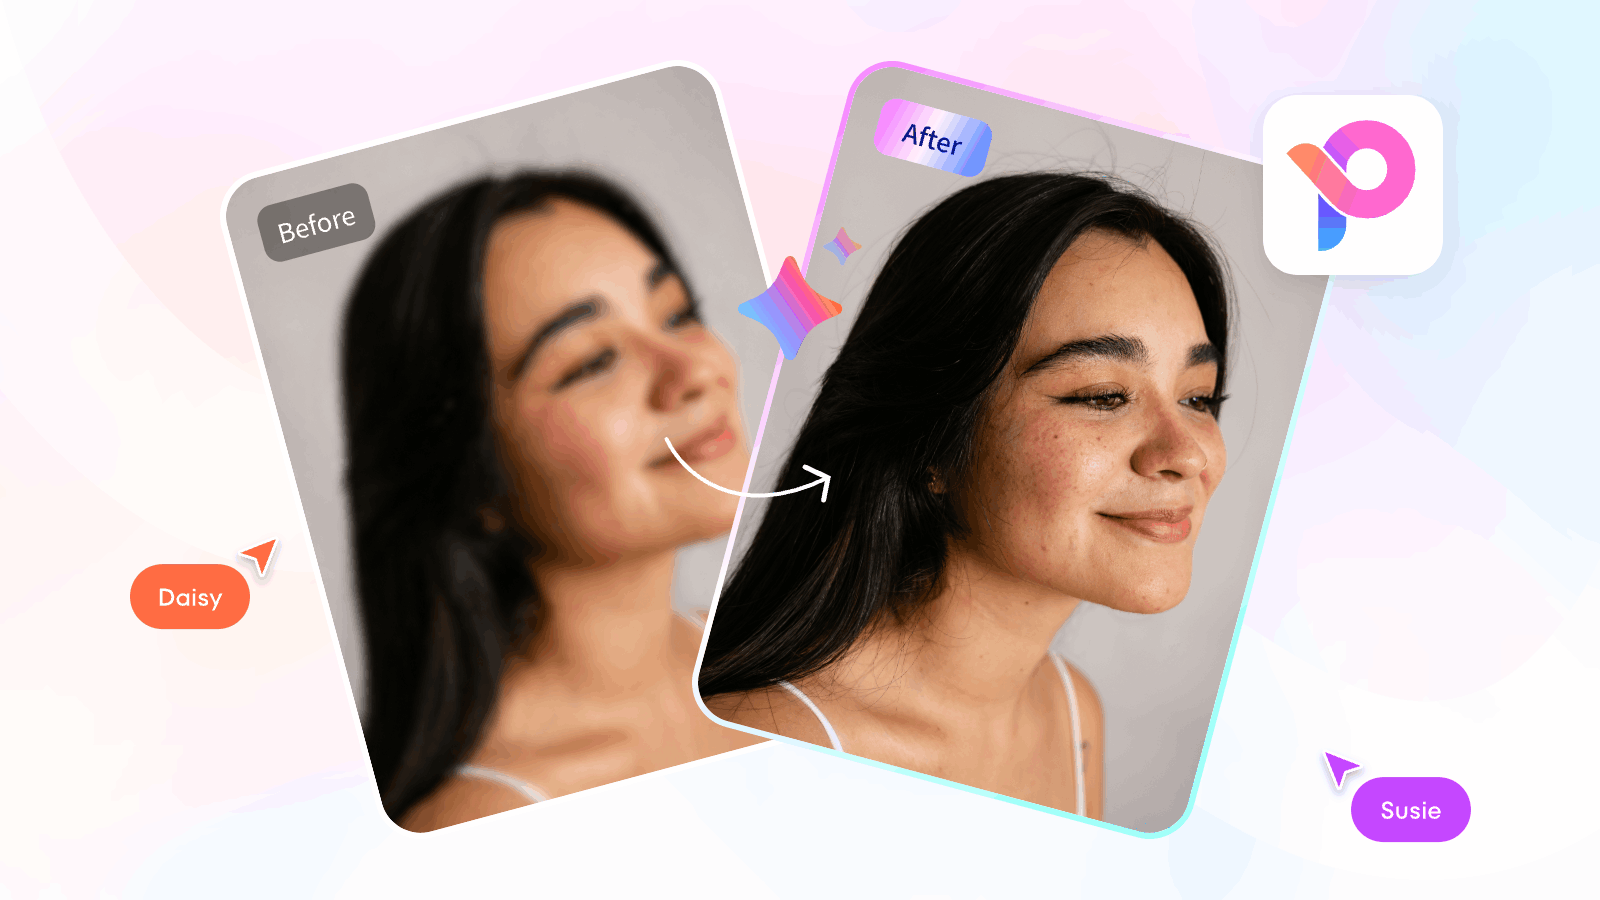
In dynamic or candid photography, camera focus often lands slightly behind or ahead of the subject, causing hands and facial features to lose definition.
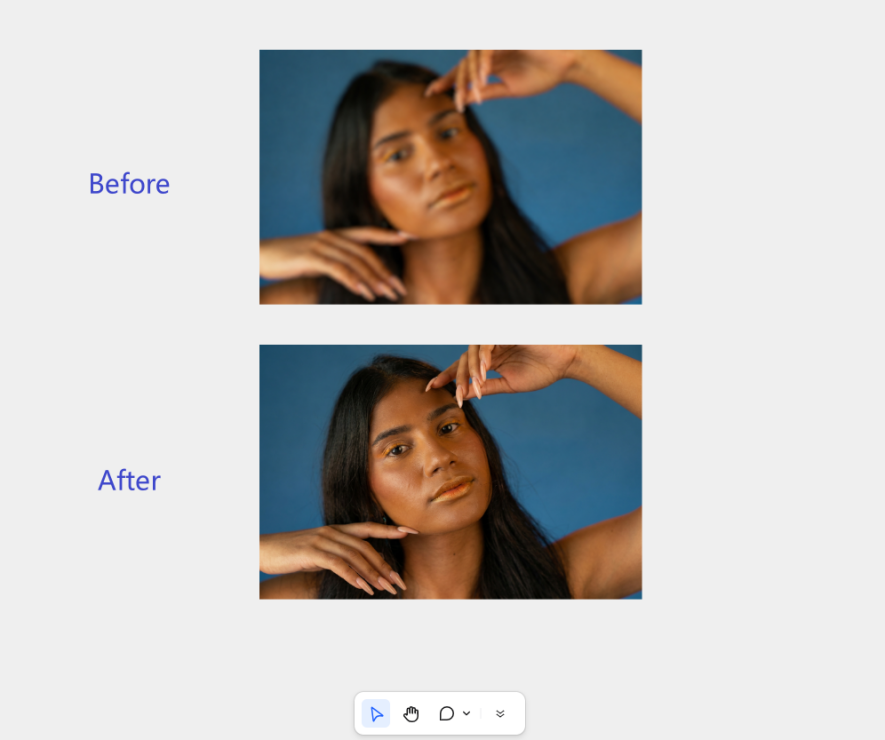
By leveraging AI, you can keep the original pose, lighting, and background intact while focusing enhancement on the subject’s face. Makeup lines around the eyes, lip contours, fingernails, and hair strands gain crisp definition, turning unusable candid shots into production-ready assets suitable for editorial or ad campaigns.
Key results achieved:
- Restored sharpness on soft-focus facial features
- Enhanced definition on eyes, lips, and jawlines
- Recovered fabric weave and individual hair strands
- Preserved original color palettes and lighting depth
Part 4. Step-by-Step Guide: How to Unblur Photos in Pixso
Pixso allows you to enhance standalone photo files as well as images embedded directly inside UI design layouts. Because editing happens on the main design canvas, there is no need to jump back and forth between external photo editing software and your design tool.

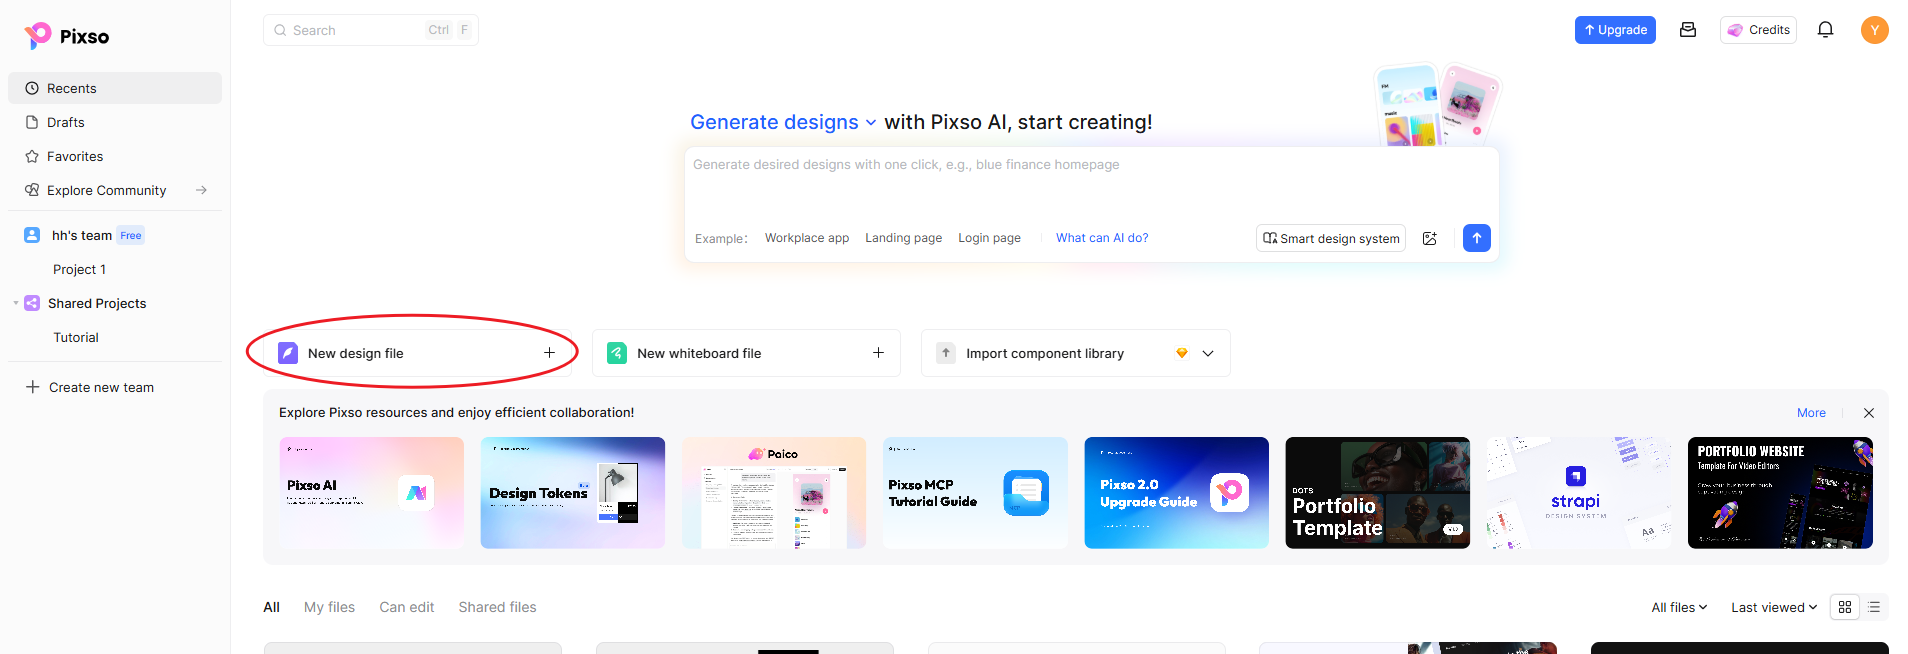
Step 1. Log in to Pixso and Open Your Canvas
Navigate to Pixso, log into your account, and create a new design file or open an existing design canvas.
Step 2. Import Your Target Image
Place your image onto the workspace using one of two standard approaches:
- Upload a standalone image file directly onto the canvas.
- Select an image frame already placed within an existing UI screen, ad banner, or prototype frame.
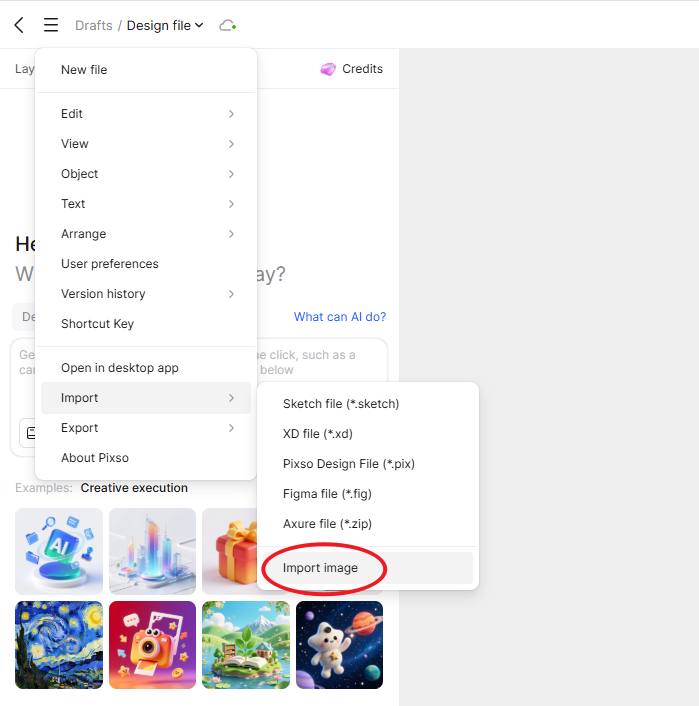
If you are working on a standalone portrait, uploading the file directly is quickest. If you are building an app UI or web page, you can select the target asset directly inside your artboard.
Step 3. Trigger Image Enhancement
Select the image layer on your canvas to bring up the contextual toolbar, then click Image Enhance.
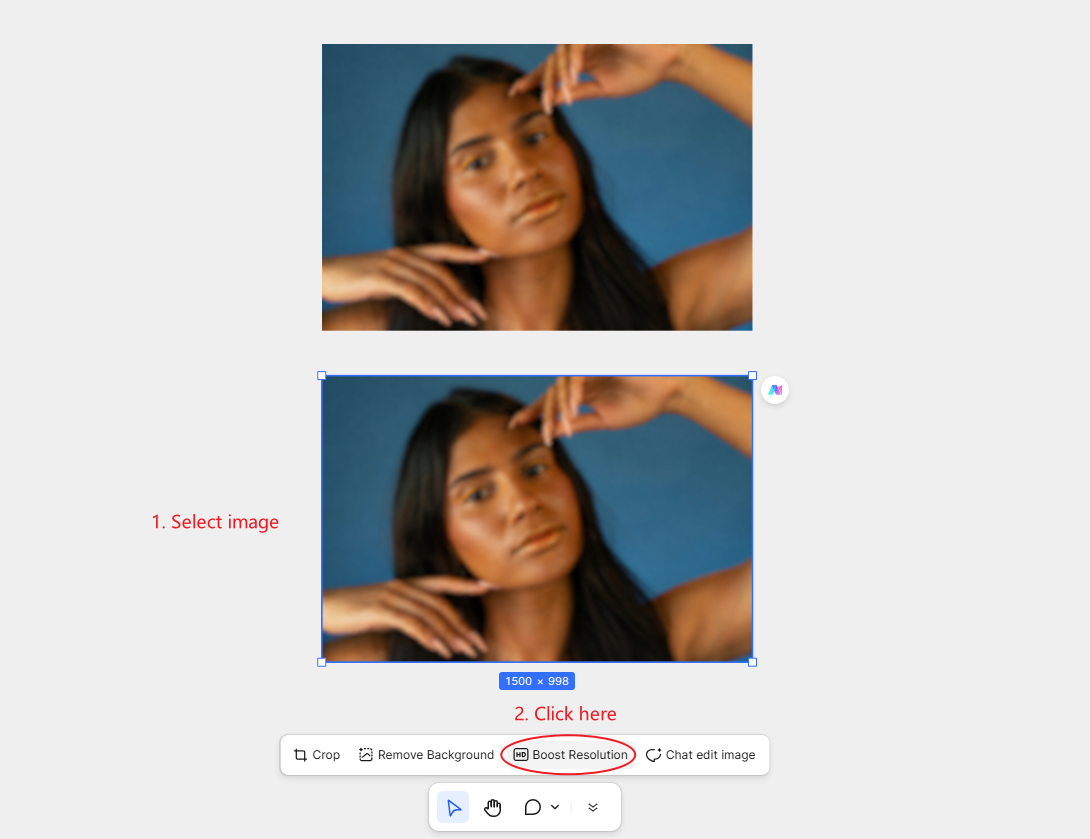
You do not need to write complex prompts to get started. Clicking the enhancement button prompts Pixso AI to analyze facial structures, hair edges, and soft details automatically, returning an upgraded asset in less than a minute.
Step 4. Review Results and Fine-Tune with Prompts
Compare the generated output against your original source file. If specific areas require further tuning, you can provide precise natural language instructions in the AI prompt bar to guide the tool.
For example, if you want to avoid an over-polished look, you might enter:
"Maintain sharp eyes and hair strands, but keep natural skin texture and pores intact. Avoid artificial smoothing or glossy lighting."
Step 5. Integrate Directly into Your Designs
Once satisfied with the restored image, scale and position the asset on your canvas alongside buttons, typography, vector icons, and layout grids. Handling both asset editing and UI design in one platform eliminates unnecessary file exports and keeps your project assets organized.
Part 5. Prompting Tips & Best Practices for AI Image Restoration
1. Specify Elements to Preserve First
To prevent AI from changing a subject's identity or product shape, explicitly state what should remain unchanged in your prompt (e.g., "preserve original facial structure, expression, and freckles").
2. Target Specific Soft Areas
Instead of generic phrases like "make image clear," use focused instructions such as "sharpen eyes, glasses frames, and hair definition." Learning how to unblur images effectively relies on giving clear visual targets.
3. Set Boundaries Against Over-Editing
Prevent artificial, plastic-looking skin textures by setting constraints in your prompts (e.g., "keep realistic skin texture and avoid over-smoothing").
4. Avoid Changing Too Many Parameters at Once
If you need to adjust color, lighting, background, and sharpness, start by resolving focus first. Once you achieve a sharp portrait, apply secondary adjustments for lighting or color grading.
5. Contextualize the Output
Include the intended placement of your visual asset in your prompt (e.g., "clean corporate headshot for modern website team page"). Context helps the AI determine appropriate contrast and sharpness balance.
💡 Pro Tip
Looking to alter the overall aesthetic or artistic style of an image rather than just fixing focus? Check out our dedicated guide on styling visuals with AI:
🔗 [NEW] How to transfer photo styles with an AI photo editor
Essential Checklist When Enhancing Images
- Compare against the original source file: Always zoom in to verify that key features, such as eye shapes, facial contours, or brand logos, have not been distorted during processing.
- Inspect fine typography and branding: AI can occasionally misinterpret small text or subtle logos on clothing and packaging. Double-check these details against your original visual assets.
- Recognize source image limitations: While modern tools excel at showing you how to unblur a photo, severely pixelated or tiny thumbnail images may yield hallucinated details if the source visual information is too degraded.
- Keep original backups: Always maintain a copy of your unedited raw assets alongside your AI-enhanced versions for easy side-by-side comparison or future revisions.
FAQ
Q1. What is AI photo restoration?
A1. AI photo restoration uses machine learning to analyze subjects, faces, and backgrounds in an image, automatically recovering sharpness, color balance, and fine detail in blurred or low-clarity areas.
Q2. Can an AI tool reliably fix out-of-focus portrait photos?
A2. Yes. AI can identify soft facial contours, eye reflections, hair, and clothing, enhancing edge definition cleanly. However, if a source photo is extremely tiny or heavily corrupted, you should inspect the generated output to ensure facial features remain accurate.
Q3. Is photo enhancement the same as upscaling image resolution?
A3. Not entirely. Resolution upscaling increases canvas pixel dimensions and edge density, whereas photo enhancement focuses on improving focus, contrast, skin textures, and lighting balance. The two techniques are often combined in modern editing workflows.
Q4. Do I need professional graphic design experience to use Pixso AI?
A4. No. You can trigger automated enhancements with a single click or describe adjustments using everyday English phrases, making it easy for non-designers to unblur photo assets quickly.
Q5. Can I edit images directly inside existing UI components in Pixso?
A5. Yes. Pixso supports editing both standalone image uploads and image layers placed within UI artboards, ad banners, and component frames.
Q6. Can I use AI-enhanced portrait photos directly in commercial projects?
A6. For commercial ad campaigns and e-commerce product listings, always audit the final image to ensure that facial features, product details, text, and brand logos match your original source assets accurately.
Conclusion
A soft or out-of-focus photo no longer means re-scheduling shoots or spending hours tweaking manual sharpness sliders in Photoshop. By taking advantage of modern AI capabilities, you can preserve core facial characteristics while restoring crisp detail to eyes, hair strands, and clothing.
With Pixso, your image editing workflow lives directly alongside your UI canvases, wireframes, and design systems. If you want a faster, more integrated way to unblur image assets and build polished digital products, explore Pixso’s built-in AI tools today.

![[Detailed Review] UI VS UX](https://pixso.net/assets/media/core-of-ui-ux-19d28f0203322729.webp)
![[NEW] How to Change an Image Background and Upscale Its Resolution with AI](https://pixso.net/assets/media/image-change-background-4845cfdb2aae5eedb49f-9db55c5fd1eab321.webp)


