User guides
Shaders
Beta feature: Shaders are currently in beta. Features and usability are still being refined, and available capabilities and steps may change in later versions.
Shaders add textures, patterns, pixelation, or color dispersion to layers. Apply an existing shader, or describe an effect to AI to create your own. You can reuse a shader and adjust its parameters to change its appearance.
This guide covers applying, creating, editing, and publishing shaders, as well as using and updating them in other files.
The screenshots in this guide show the Chinese interface. Labels may differ depending on your interface language.
Understand the two shader types
| Type | Location | Use |
|---|---|---|
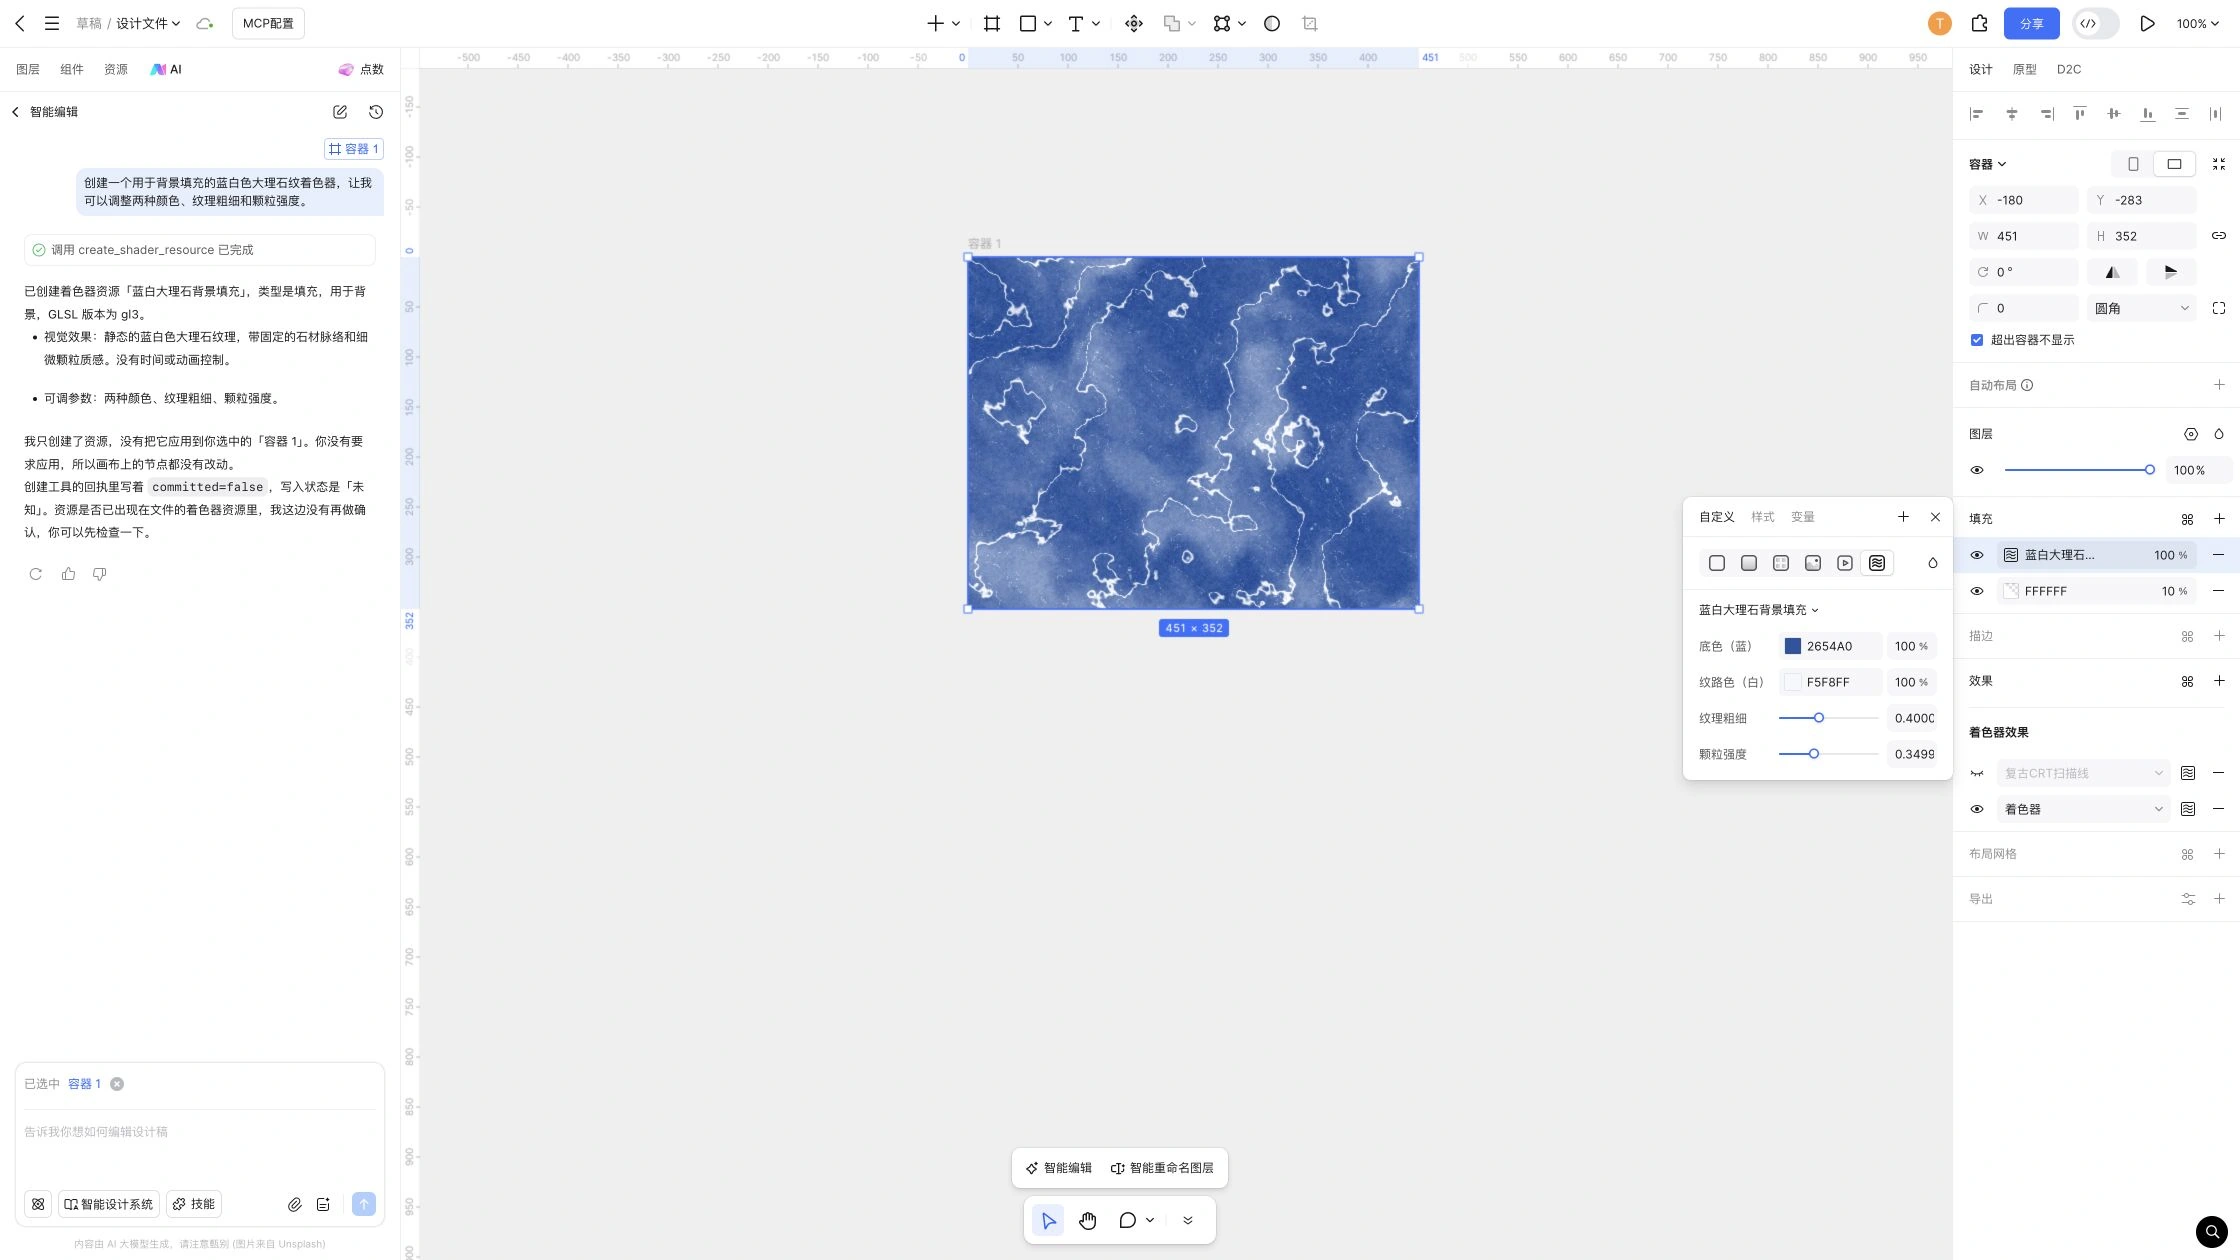
| Shader Fill | Fill or Stroke | Generate textures, noise, patterns, or materials, such as a marble background. |
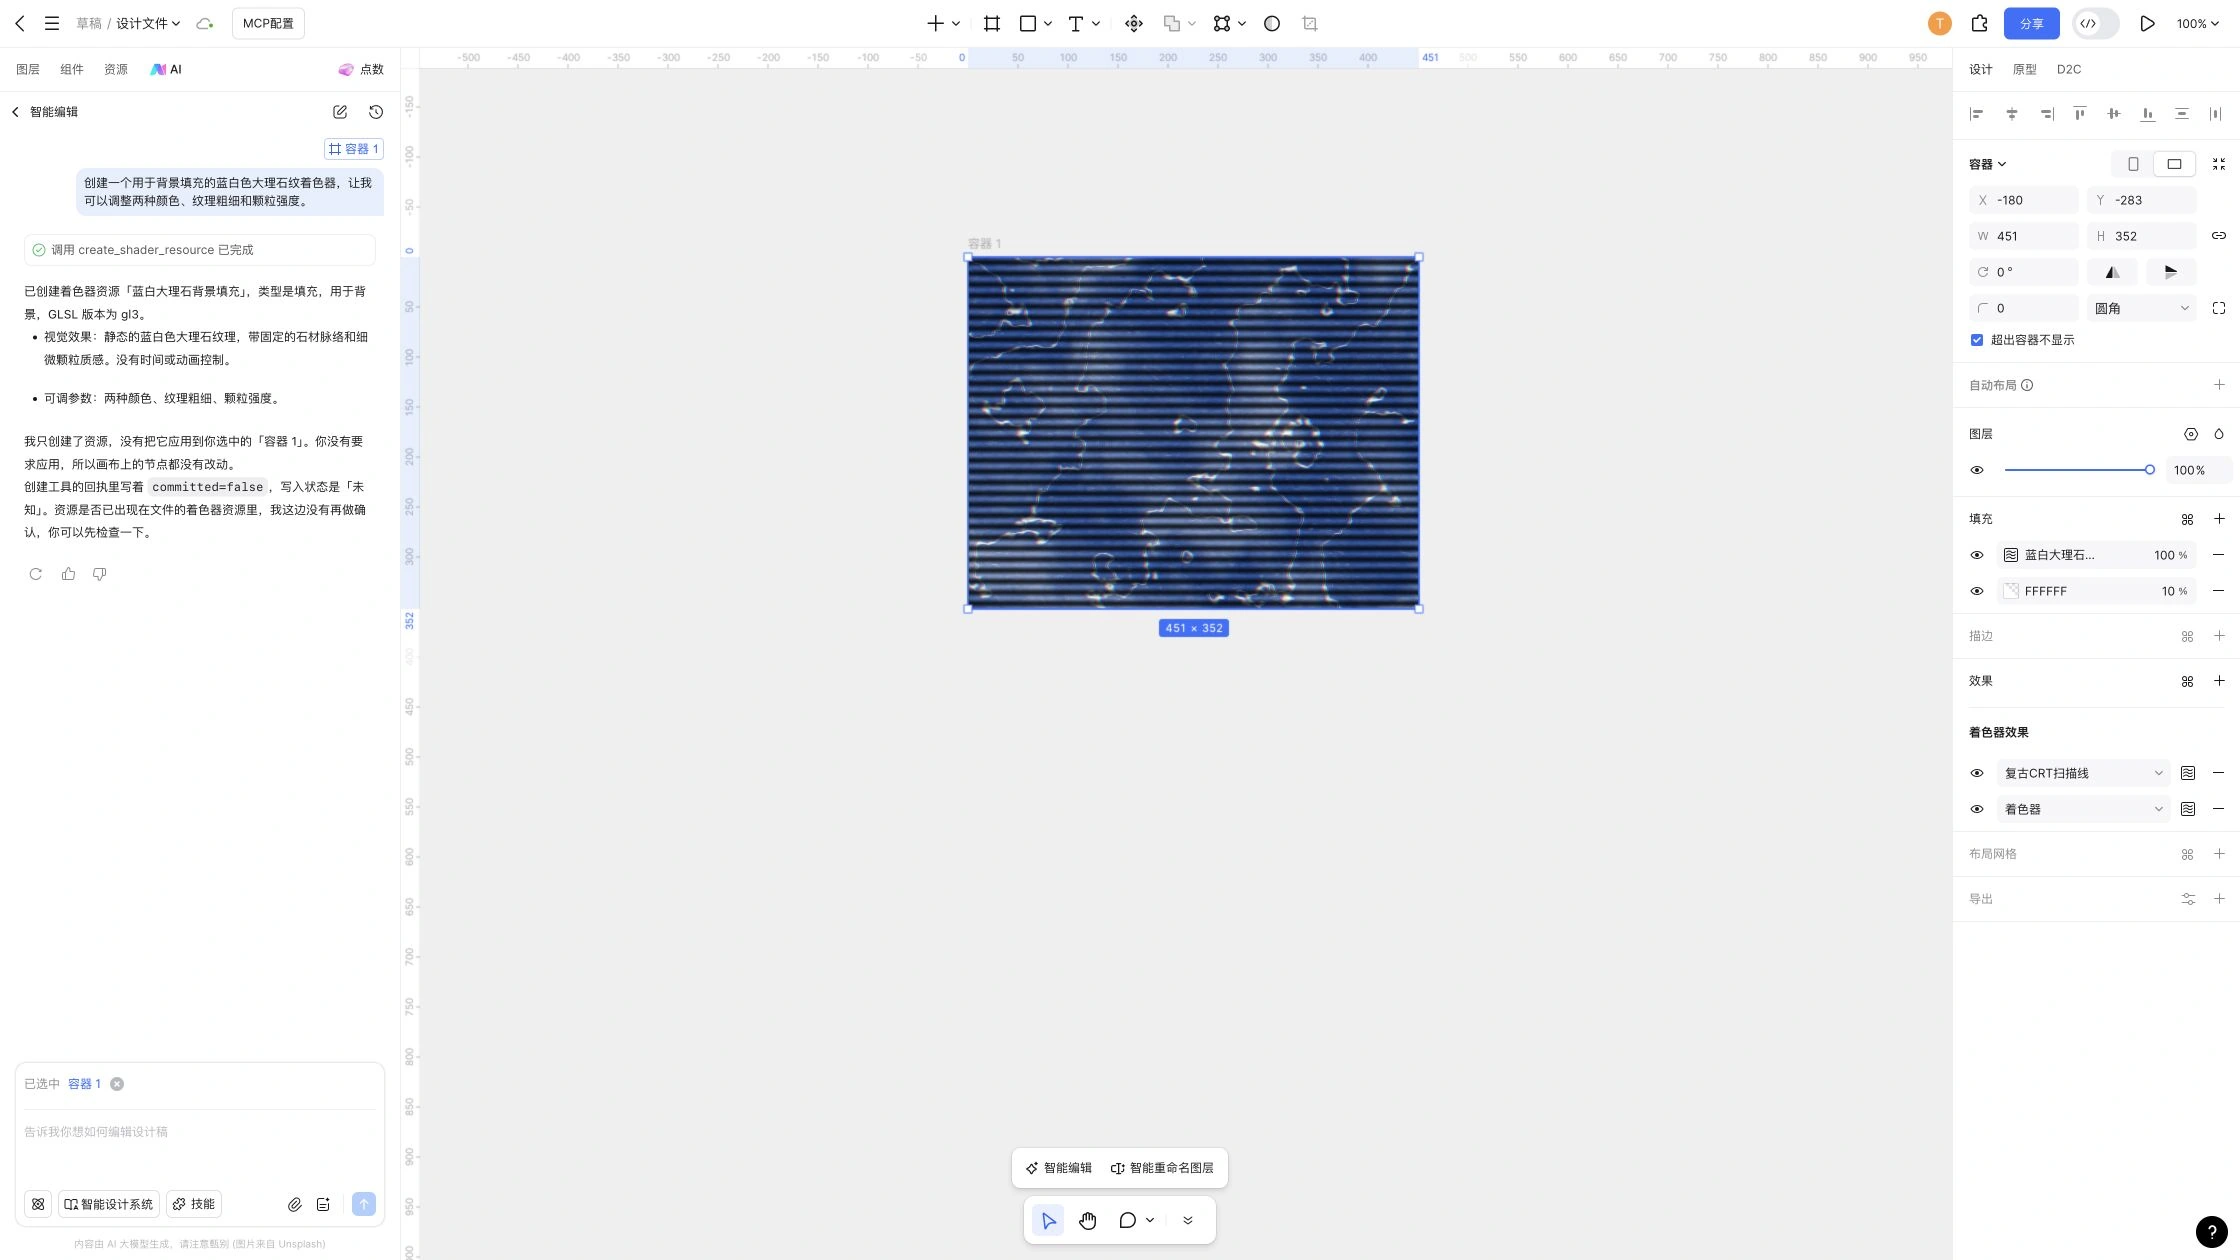
| Shader Effect | Effects | Process a layer’s existing rendered content, such as adding pixelation, distortion, or color dispersion to an image. |
The two types are not interchangeable. Fill and Stroke show only shader fills; Effects shows only shader effects. Use a shader effect to retain an image’s content while changing its appearance. Use a shader fill to generate a pattern or texture.
Before you start
You need edit access to the current file to use shaders. Custom shaders also require the appropriate access for the space containing the file.
| File location | Requirement |
|---|---|
| Personal drafts | You must own the file and have edit access. |
| Enterprise drafts | You need a full-feature seat and edit access to the current file. |
| Team or enterprise files | You need a full-feature seat and edit access to the current file. Guests must also meet both requirements. |
Anyone with edit access to a file can apply Pixso’s built-in official shaders.
You can apply shaders to ordinary frames, groups, shapes, vectors, text, and image layers. Slices and sections do not provide shader controls.
Apply an existing shader
Apply a shader to a fill or stroke
- Select a layer on the canvas or in the Layers panel.
- Open its Fill or Stroke color settings in the right properties panel.
- Switch the type to Shader, then open the shader selector.
- Choose a shader fill from the list to apply it to the current fill or stroke.
- Adjust its parameters and check the result on the canvas.
Note: Switching the type to Shader does not apply a resource automatically. You must also select a shader from the list.
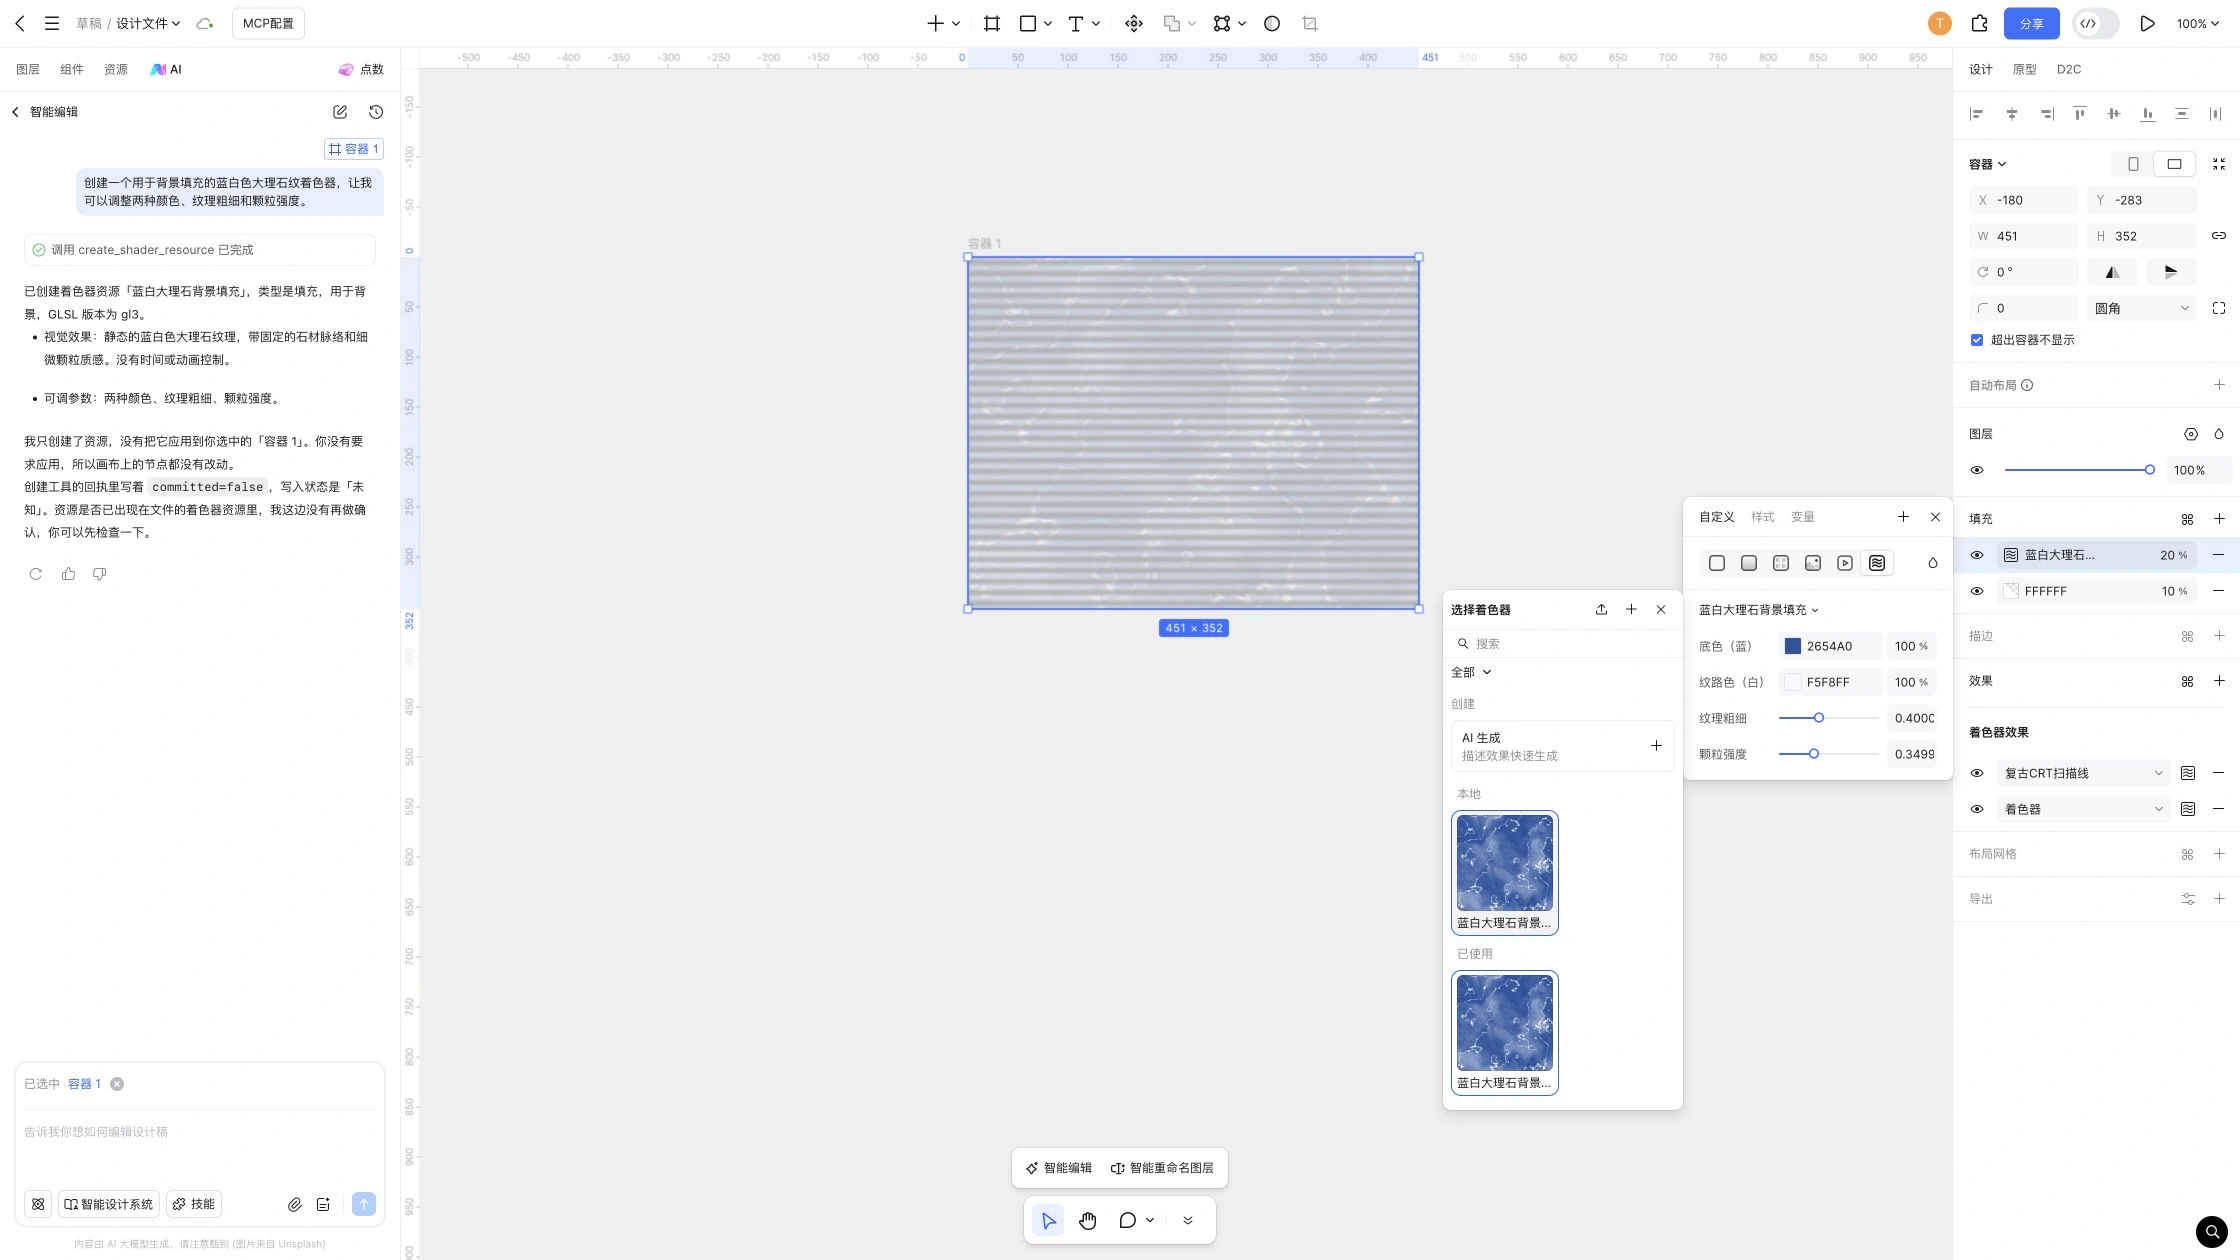
Apply a shader effect
- Select a layer, then add or select the Shader type in the Effects section of the right properties panel.
- Choose a shader effect from the list that opens.
- Open its parameter panel, adjust the effect, and check the result.
If the layer also uses regular effects such as shadows or blur, shader effects appear separately below the regular effects list.
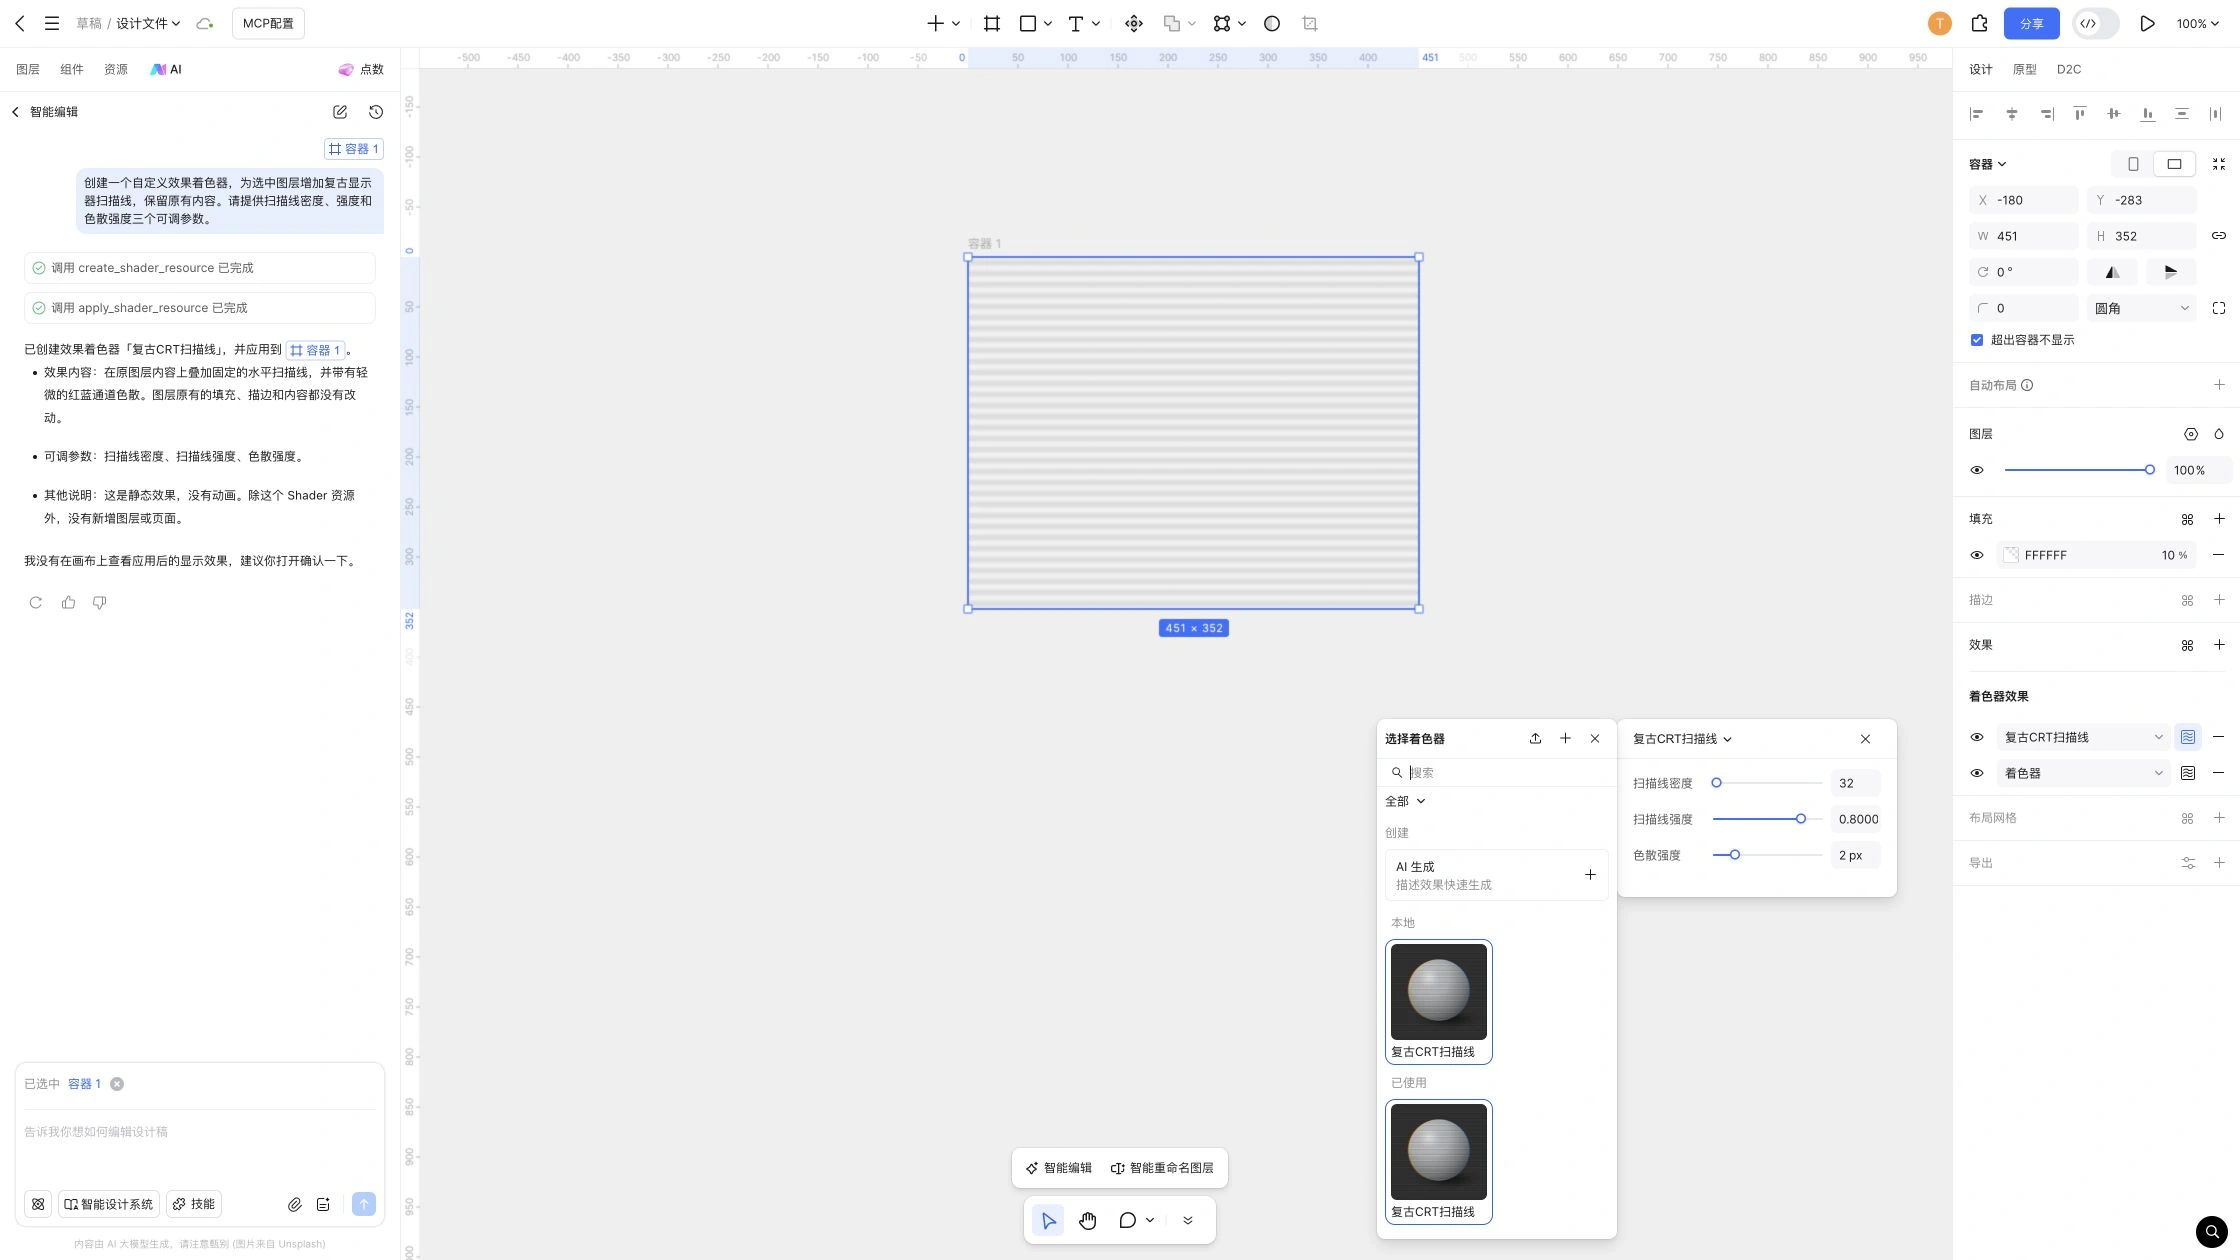
Find resources in the list
The list opens on All and groups resources in this order: Official, Local, Cloud, and Used. You can also filter by source.
| Category | Contents |
|---|---|
| Official | Shaders built into Pixso. |
| Local | Shaders created in the current file. |
| Cloud | Published shaders available to you as a member of the relevant team or enterprise. |
| Used | Shaders applied anywhere in the current file, including its other pages. |
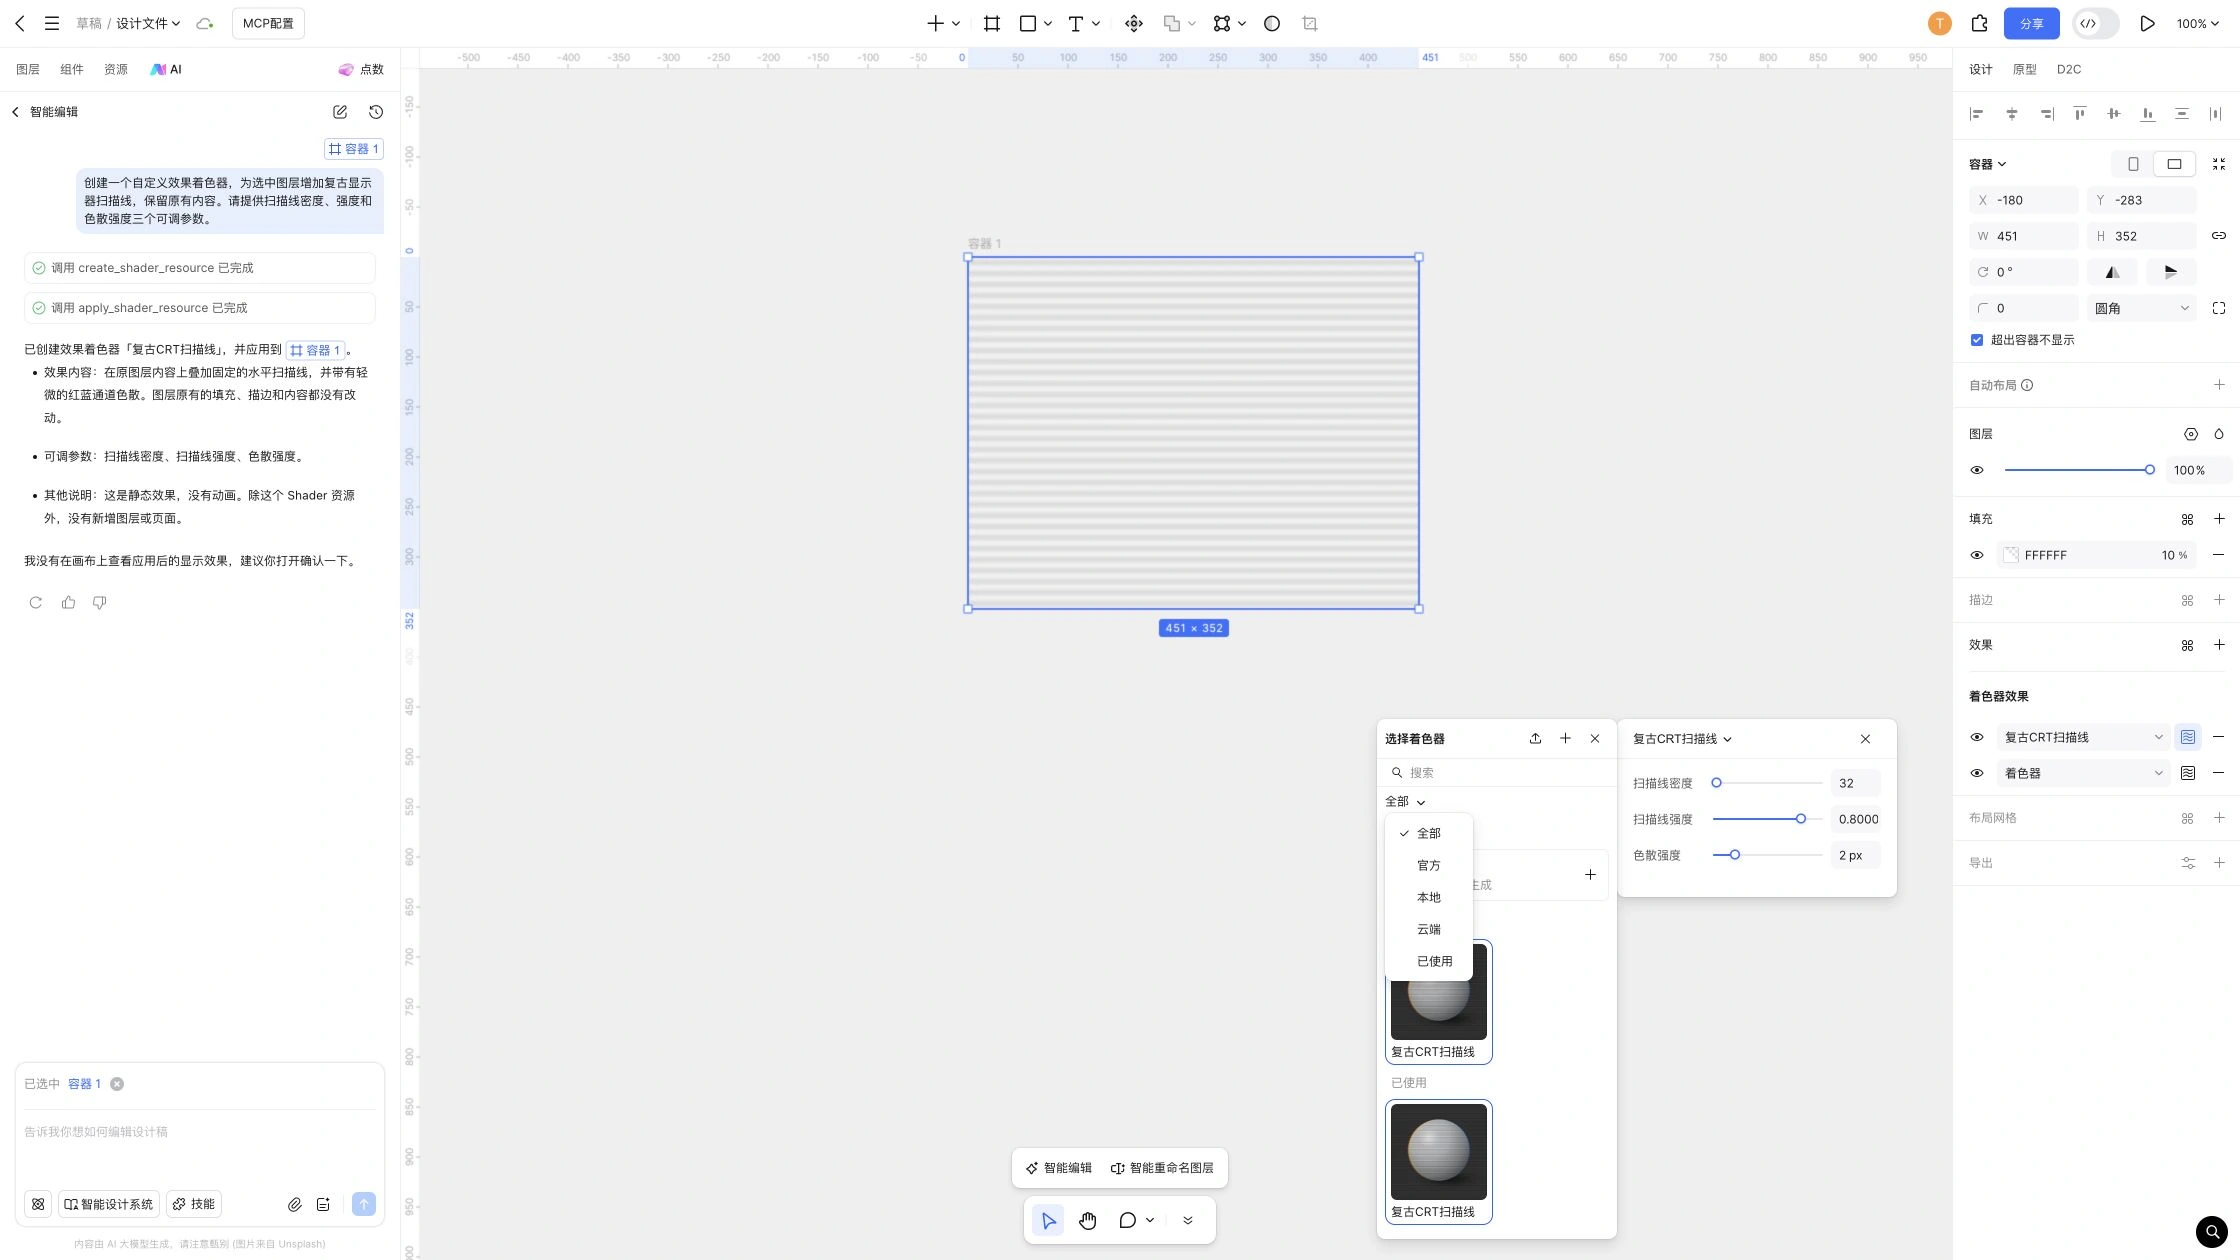
Adjust shader parameters
Select a layer with a shader applied and open its Fill, Stroke, or Effects settings to adjust the parameters. Each shader defines its own controls, so available settings vary.
- To refine a single layer’s appearance: adjust parameters such as color, intensity, angle, or texture size. Changes appear on the canvas immediately.
- To add a control or change how the effect works: edit the shader itself with AI rather than changing only the layer’s parameters.
- Shader fills can be combined with regular fills and stack in fill-list order. You can also adjust their fill opacity.
Shader fills use the same blending behavior as regular fills. Shader effects process the layer’s rendered result and do not use fill-level blend modes. Use the layer’s blend mode to blend the result with content beneath it.
Note: If either layer dimension is less than 200 px, a quality hint appears beside its size label. Pixelation may be more noticeable on small layers. This does not mean shader creation failed, and 200 × 200 px is not a required minimum size.
Create your own shader
A new shader is saved in the current file. It does not automatically become a cloud resource for other files. You can currently create shaders with AI: select the + at the top of the shader list and choose Generate with AI, or describe your request directly in AI chat.
Generate a shader with AI
- Open the shader list from Fill, Stroke, or Effects. Select +, then Generate with AI. Alternatively, open AI chat and describe the shader you want to create.
- Describe the visual effect and whether it should generate a fill texture or process an existing layer.
- Specify the parameters you want to control, such as color, grain size, distortion intensity, or angle. You can also upload a reference image.
- Answer any follow-up questions and wait for generation and validation to finish.
- Review the shader and its parameter panel, check it on a layer, and adjust as needed.
Resources created from Fill or Stroke are shader fills; resources created from Effects are shader effects. When you start from one of these controls, AI uses the selected type, so you do not need to specify it again.
If you create a shader through AI chat with a compatible layer selected, Pixso applies it and opens its parameters when generation finishes. If it has not been applied, select it from the appropriate Local list.
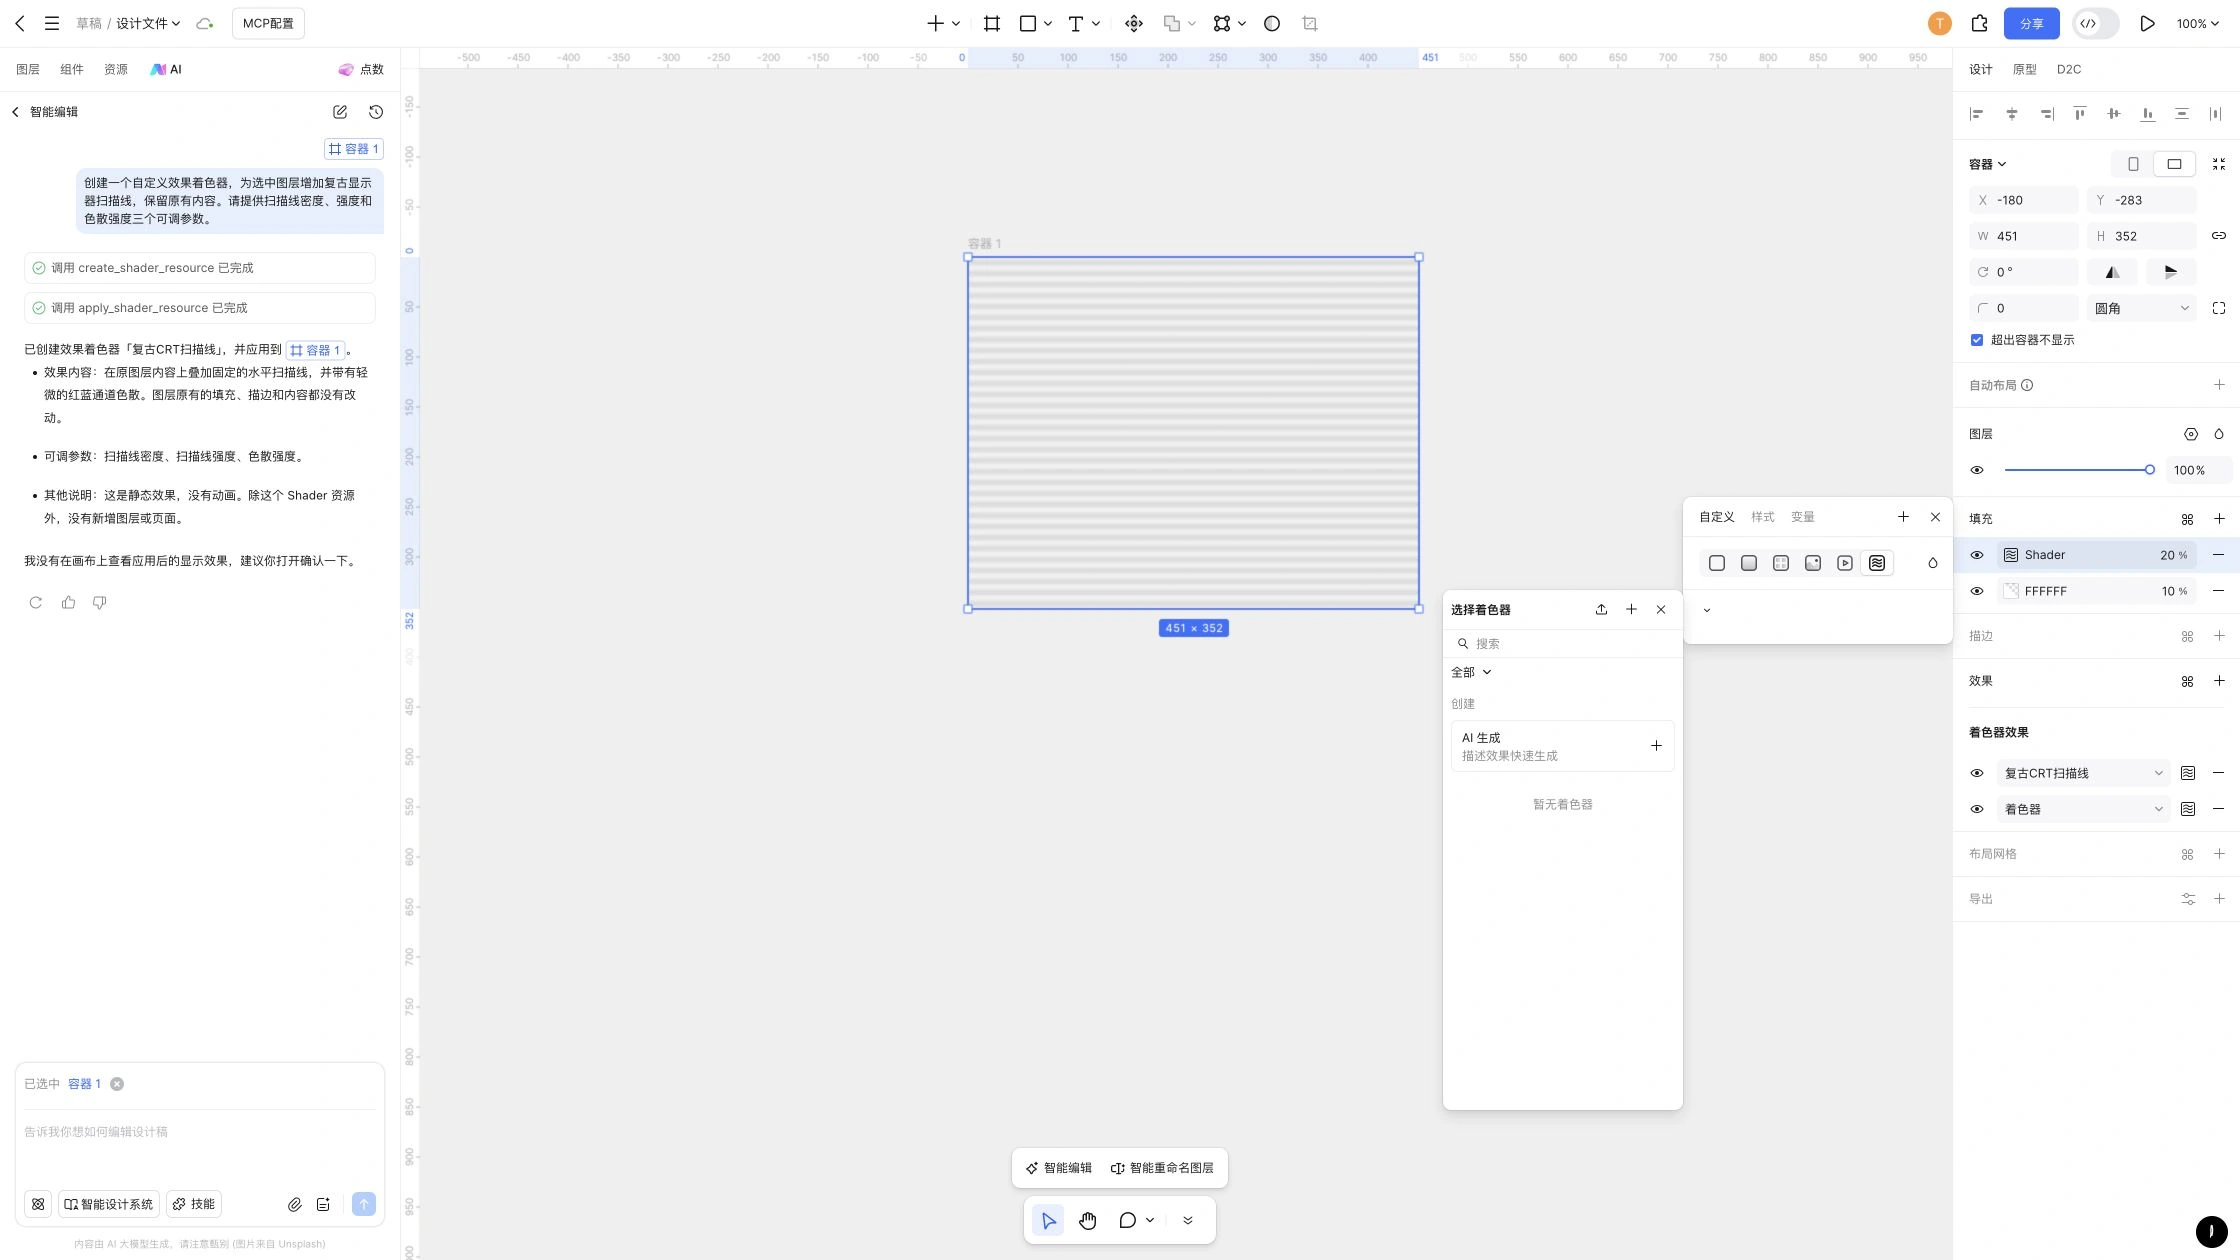
Describe the effect you need
Include the desired effect, where you will apply it, and which parameters you need to adjust.
- Fill example: “Create a blue and white marble shader for a background fill. Let me adjust both colors, vein thickness, and grain intensity.”
- Effect example: “Create a retro monitor effect for the selected image. Preserve the image content and let me adjust scanline density, color dispersion, and brightness.”
- Edit example: “Add a vein direction control to the current marble shader and keep the existing color controls.”
If information is missing, AI asks about the type, effect, or parameters. To create several shaders, describe each purpose in one message and specify whether you want only the main controls or a broader set of parameters.
Note: Use Pixso’s existing properties for ordinary solid colors, gradients, shadows, or blur. Create a shader when you need a more specialized visual effect that you can reuse and adjust.
Edit and manage shaders
Layer parameters and shader resources
Layer parameters change the effect on the current layer. Editing a shader with AI or renaming it changes the reusable resource. To add controls, change the default appearance, or change how it works, identify the local shader and describe the changes in AI chat. Save after editing and validation finish.
After you save a resource, layers using it must accept the new version. Their appearance is not silently replaced. See Update applied shaders.
Right-click a shader you created in the list to rename it. You can also describe a custom effect to AI to create a separate shader.
Delete a resource
In the source file, select the local shader and confirm deletion. An unpublished resource is removed from Local and Used. A published resource is removed from shared resources and Used.
Note: Deleting a resource does not remove the effect from layers where it is already applied. Those layers retain their appearance and parameters. To stop using it on one layer, remove that layer’s shader fill, stroke, or effect. Check with other users before deleting a published resource.
Publish shaders for use in other files
A custom shader belongs to the file where it was created. Publish it from that source file to make it available in Cloud in other files. You do not need to create a color or effect style first.
Check the publishing scope
| Source file location | Publishing result |
|---|---|
| Drafts | You cannot publish directly from a draft. Move the file to an eligible team or enterprise space and meet its access requirements. |
| Team | The shader is published to the file’s team. Team members can access it in Cloud from other files. |
| Enterprise | The shader is published to the current enterprise space. Enterprise members can access it in Cloud from other files. |
Note: The source file’s location determines the scope. Creating a shader does not make it available in every file on your account, and publishing does not add it to the public community. Sharing a link to the source file does not replace publishing the shader.
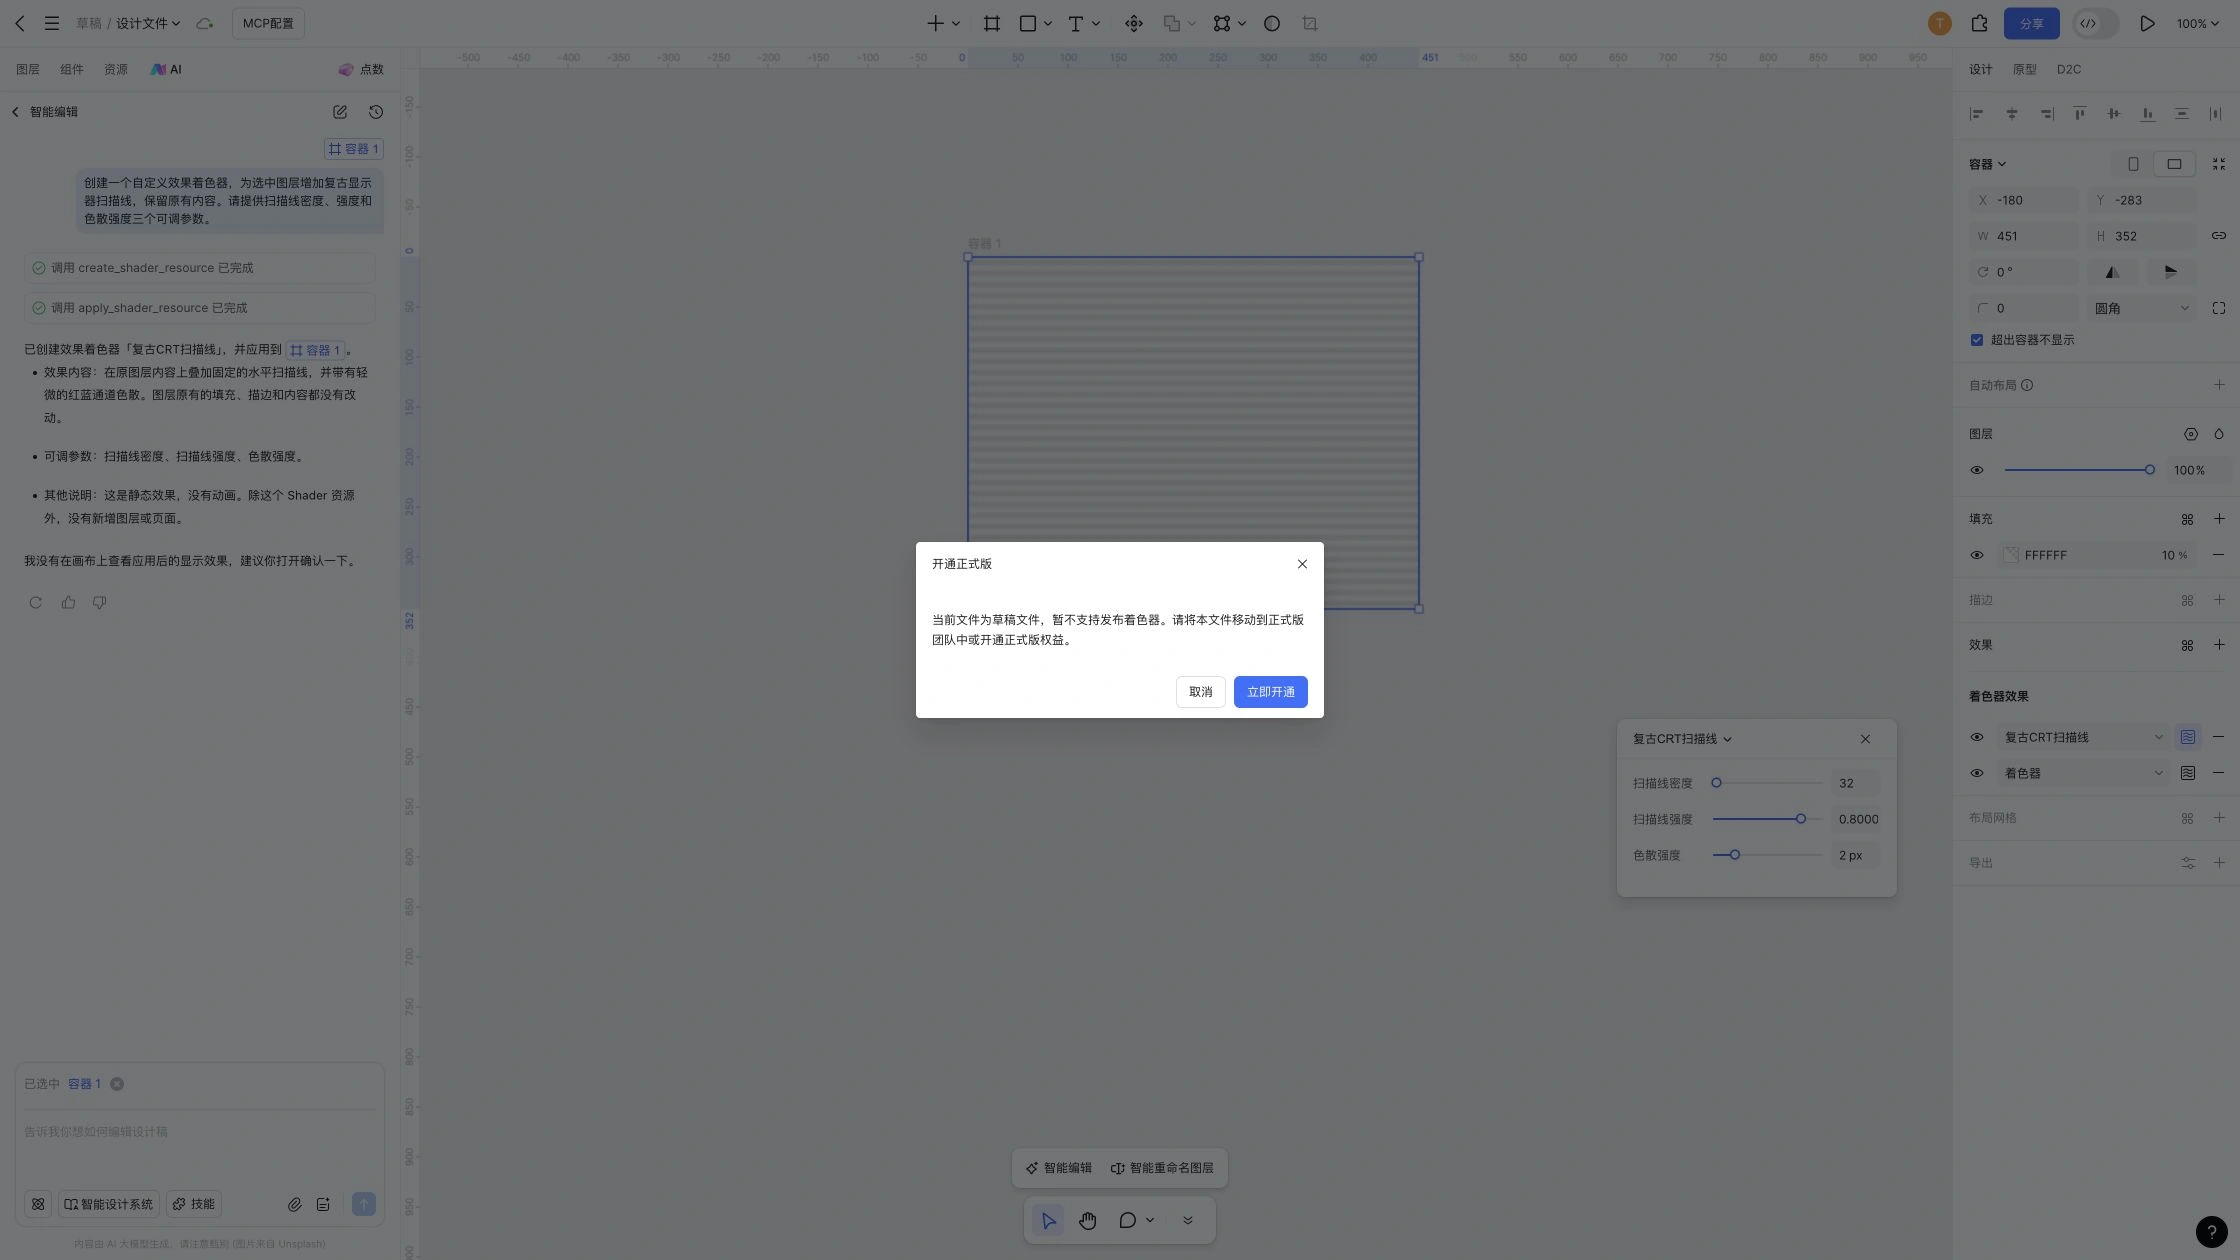
Publish from the source file
- Open the appropriate shader list in the source file. Make sure the local resource has been created and its appearance checked.
- Select the publish button in the list to open the confirmation dialog.
- Check the file’s space and the sharing scope, then confirm publication. If the file is in drafts, follow the instructions to move it and meet the access requirements first.
Use a published shader in another file
- Open the destination file with an account that belongs to the relevant team or enterprise. Confirm that you have edit access and the required seat.
- Select a layer and open the shader list from Fill, Stroke, or Effects as appropriate.
- Switch to Cloud, select the published resource, and apply it.
- Adjust its parameters for the current design. Shader fills can still only be used in Fill or Stroke, and shader effects only in Effects.
Update applied shaders
Updating a resource and accepting that update on a layer are separate steps. The requirements differ for layers in the source file and in other files.
| Layer location | When an update is available | Action |
|---|---|---|
| Source file | After saving changes to the local resource. Publication is not required first. | Select the layer, open the shader’s properties panel, and select the update icon. |
| Other files | After the updated resource has been published from the source file. | Select the layer in the destination file, open the shader’s properties panel, and select the update icon. |
Changes to a published resource’s effect or name must be published again from the source file before other files can receive them. Saving local changes alone does not deliver the new version to other files.
What happens to parameters after an update?
- Parameters that match between the old and new versions keep the values you set.
- If the new version narrows a parameter’s range, the old value is adjusted to fit. For example, a value of 100 becomes 50 when the new range is 10–50.
- Stored layer values for old parameters that cannot be matched are removed.
Note: Check important layers after accepting an update, especially when controls have been added or removed, or parameter ranges have changed.
Frequently asked questions
Why can’t I find a shader I created?
Check the type: Fill and Stroke do not show shader effects, and Effects does not show shader fills. Unpublished local resources are visible only in the file where they were created. To find a shader in another file, confirm that it has been published and that your account belongs to the relevant team or enterprise.
Why is publishing unavailable?
Check whether the source file is in drafts and whether you meet the space’s access requirements. You cannot publish shaders directly from drafts; move the file to an eligible team or enterprise space first. Team and enterprise publishing scopes are separate.
Why hasn’t a change reached other files?
Confirm that the update has been published from the source file, rather than only saved locally. In the destination file, select a layer using the resource, open its shader properties, and select the update icon.
Why are there no style, component, or variable controls?
Shader color styles, effect styles, and variable binding for shader parameters are not currently available. Fill and Effects settings for components, variants, and instances do not show shader options. Creating a component from a layer with a shader displays a notice. To reuse shaders across files, use shader publishing and the Cloud list rather than style publishing.
What can I do about visible pixelation?
Check the layer’s dimensions and quality hint. Pixelation may be more visible when either dimension is less than 200 px. Adjust the layer size for its intended use, or adjust the shader’s texture or grain parameters, then check its appearance at the final display size.